Caustics are everywhere in the real world but rarely seen in renders. Learn why they’ve been ignored — and how you can now render them effortlessly in Corona.
First, let’s refresh our knowledge of what a caustic is. For anyone that has been involved in the world of 3D rendering — ray tracing, more specifically — you might have some knowledge of what caustics are. Most people think of caustics as the sparkle of light that comes from a glass or a body of water that creates interesting highlights.
CG artists typically know that these effects can take a lot of time and effort to compute when rendering, so they are generally ignored — and people have been able to get believable-looking images without them.
Some people will go to the extra effort of faking caustics to make an image more believable. But the truth is that, in real life, caustics are a huge part of the lighting contribution of the world. So why are we ignoring them?
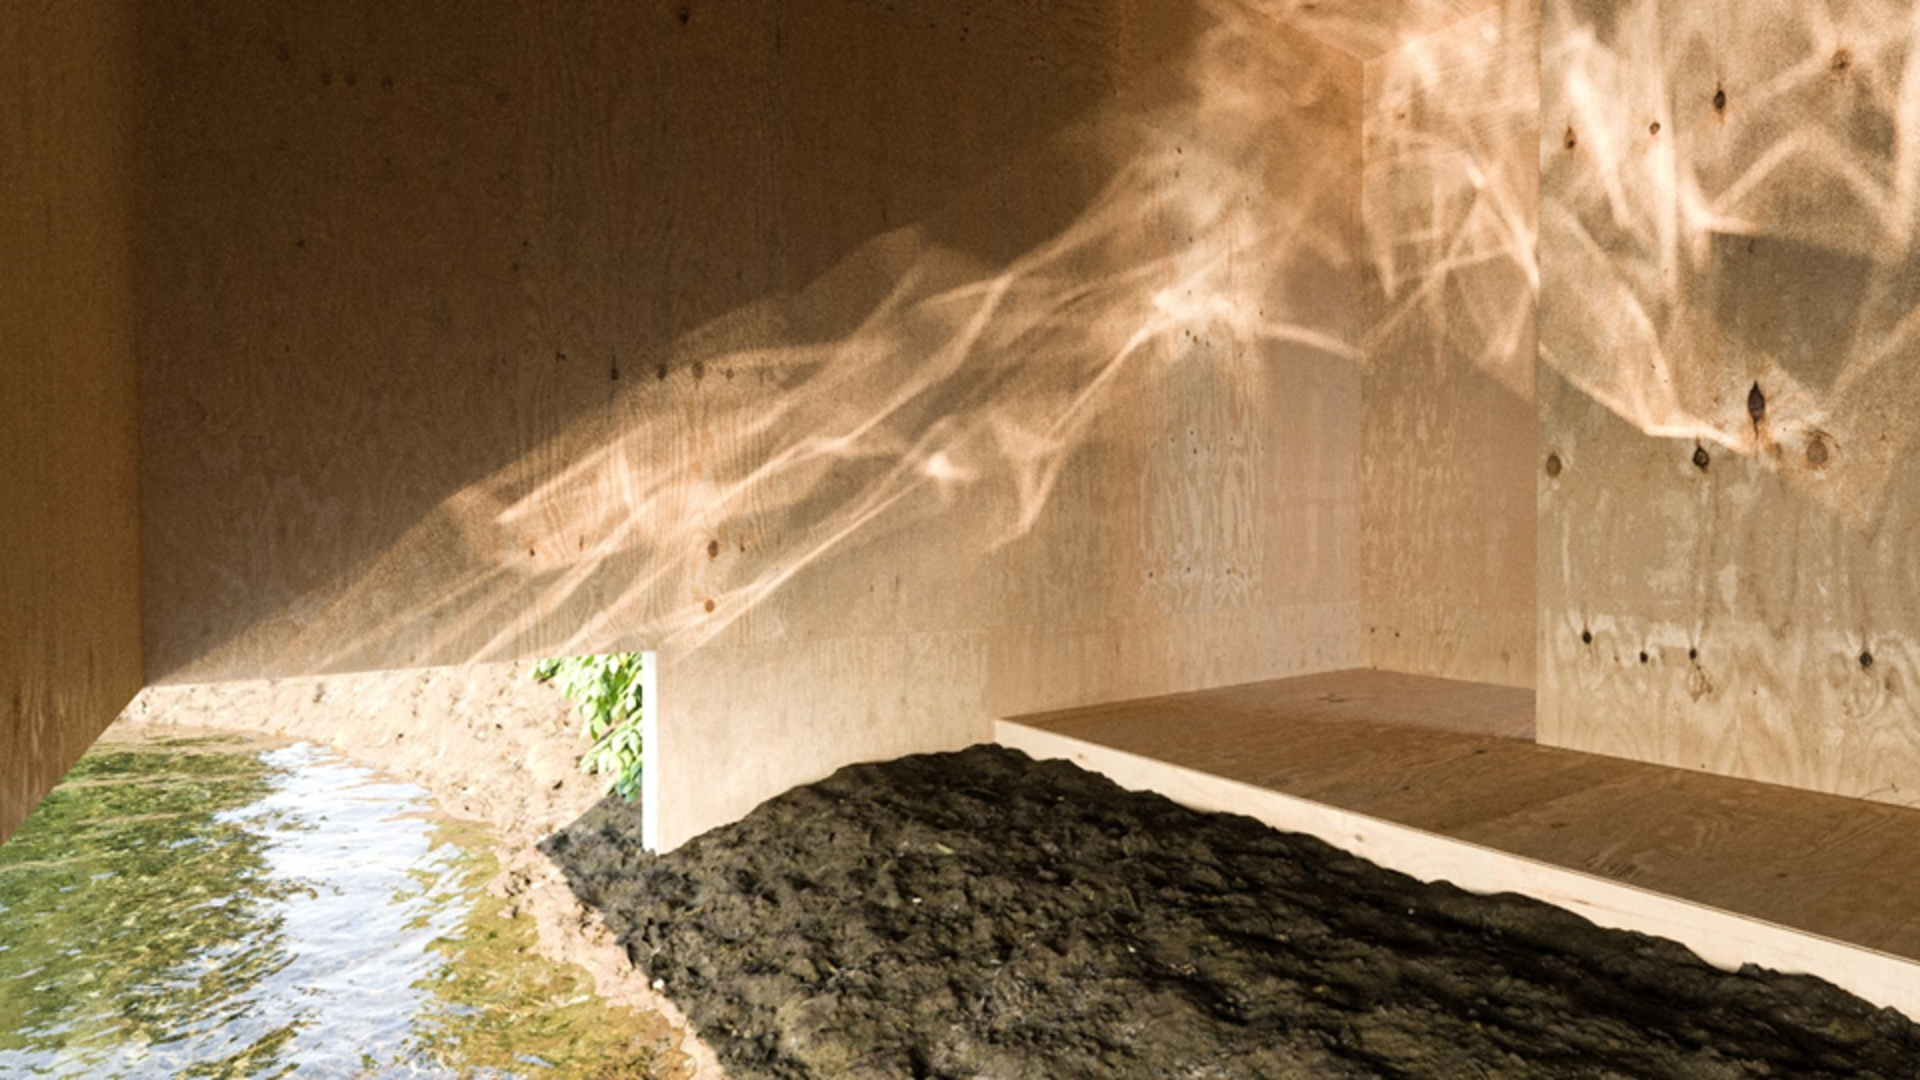
In Corona 4, we’ve decided to bring real caustic lighting back to rendering. With it, we can now create a more accurate representation of the lighting of an image. The goal is to make it very simple for users and, even more importantly, for it to have a minimal effect on the time it takes to render.
Caustics are everywhere — so let’s define them
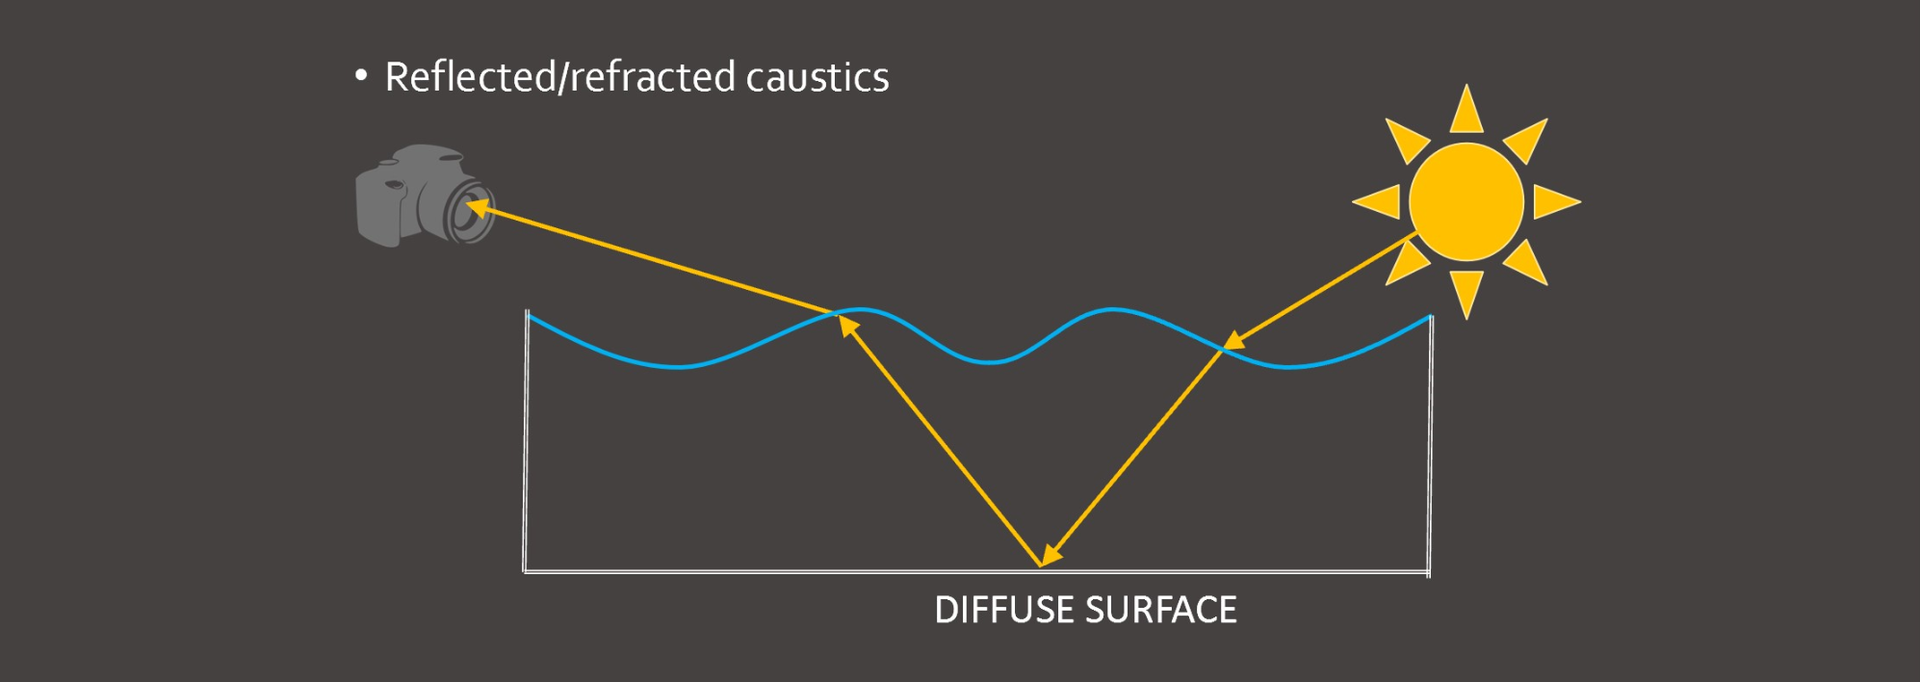
Let’s start by defining what caustics are and see why, in reality, this effect accounts for a large part of the illumination of an image. As we’ve already mentioned: Most artists think of caustics as the light that gets focused through glass or water. But, for the people in computer graphics: A caustic is any lighting contribution that goes from light source to specular (reflective or refractive), to diffuse surface, to eye (or camera).
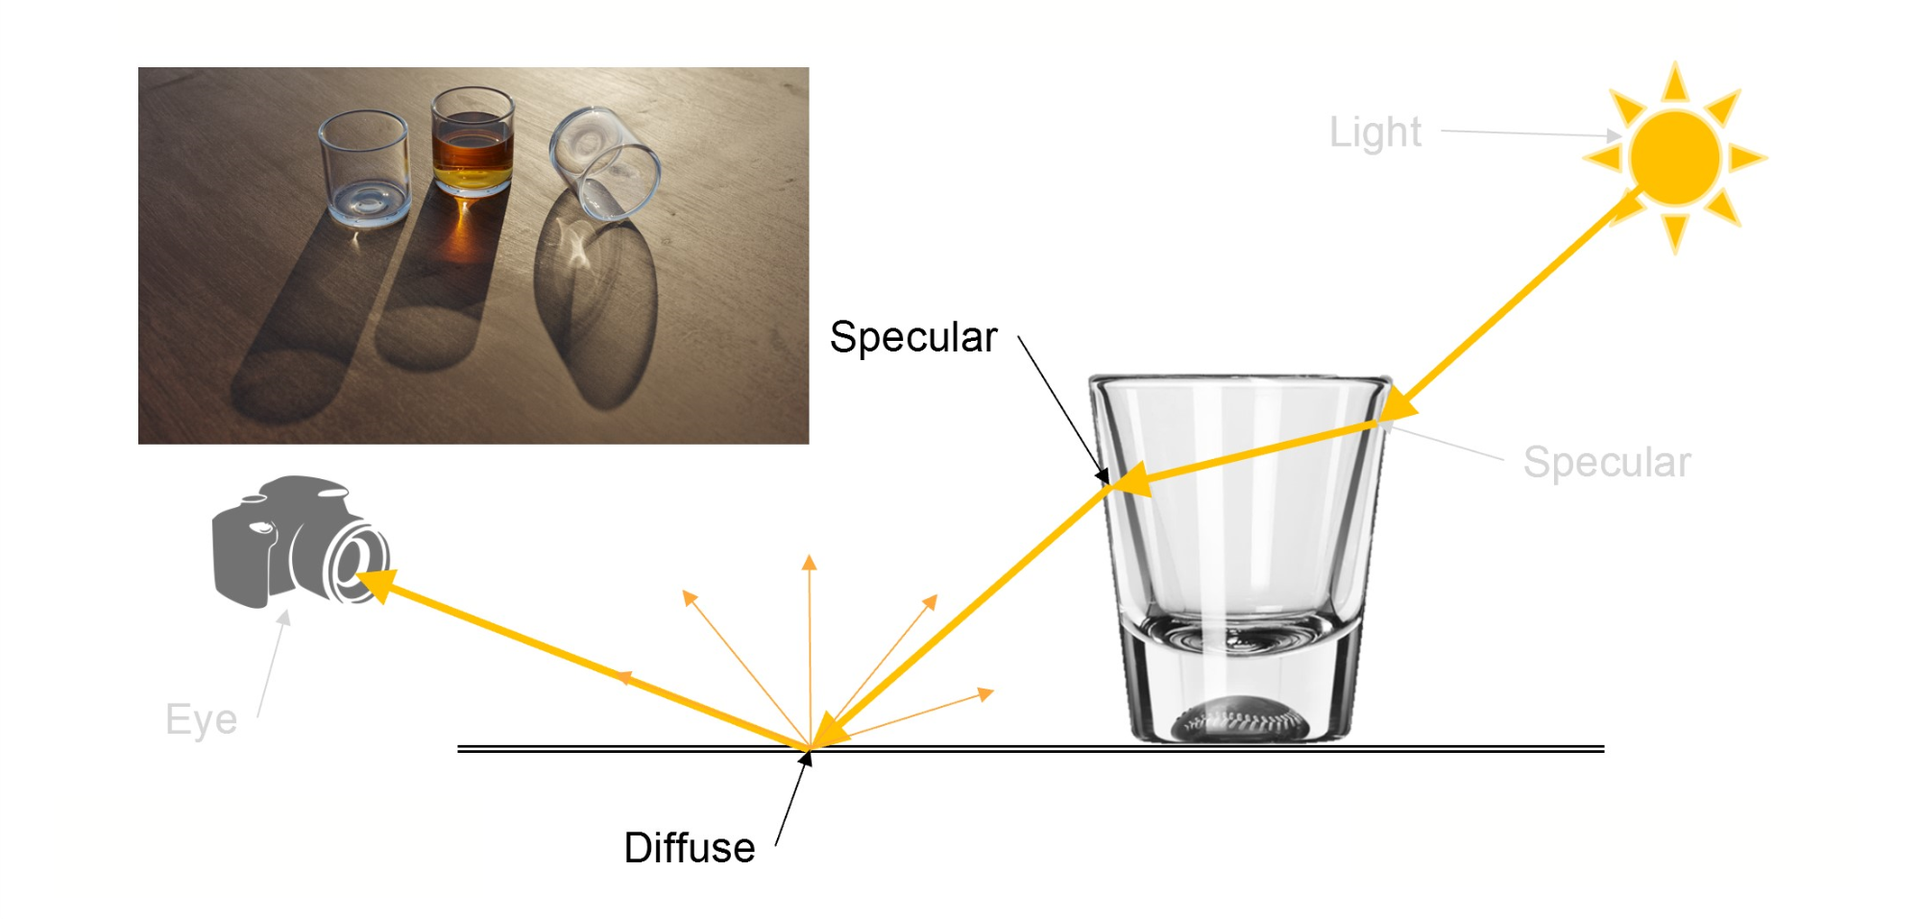
Keep in mind that even a pane of glass, such as a window, also refracts light. Technically, all light coming through a window is a caustic.
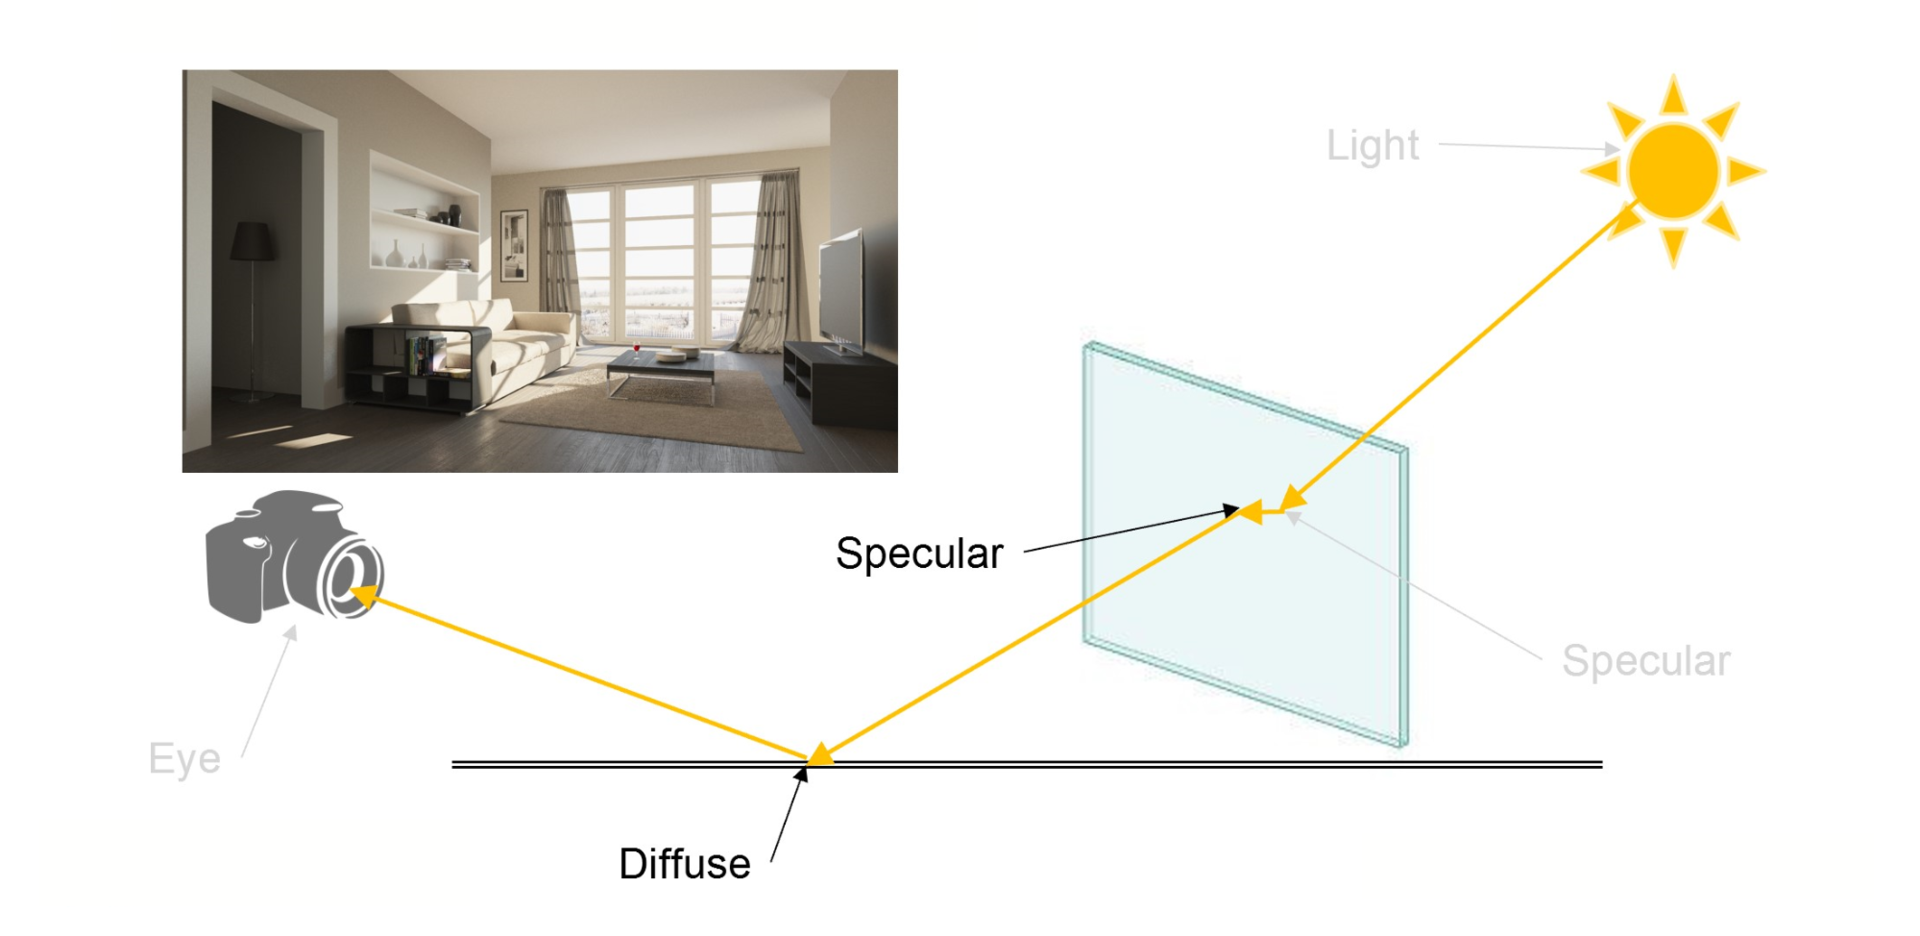
Basically, if light bounces off a surface in specular manner and then hits a diffuse surface as it illuminates it, it is considered a caustic. This means that, in reality, caustics account for a huge amount of light in a scene.

You might be wondering: If we’ve been ignoring caustics for so long, why do we get renders that look believable? In short: Caustics have been faked for years. But before we discuss how we fake it, let’s explain why we fake it.
Caustics are hard to compute
The truth is that the way that we have been calculating caustics for years has been very complicated. There are some brute-force methods that can work, but generally they either take way too long or take a huge amount of shortcuts that end up giving you only a small fraction of the actual caustic contribution.
Many renderers have used something called “photon mapping” but, traditionally, those methods have been very complicated to use — and if not set up correctly, can be very slow to render or simply look very bad (or both!). But methods like photon maps were invented because computing caustics from pure ray tracing is a big challenge. So let’s examine why.
How do caustics fit into ray tracing?
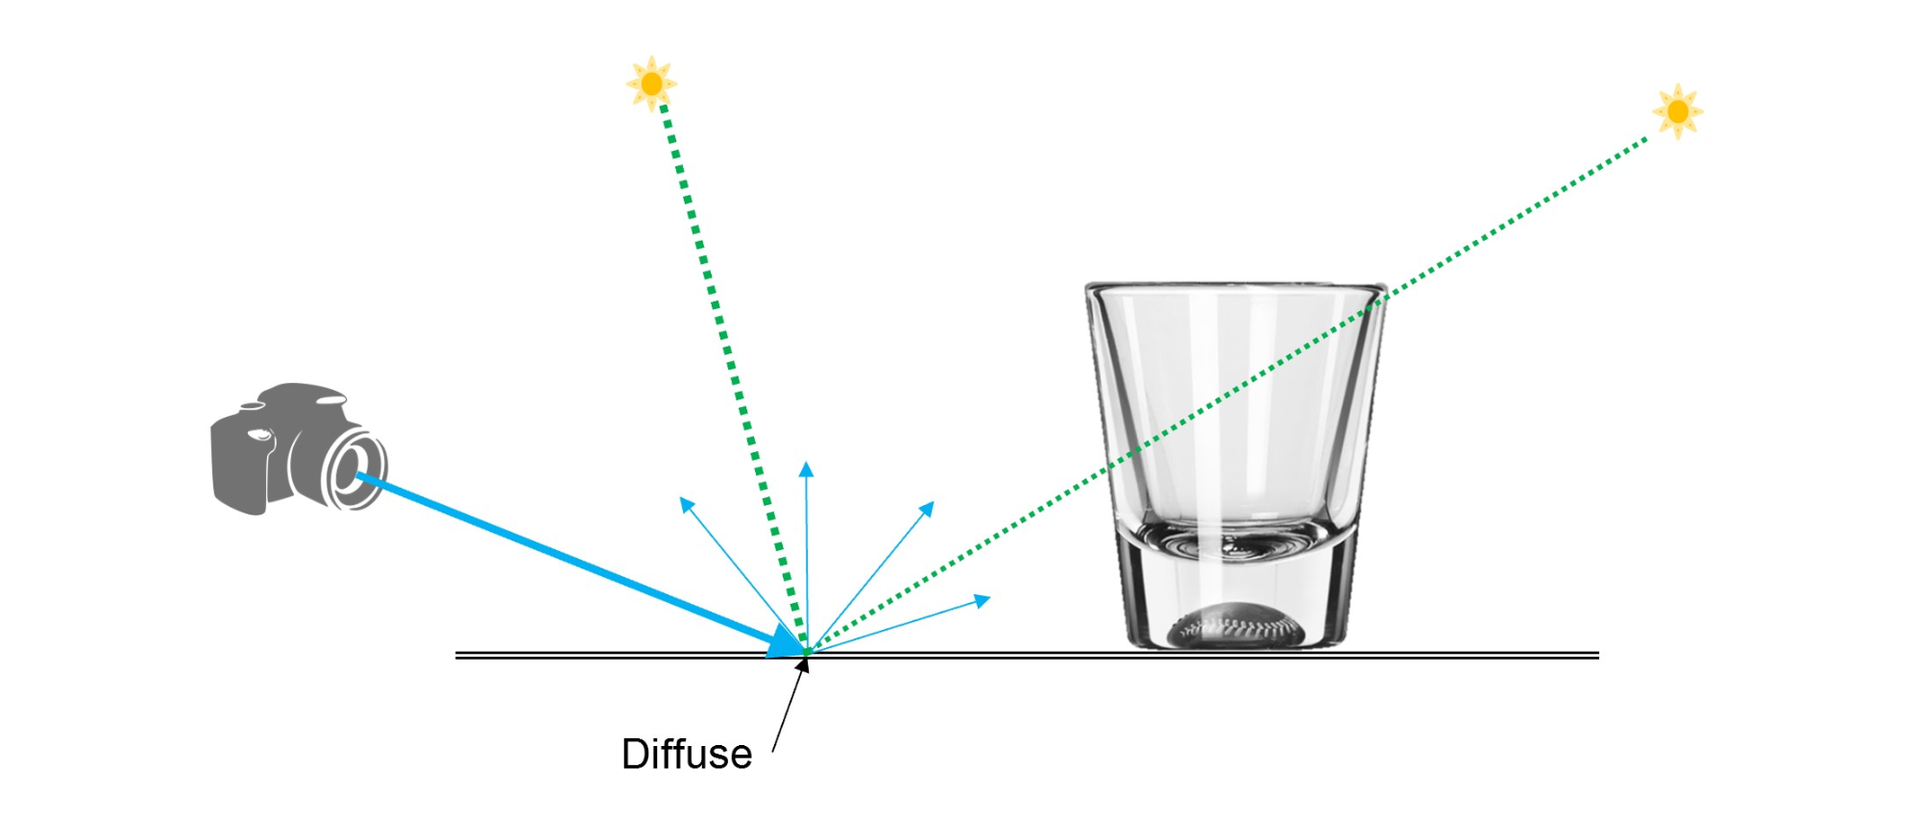
The best way to start to explore ray tracing is to start by observing nature. In nature, rays of light are emitted from a light source. That light bounces off a surface. That bounce can be specular where it changes direction — either through a reflection or refraction — or it can be diffuse where it scatters in all directions.
If we built a ray-tracing engine that imitated that specific model — i.e. trace the rays from the light source all the way to the camera — we would need to shoot an enormous number of rays to get a complete image. That’s because the vast majority of the rays shot from the light source never hit the camera.
So, while this method is the closest to nature and would eventually find all the lighting contribution of the scene, it is extremely inefficient and it would take days on a supercomputer just to get a usable rendering of a simple scene. So we need to think of something more efficient.
What if we reverse the light path and trace from the camera?
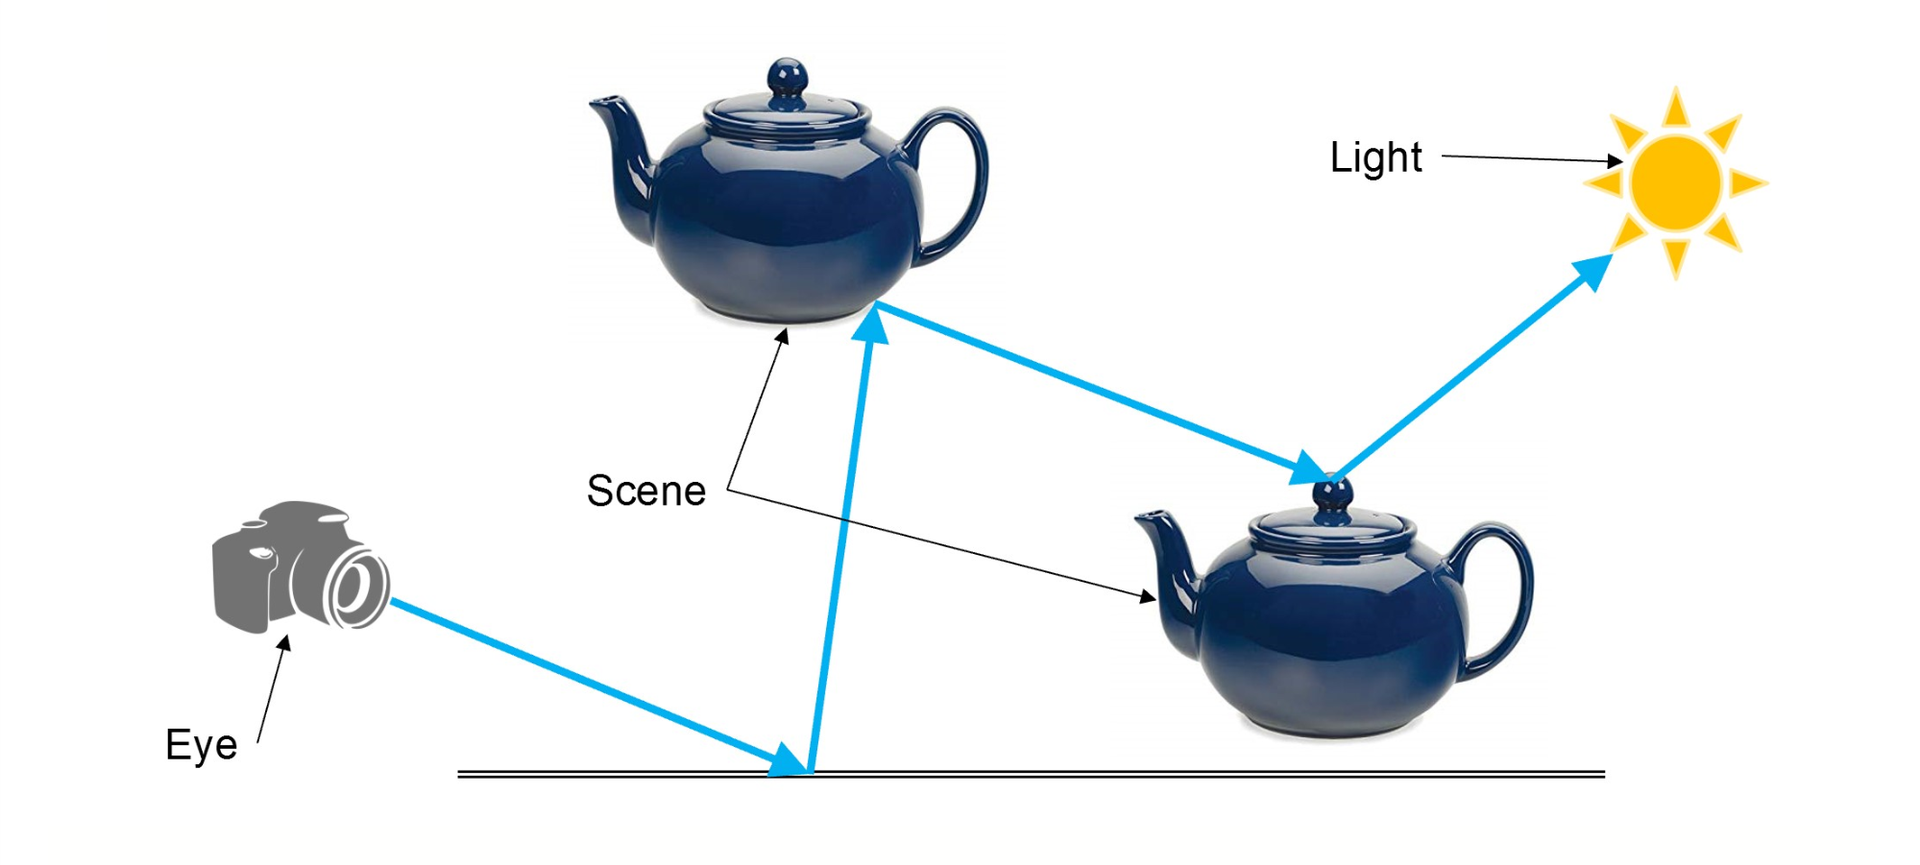
The best solution is to reverse the direction of the rays. Rather than wasting a huge amount of time calculating rays that never make it to the camera, what if we start from the camera and trace out until we find a light source?
This method is called “reverse path tracing” — usually shortened to simply “path tracing” — and it’s what is used by nearly all modern ray tracers today. It turns out that, by doing this, our rendering can be far more efficient at finding usable rays — and we now have a usable image much faster. And by faster, we mean seconds rather than days.
Problem 1: Large light sources vs. small light sources
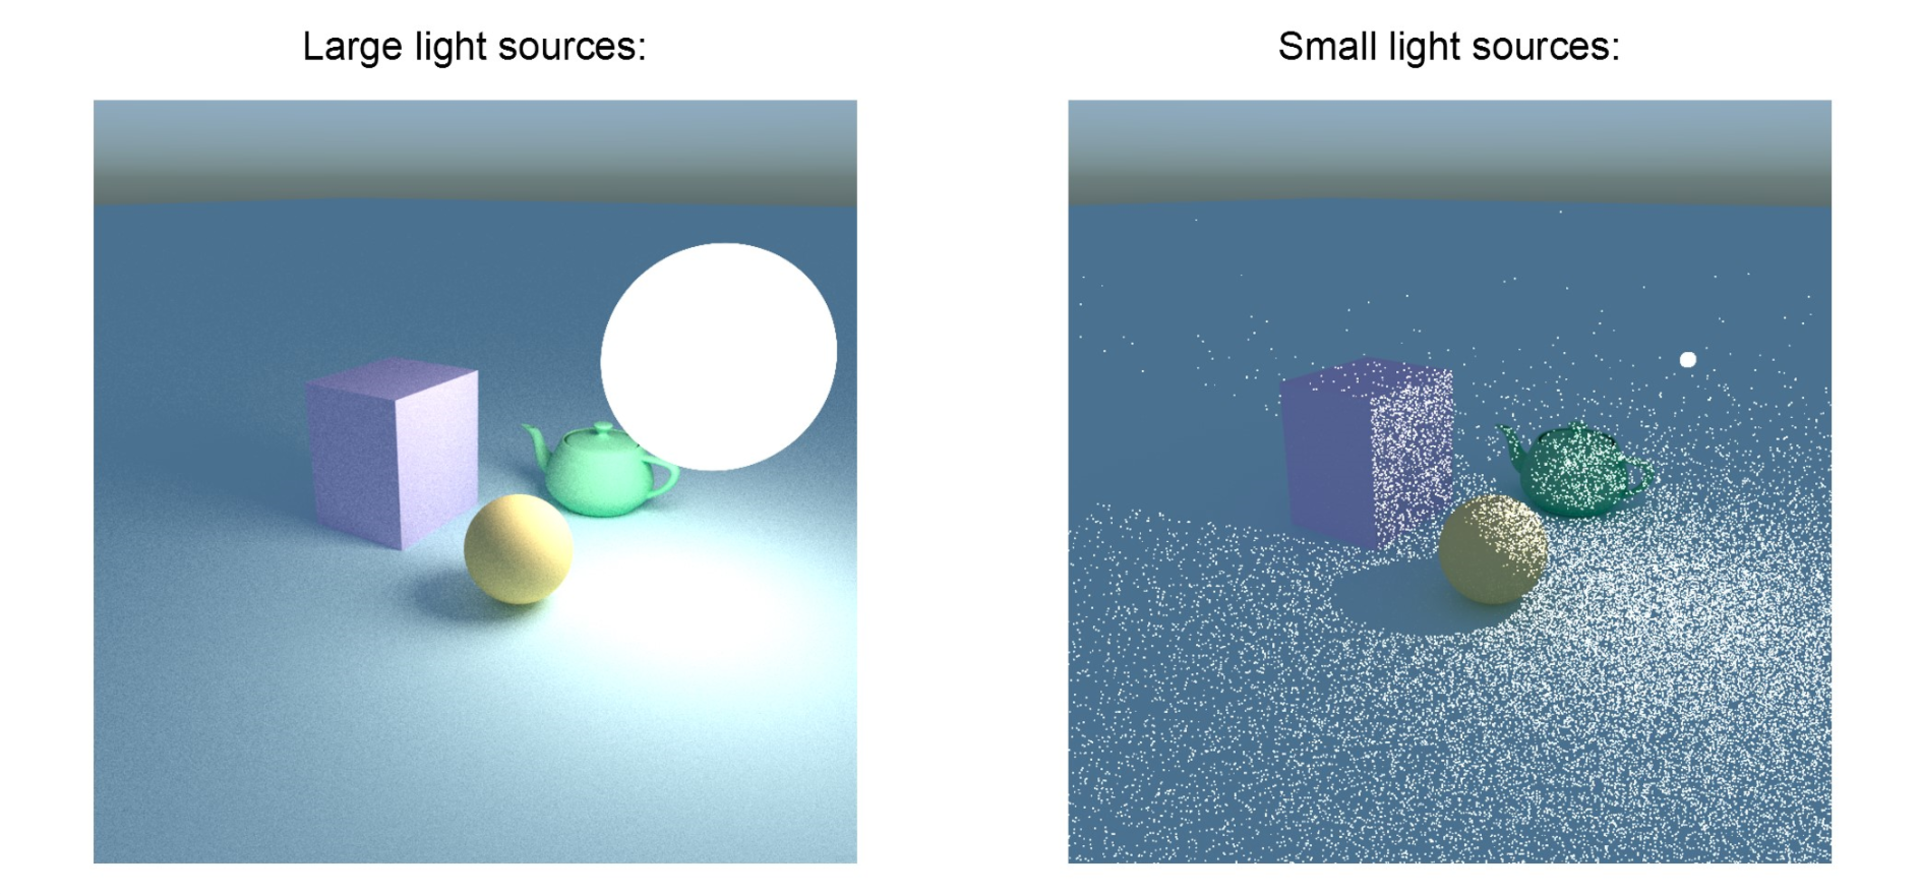
But in doing this, we start to discover some limitations. As the rays leave the camera in search of light sources, if those sources are large in scale — such as an environment light or large area light — they can be found very easily. But many light sources are very small, like a single light bulb. As such, many of the rays traced from the camera might miss the source completely. And random ones that do find the source, end up causing small white specs in the rendering — also known as “fireflies.”
Solution 1: Use light sampling to find small light sources
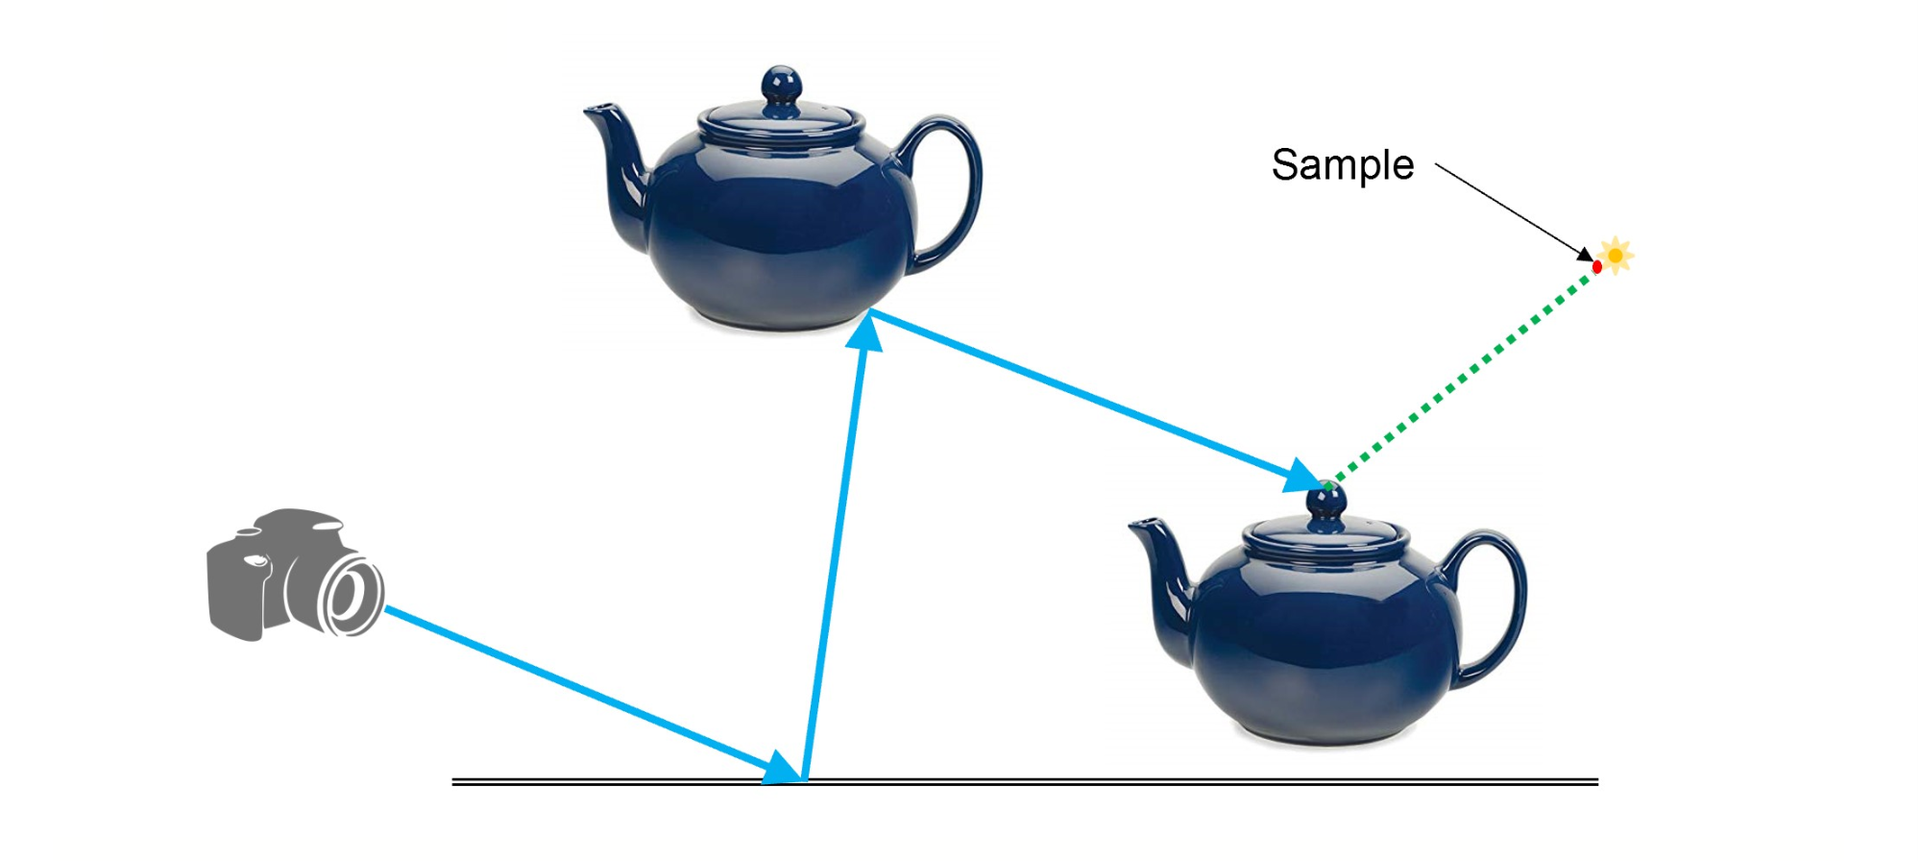
But there is a solution that helps the renderer to make sure they don’t miss the light source — even the very small ones. This method is called “light sampling.” What this does is to randomly pick points on the light sources and connect them back to the rendering path. It makes sure the rays hit the light sources. This method works really great for small direct light sources.
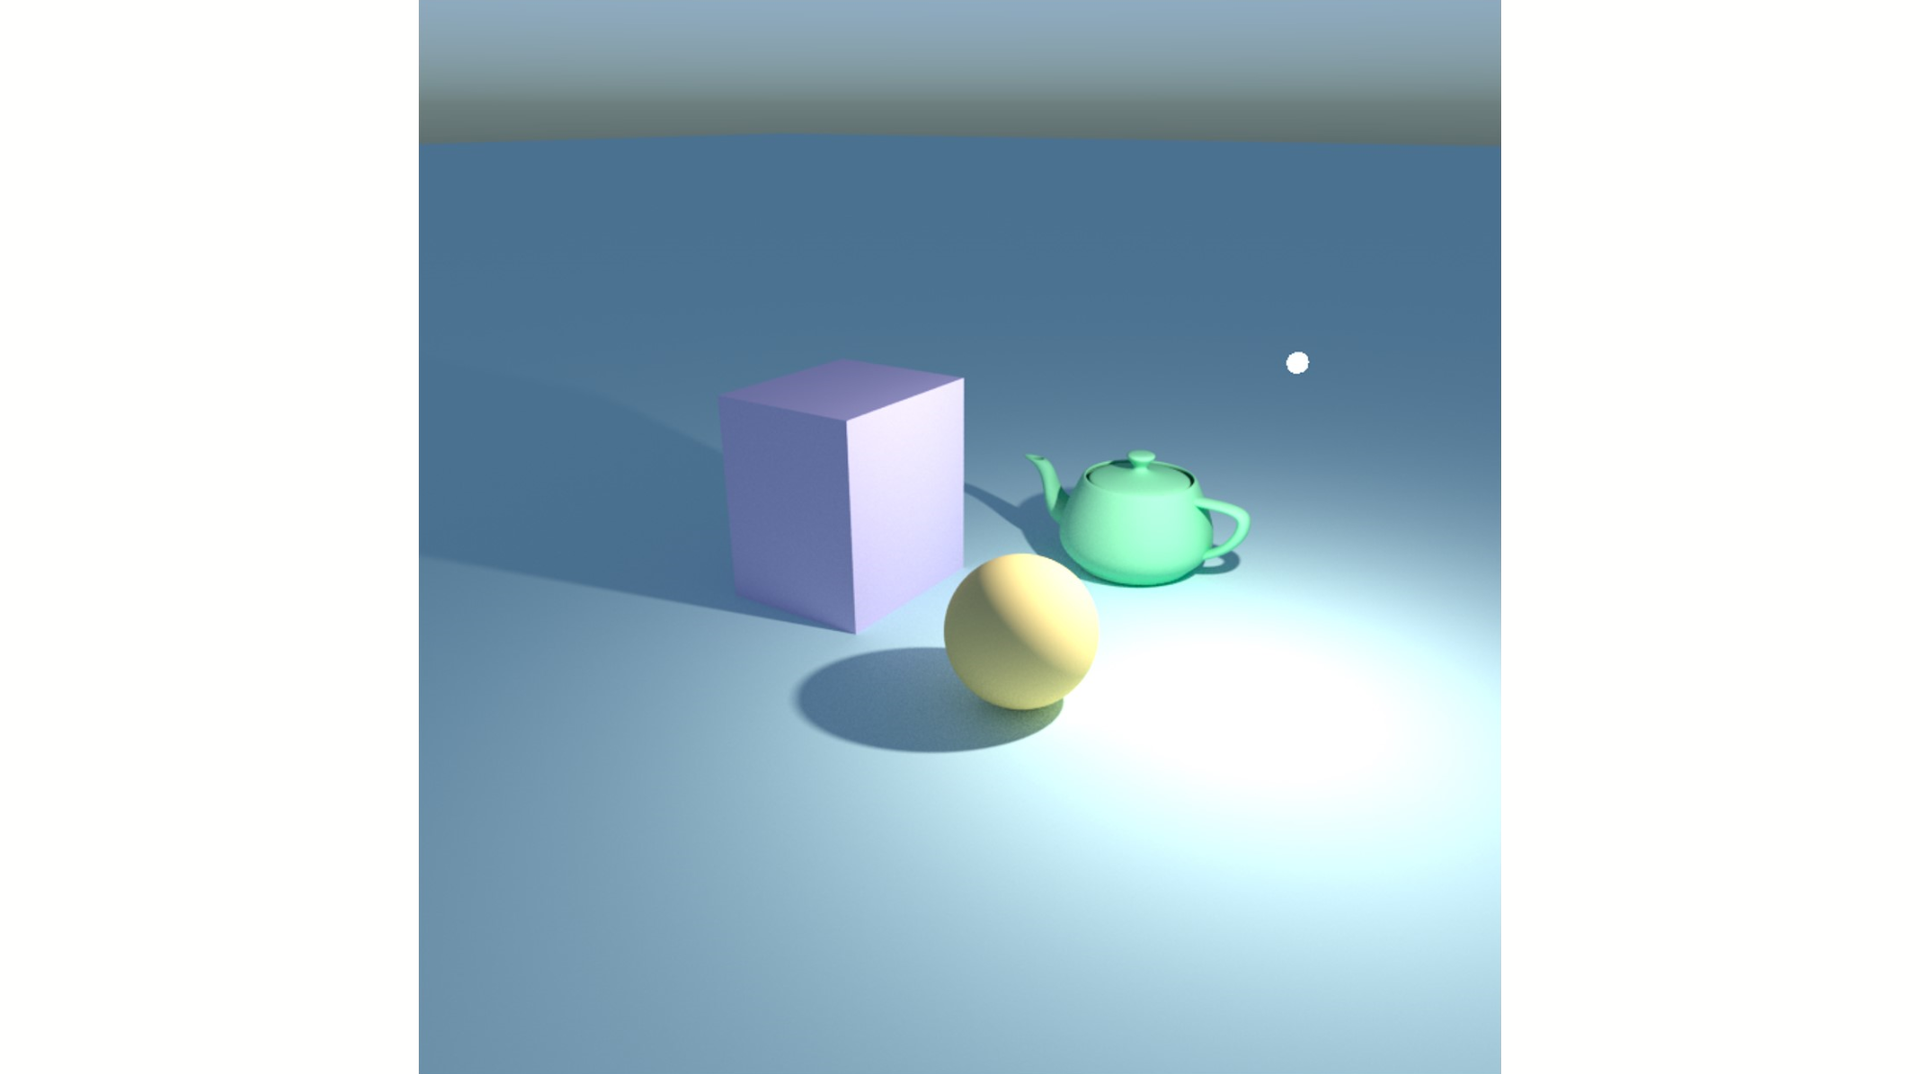
Problem 2: Indirect light sources, like caustics, can’t use light sampling
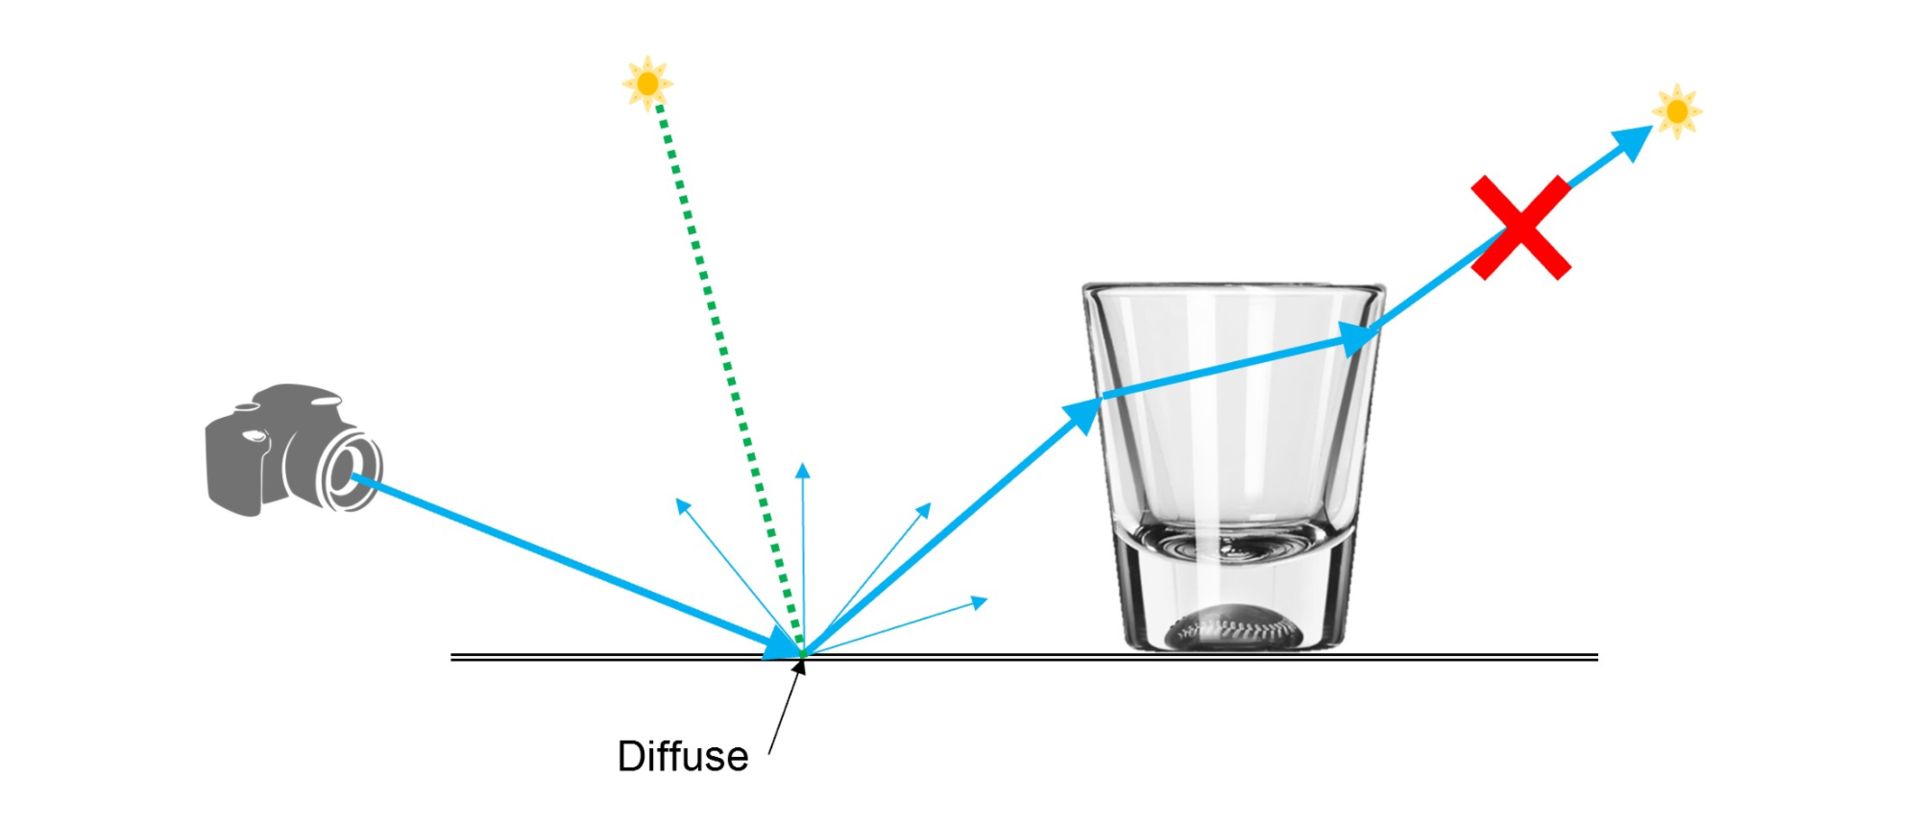
Notice that we said: “small direct light sources.” The problem is that this method cannot work for indirect light sources. One of the reasons is that, while we do know where the light sources are, we don’t know where the indirect ones are — and by indirect light sources, we are mainly talking about caustics. Once a ray reflects or refracts through a surface we don’t know where the source is until after it has been traced.
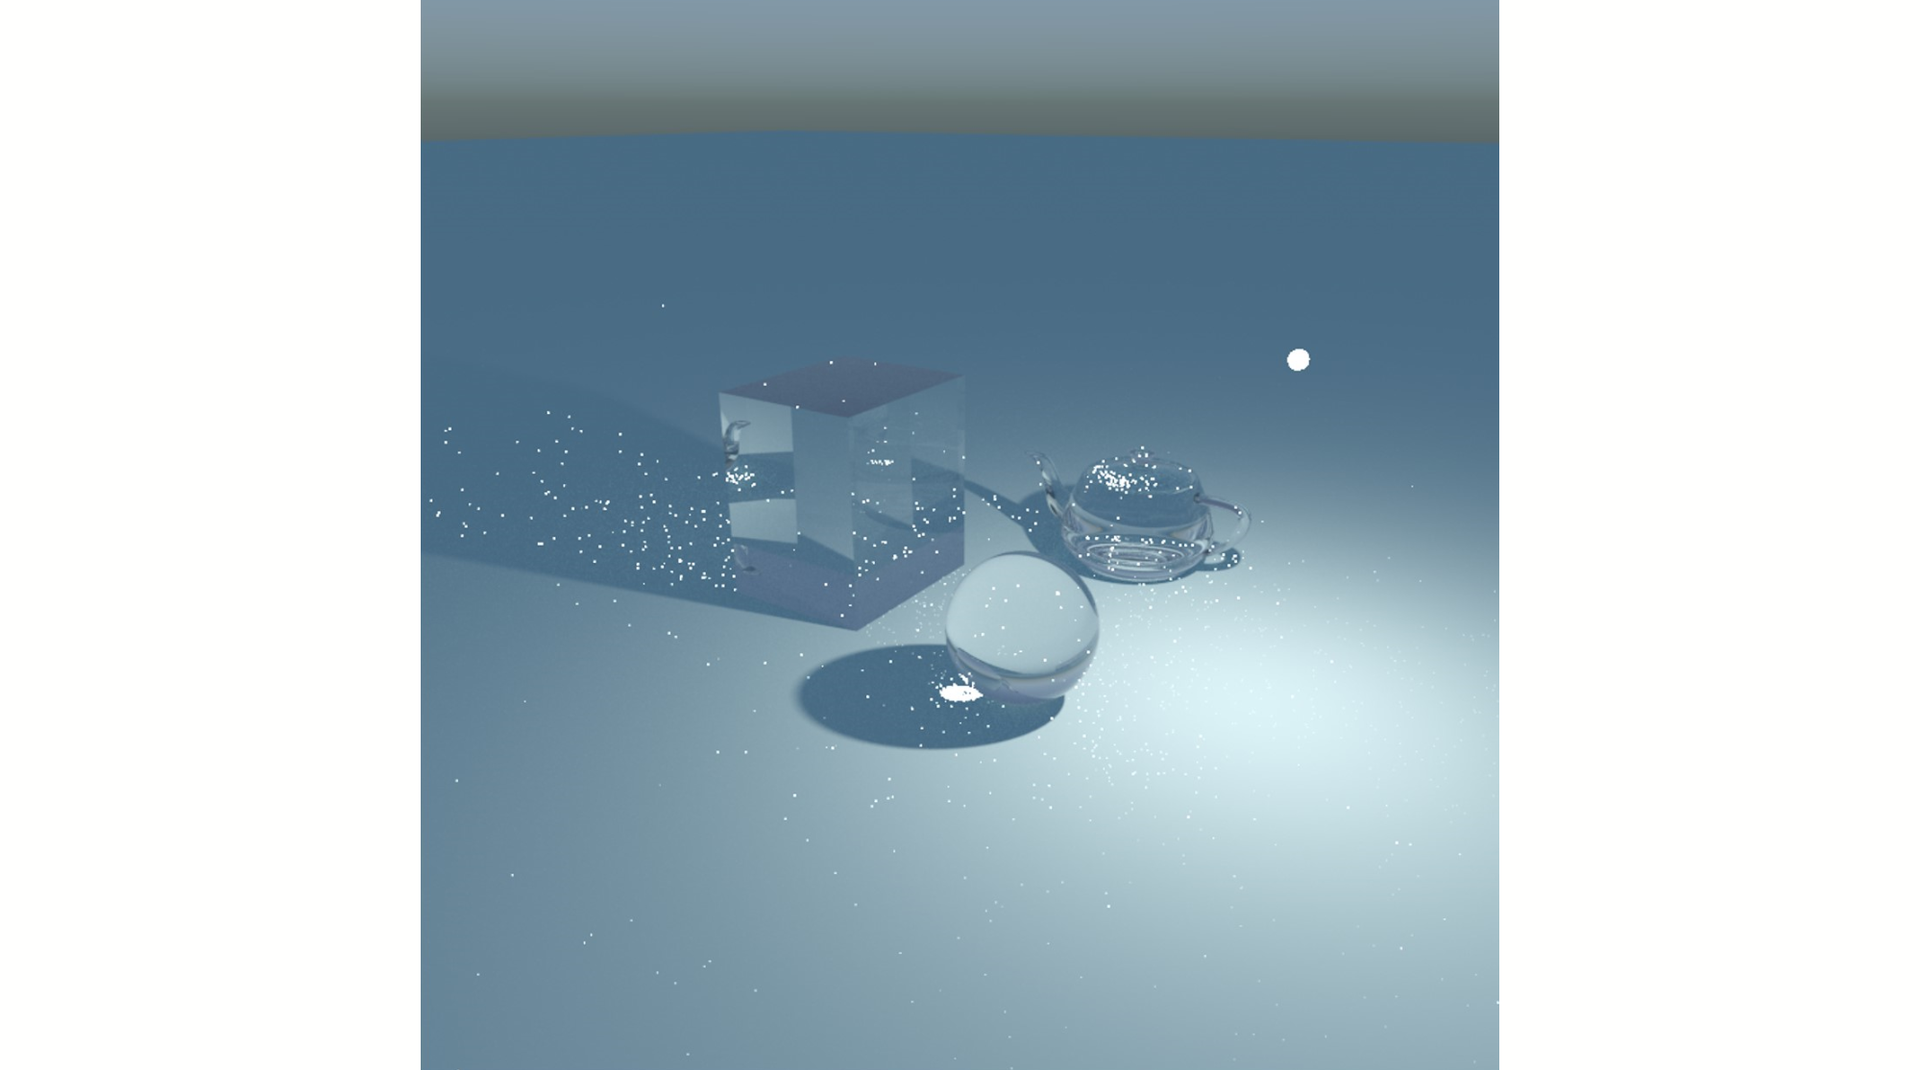
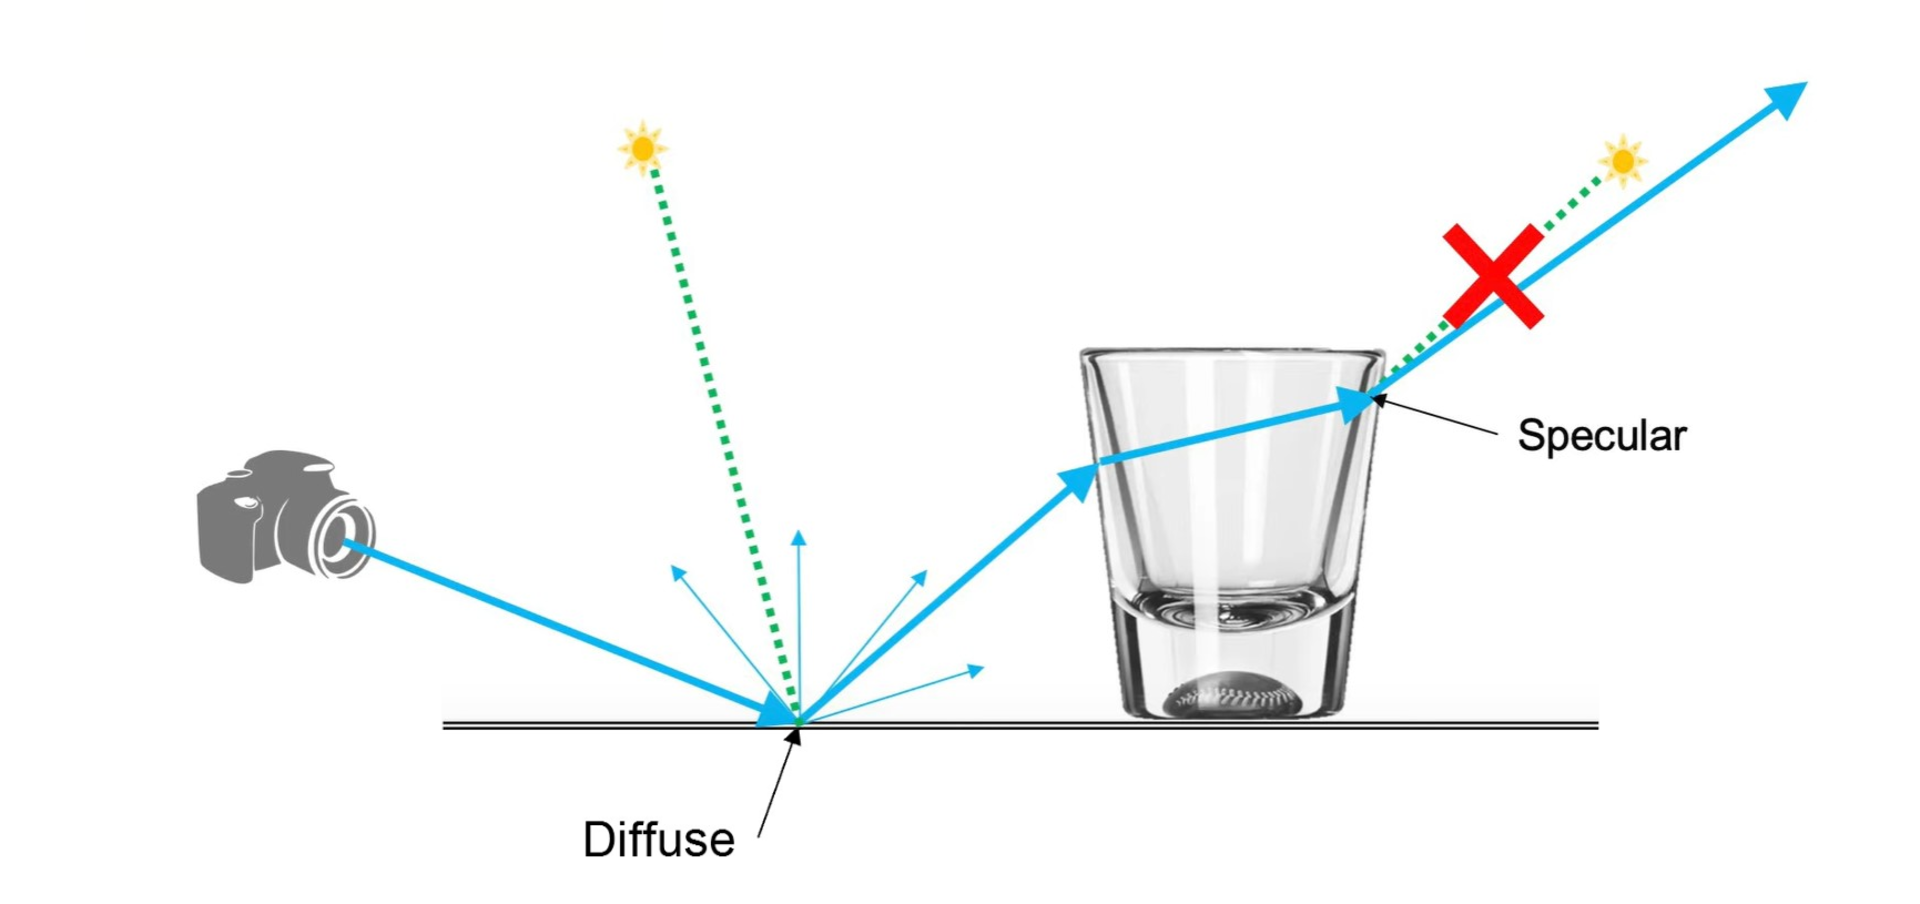
So while the light-sampling method takes care of the fireflies left by the direct light sources, we still get a lot of fireflies from caustics. Similar to the issue before light sampling was added, random rays could come across a caustic and leave a firefly effect. So how do we deal with that?
Hack 1: Clamp everything!
One solution that a lot of renderers use is to clamp everything — which is really just a fancy term for giving up. If it randomly comes across a very bright ray from a caustic, “clamp it.” (Or simply ignore it.)
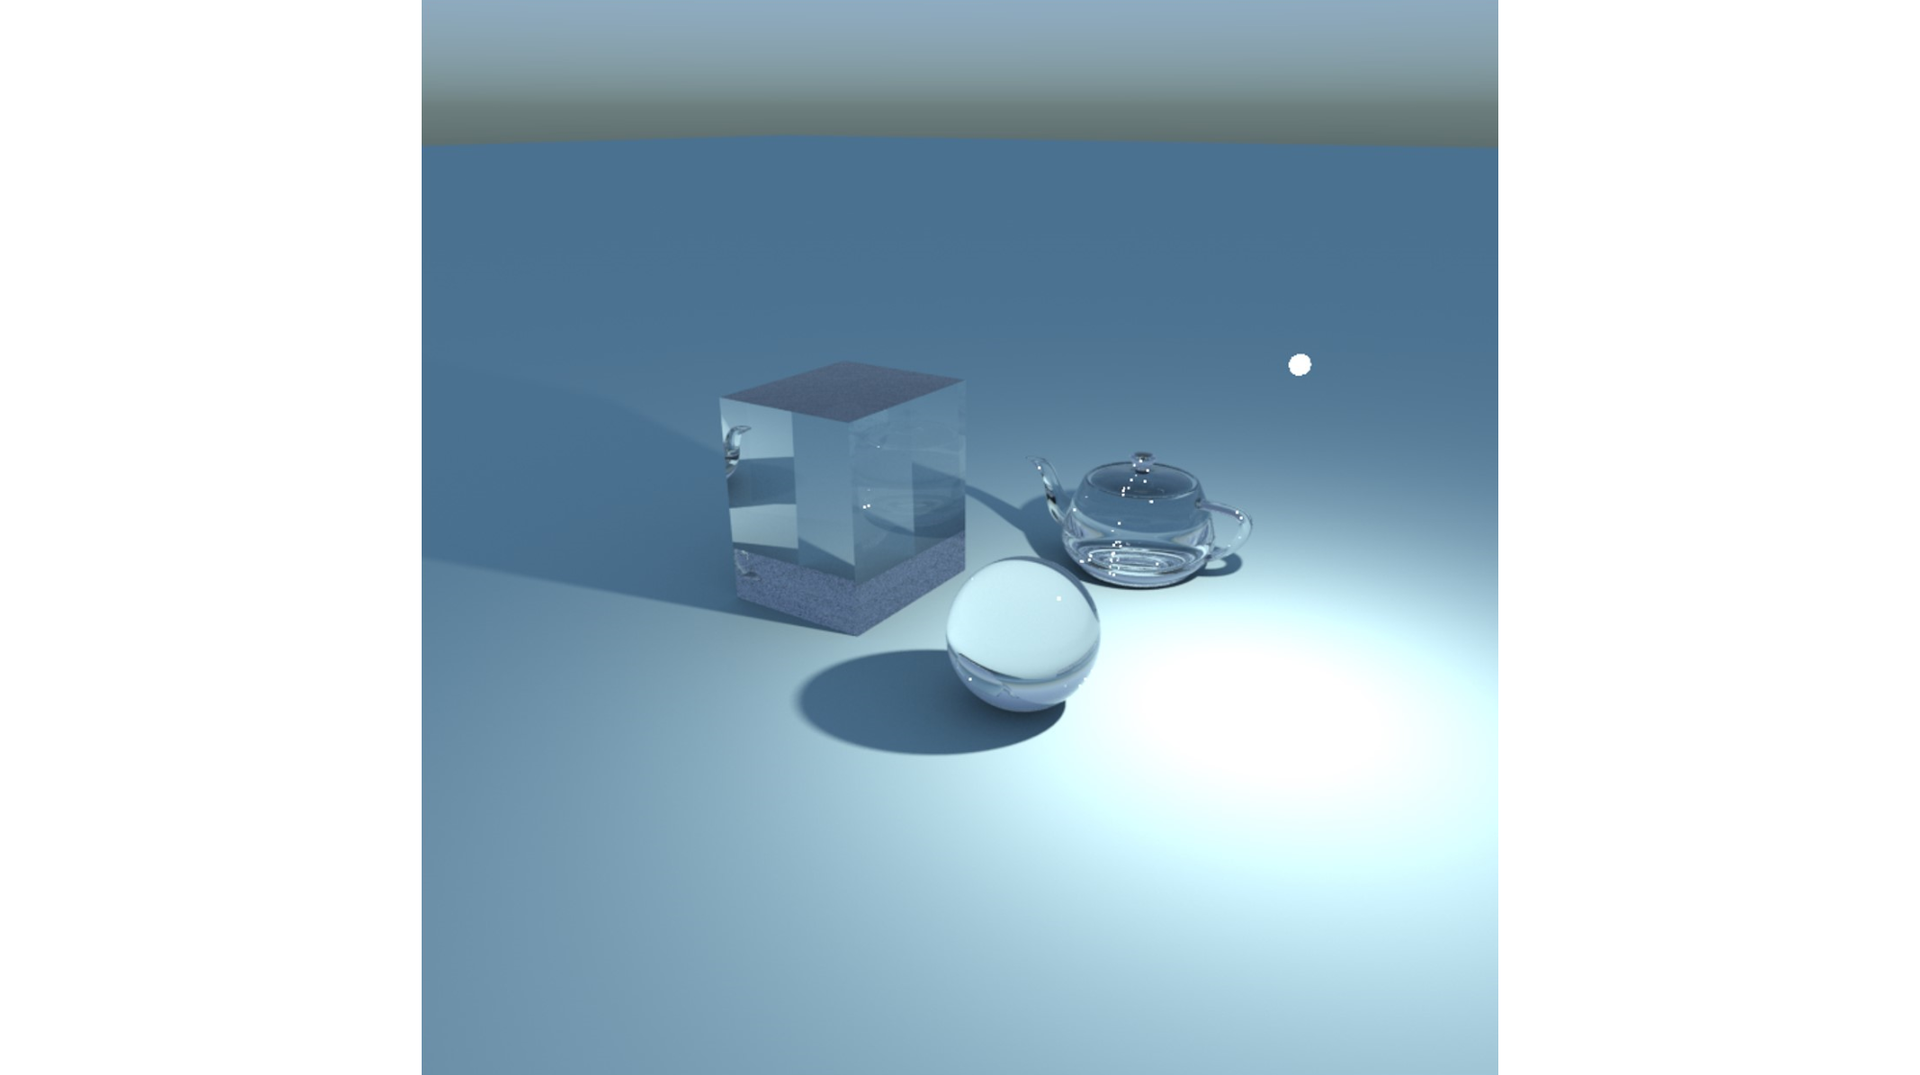
At this point, instead of a caustic through a glass object, what we get is a shadow. In some cases this can produce an image that is somewhat believable.
But if you go back and consider that even a pane of glass is technically a caustic, then using this method we would get an image like this:
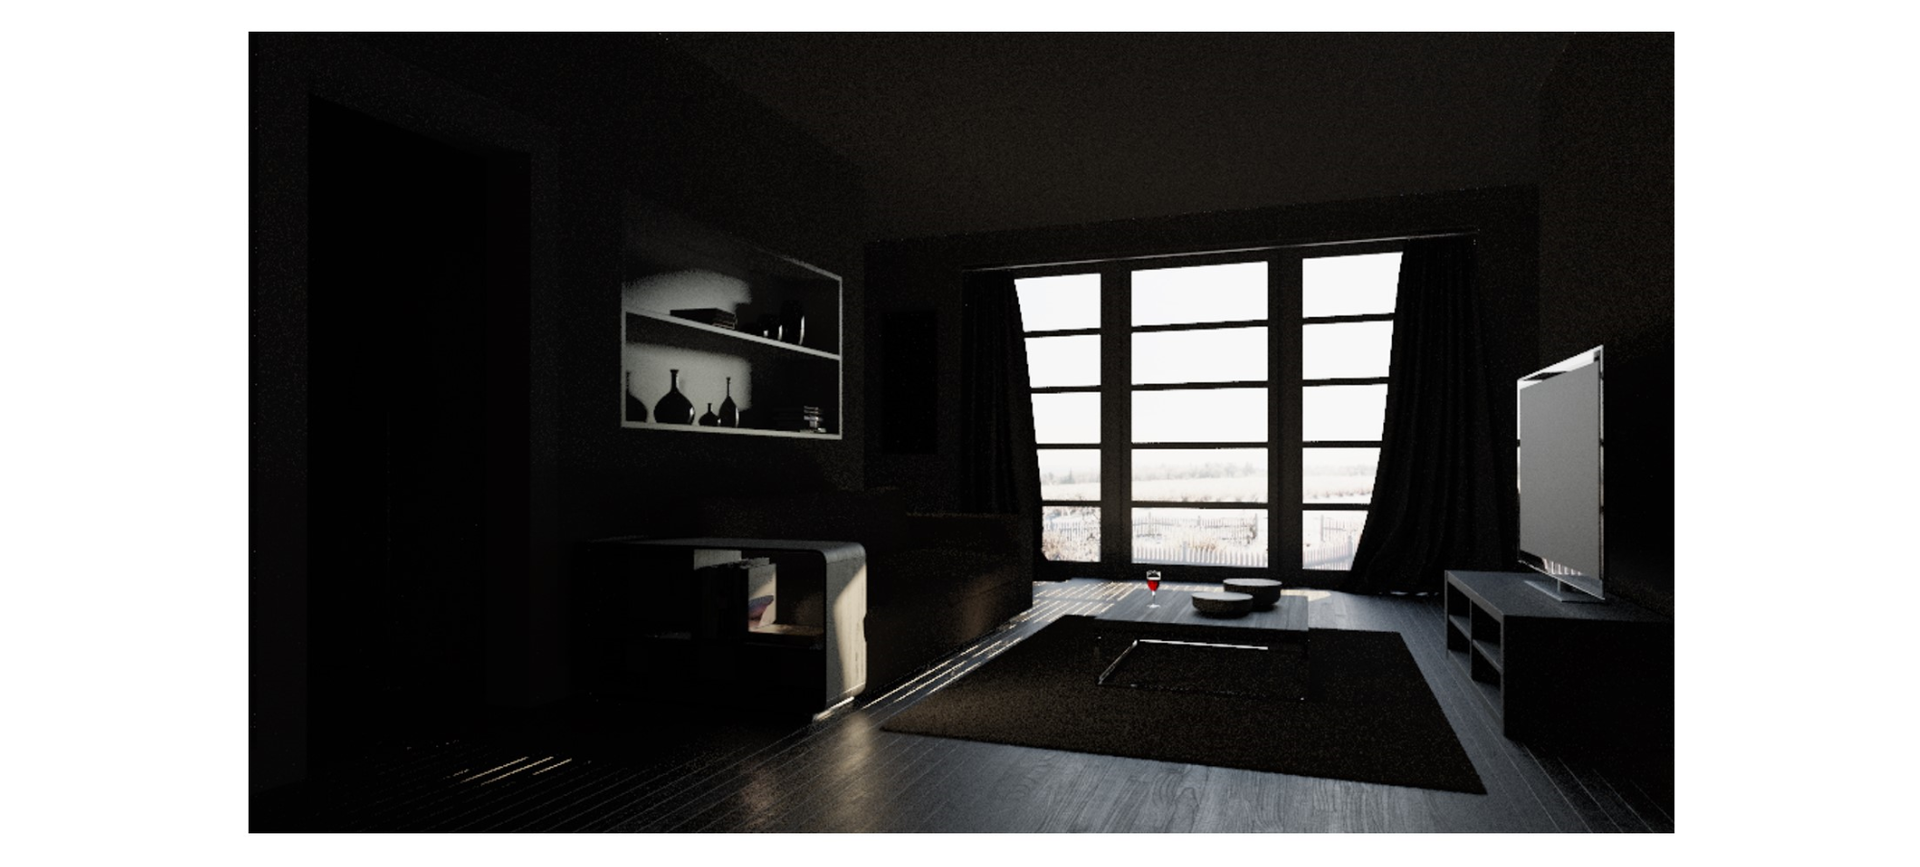
Hack 2: Just ignore the glass
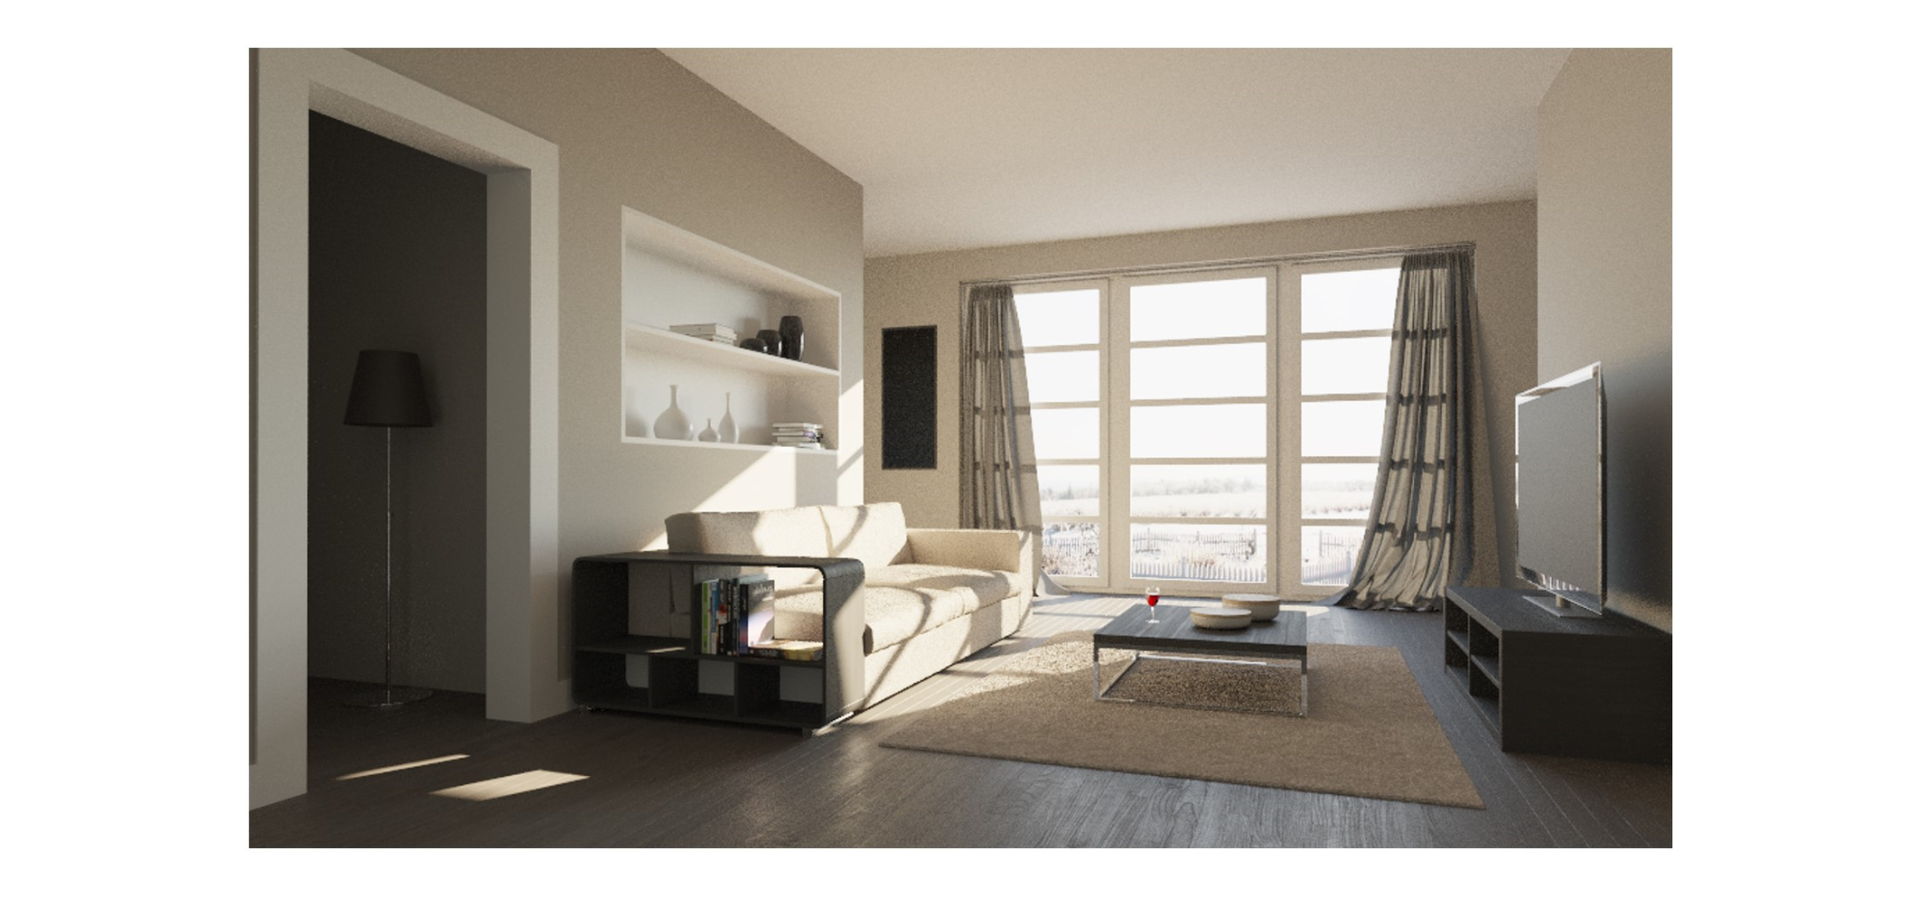
Now for the next hack. Since the issue lies in the fact that the ray is bouncing either through or off a specular surface, what if we simply ignore the glass and trace right through it? We can then go back to light sampling and everything will be back to normal.
This solution works great for our architectural interior, for example:
But, unfortunately, our glass objects will not do so well:
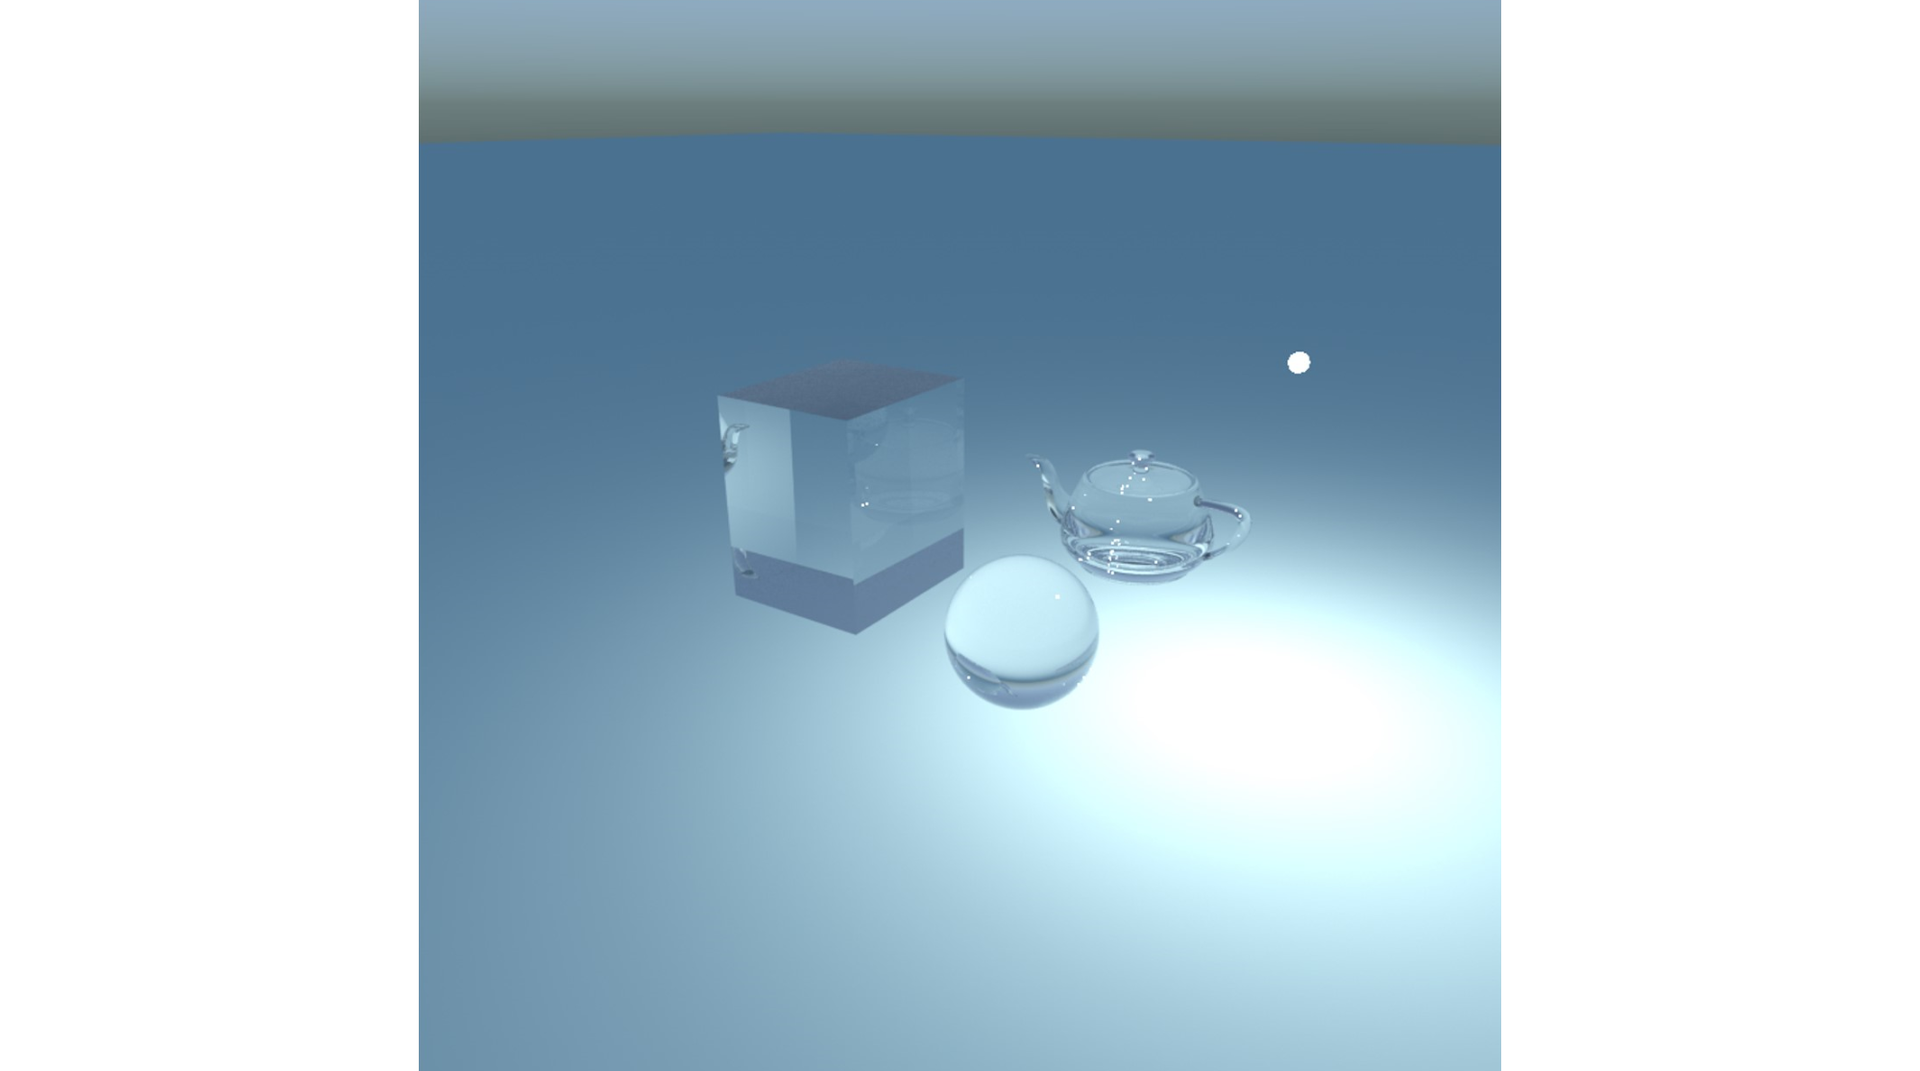
Hack 3: Hybrid/fake/architectural glass
Now for the third hack. Here, we’ll let some of the light through, but not all of it, depending on the thickness, angle or color of the glass. This allows a slightly more believable shadow to form:
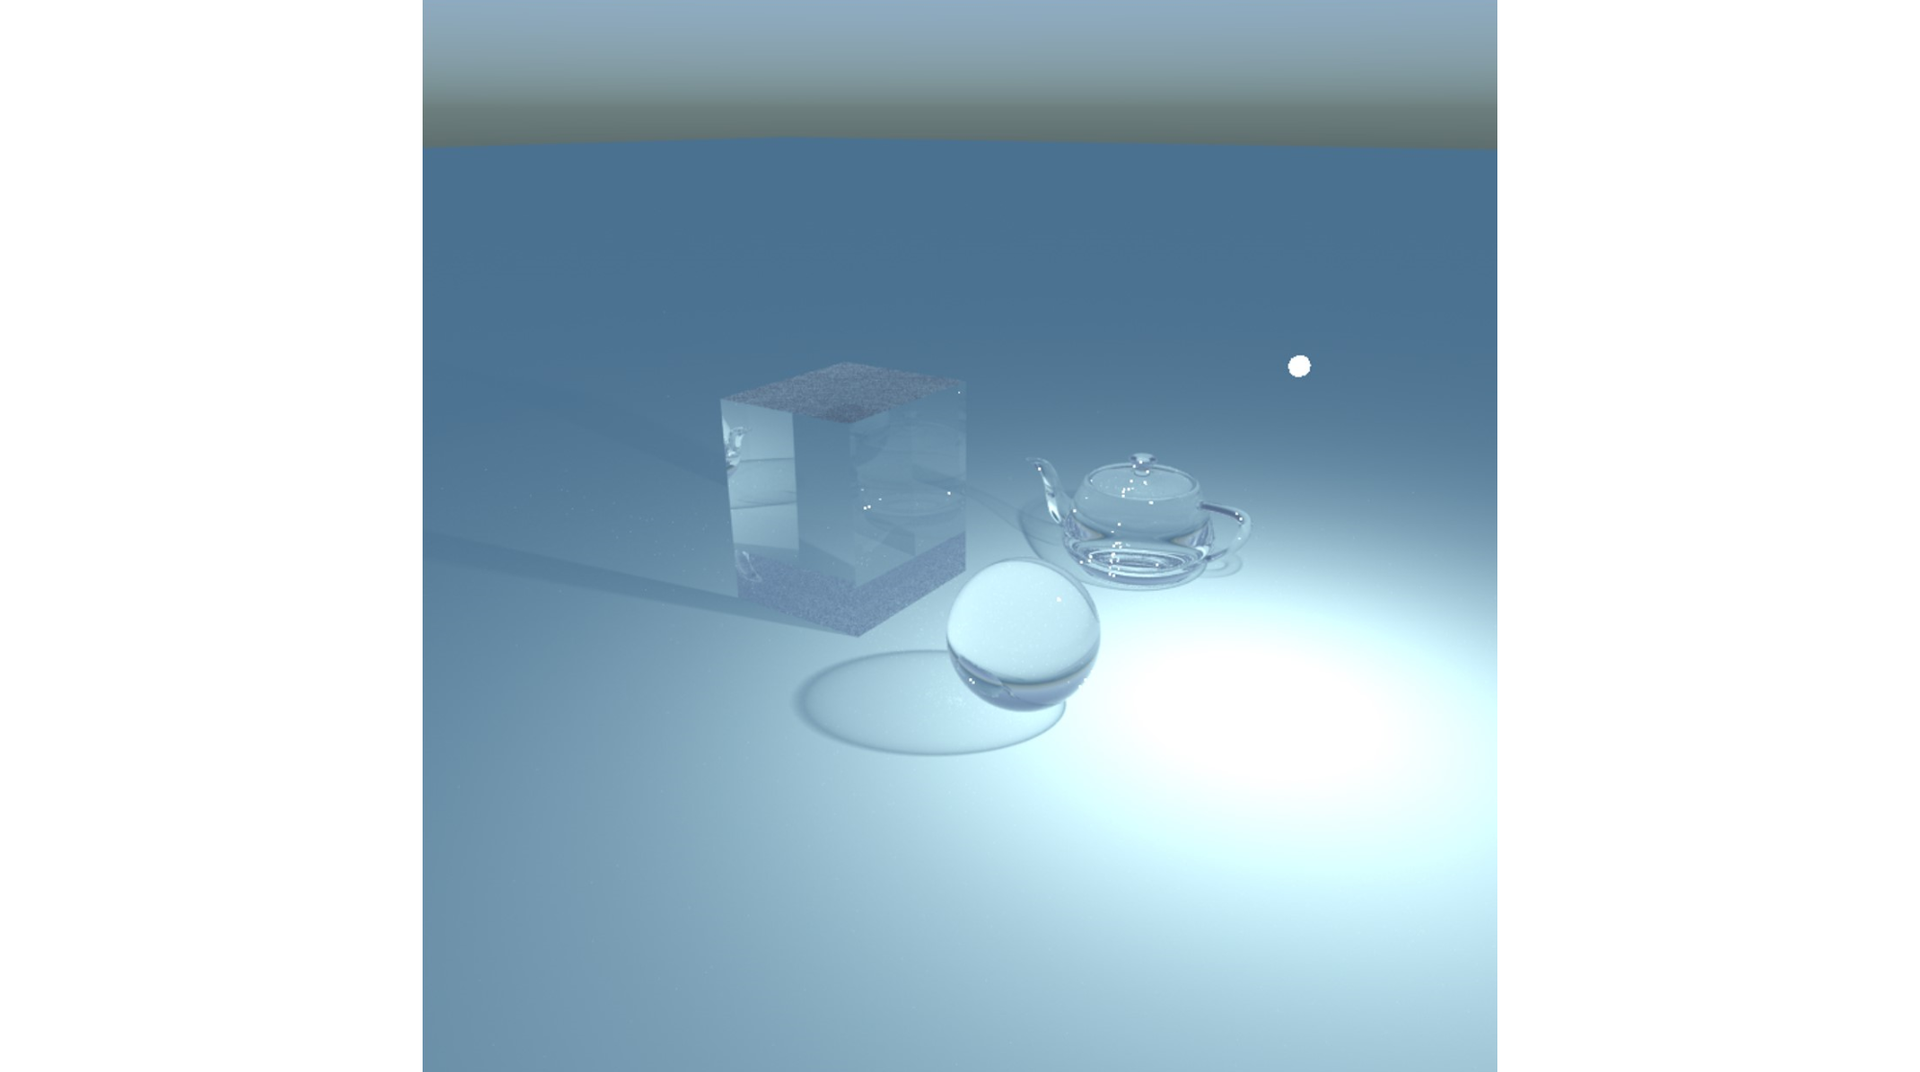
This is what most rendering solutions have been doing for the last 10 years. It’s sometimes called “hybrid glass,” “fake glass” — and sometimes it has a very fancy name: “architectural glass.” However, none of these hacks are actually caustics and, as such, none of them are correct.
What if we just stop hacking and trace from both directions?
Considering how complicated and time-consuming it is to render caustics correctly, traditional hacks — such as “architectural glass” — were a good compromise. Until now.
What if we told you you can render caustics easily and this only has a small impact on your render time? Well, that’s what Corona Renderer 4 is doing — and to achieve this effect, the Corona team simply went back to basics.
What we know is that if we trace rays from the camera, it works really well — and in nearly all cases, except for caustic rays. Those rays do much better when traced from the light source. But what if we could combine both forward and reverse rays depending on what sort of ray we need? Note that this is not a new idea — in fact, it has been around since the 90s. It was first mentioned in a paper about bi-directional path tracing from Lafortune and Willems in 1993.
Idea 1: Use Bi-Directional Path Tracing
One idea is what is called “Bi-Directional Path Tracing” — or BDPT. This solution is fairly fast, but when it comes to caustics it ends up missing too many caustic rays and we end up with a solution where, in many cases, we hardly see the caustic at all.
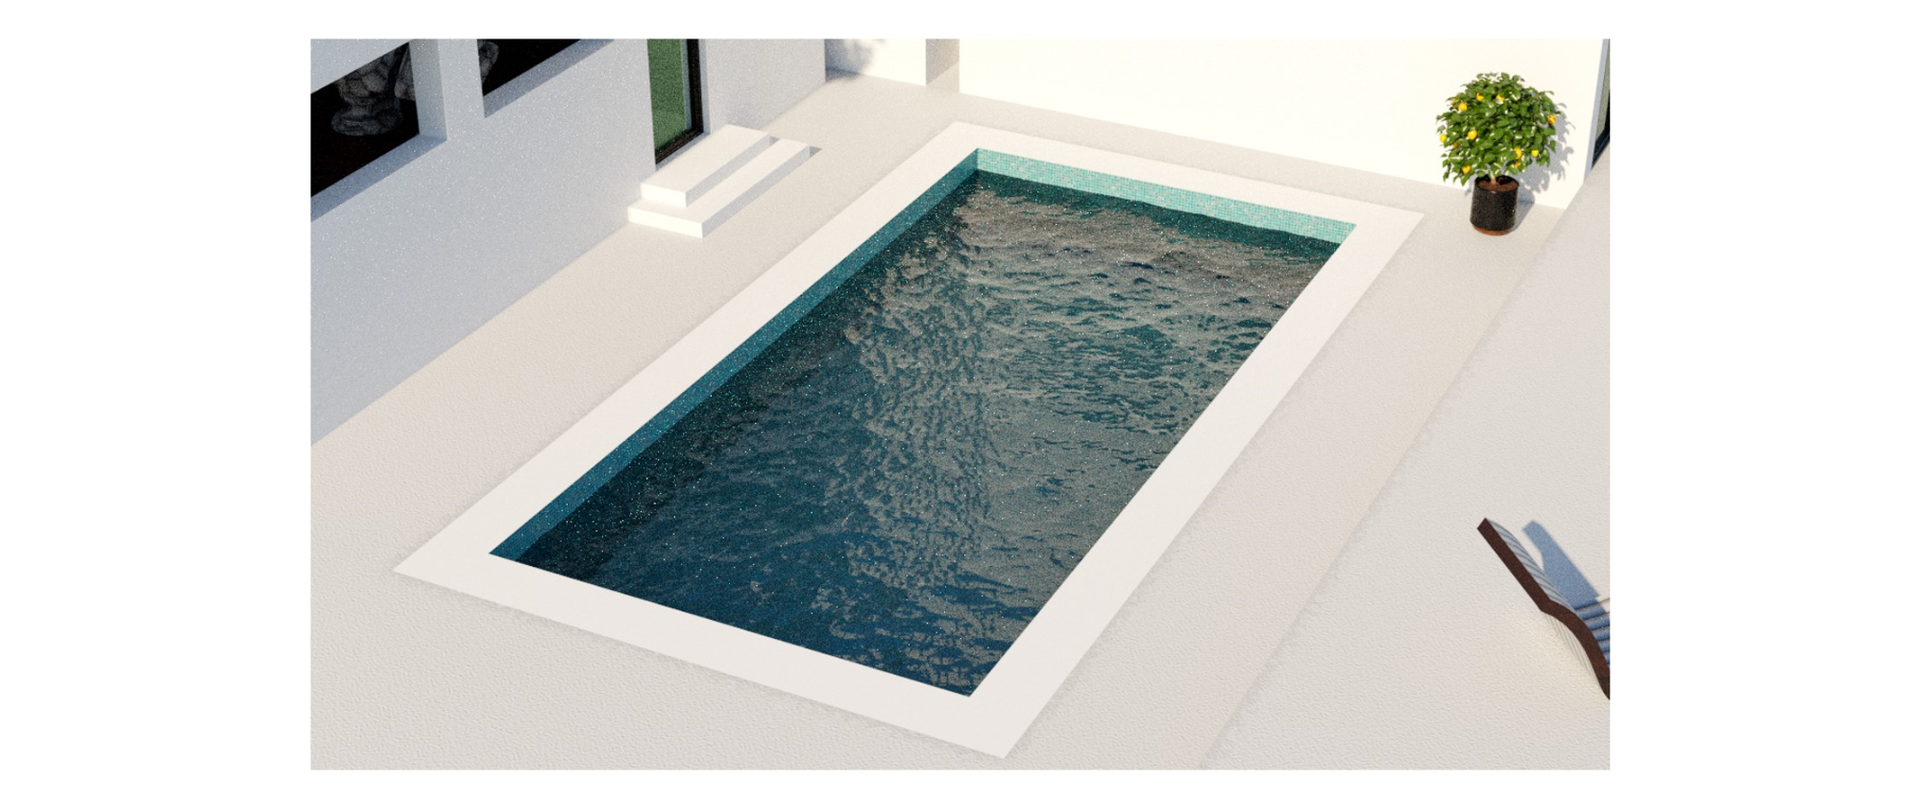
VCM combines too many strategies (and is very slow)
Another method, introduced in 2012, is known as “Vertex Connection and Merging” — or VCM. This method combines photon mapping and BDPT. While this method is generally easier and will get you good results, it over-samples too many rays to get a good solution and drastically increases render times.
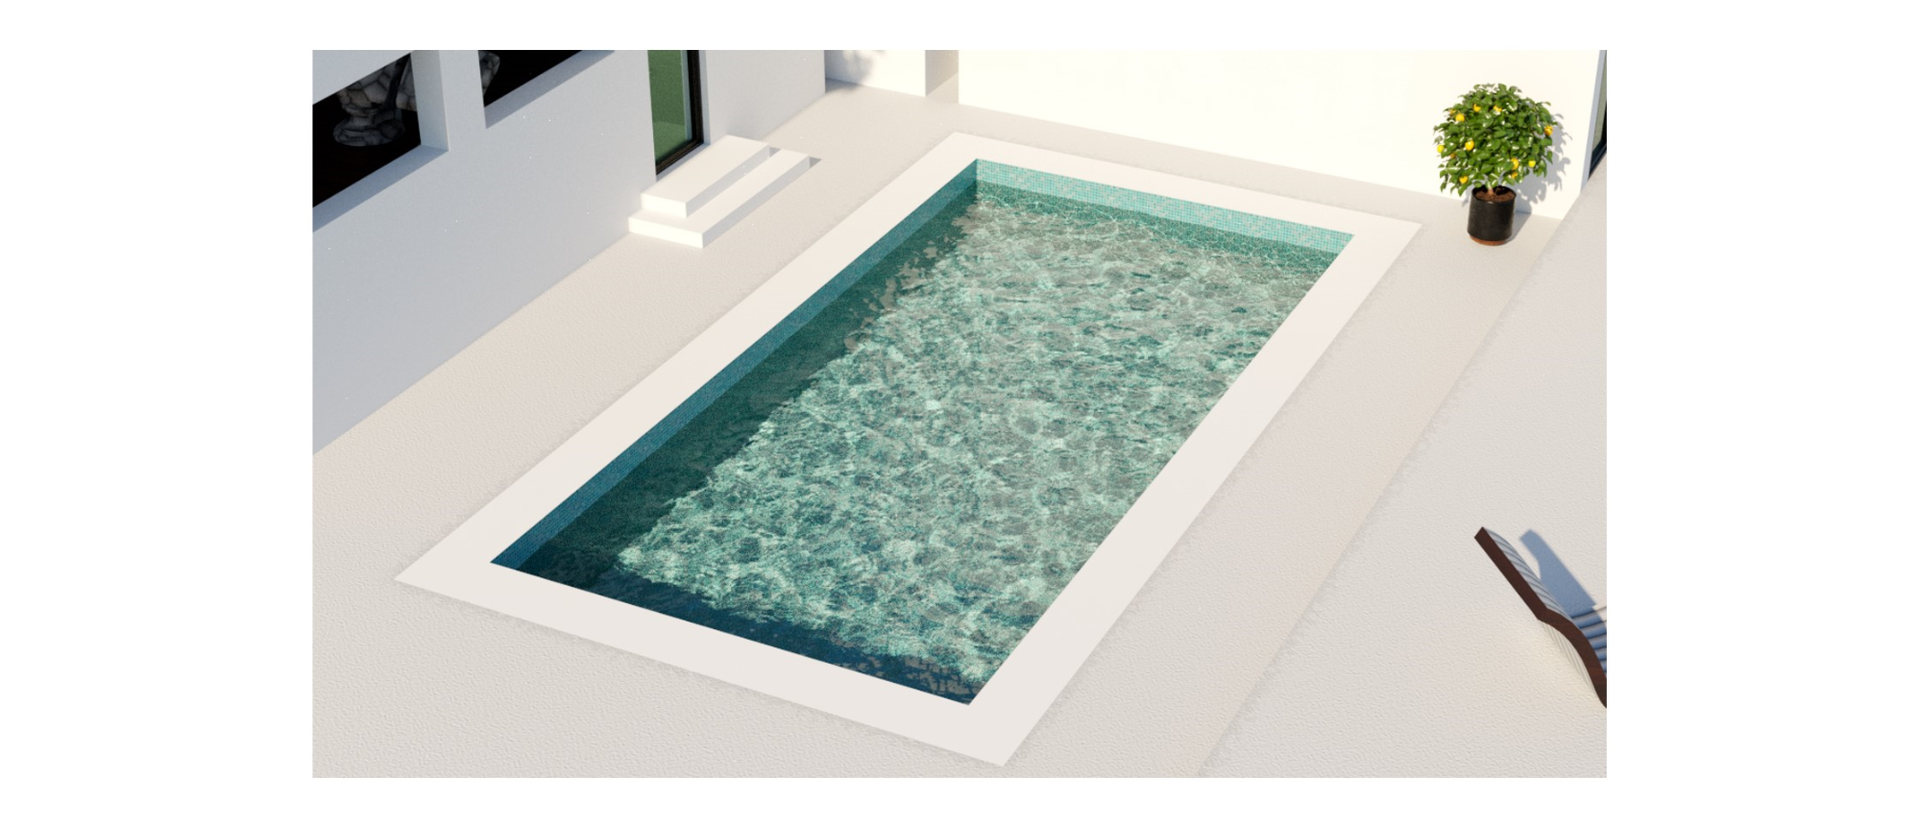
Corona uses reverse path tracing and photon mapping
Corona’s approach is to use a much more efficient and effective use of both reverse path tracing and photon mapping. But rather than letting you struggle with setting up efficient photon mapping on your own, Corona figures it out for you and gives you the correct result as efficiently as possible.
This means we are now able to render with caustics using not-too-few rays (like with BDPT), or not-too-many rays (as with VCM). Corona uses just-the-right amount of rays and gives you the correct result with all the right caustics, with minimal impact on your render times.
This is not to say that this is a simple task for Corona. Behind the scenes, some very complicated things need to be figured out, like: When to consider forward rays and when to consider reverse ones? How do you combine the results of these two methods? Plus much more.
But for the user, it is a very simple experience. Generating caustics is simply a checkbox in Corona 4. Do you want to render Caustics or not? If you do, you’ll get an image that is much closer to reality — and it will only impact your rendering time by about 50%.
“If the image has caustics, it’s probably a photograph or a Corona render”
— Vladimir Koylazov
During a conversation with Vlado, he said that he enjoys challenges where people have to guess if the image is a rendering or a photograph. He personally always used to look for signs of caustics in an image — i.e. if the image had them, it was almost always a photograph. But now that Corona 4 has made it so easy to add caustics to renderings, the challenge is going to be a lot harder!
One more thing…
It should be noted that because Corona is now doing a very accurate representation of all light — including its proper caustic contribution — it supports many noteworthy features that are not available in most other rendering packages, including:
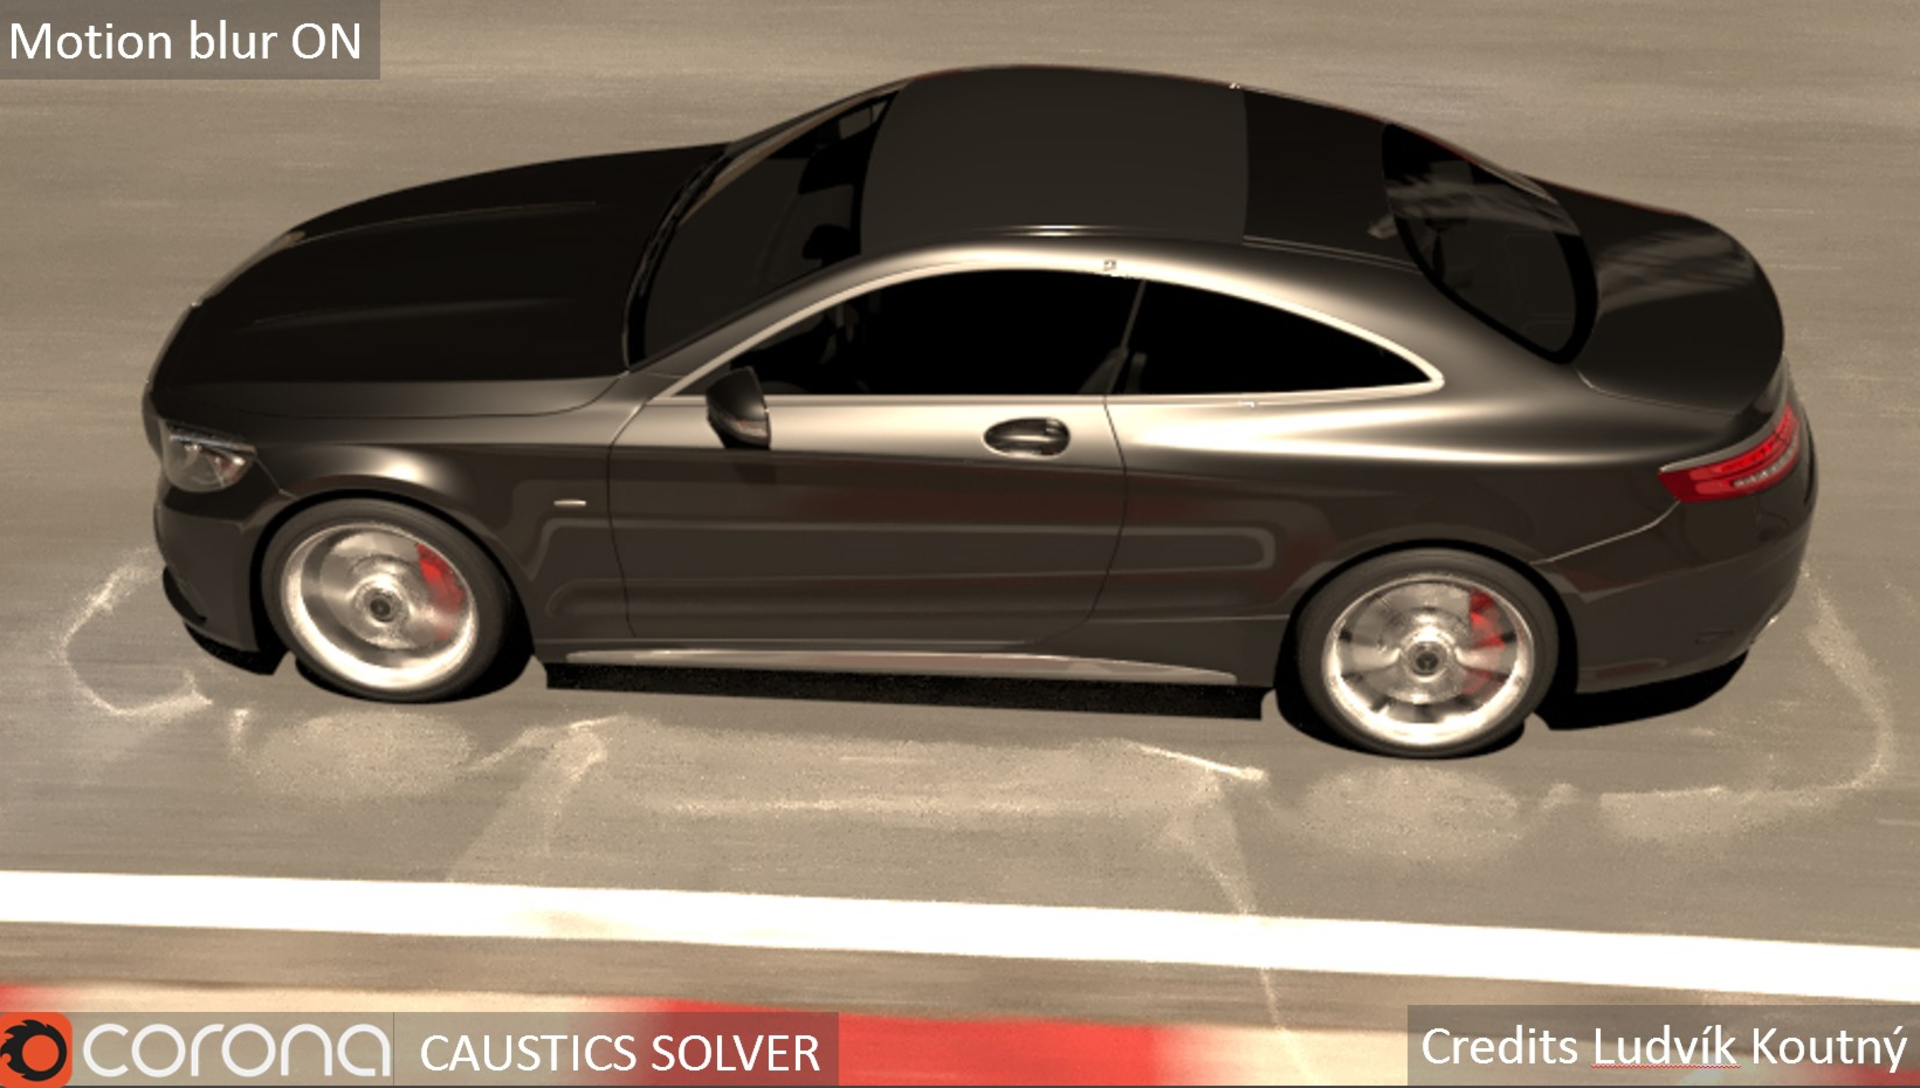
- The caustic motion blurs correctly. As an example, if you see the caustic coming from the wheel of a car on the street, that car is moving forward and the camera is following that car at the same speed. The street should have motion blur relative to the camera, but the caustic — which is on the street — should not. While this seems obvious, you might not realize this but other rendering solutions don’t actually do this correctly.
- One of the big features of Corona 4 is the Light Mixer. Since caustics can be initiated from any different light source, it is also split out and can be properly mixed with the Light Mixer.
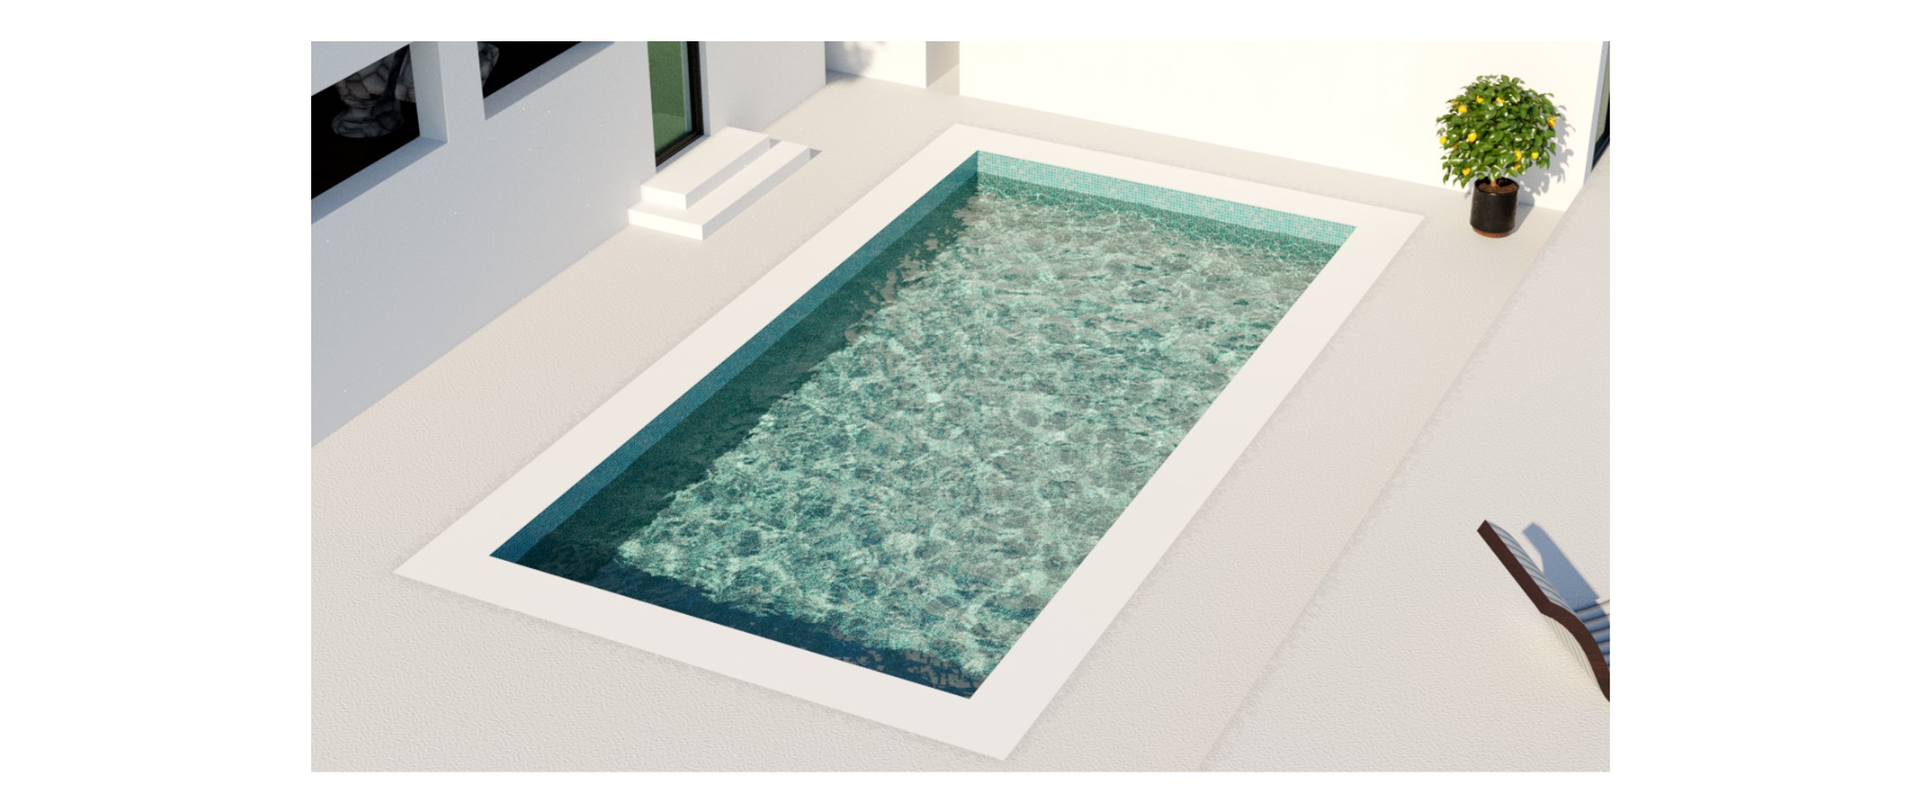
- If you are experimenting with caustics with different rendering engines, then try this: Create a pool with ripples in it; have it next to a wall — such that you would expect caustics should appear on the wall. With Corona, you will see caustics both at the bottom of the pool as well as on the wall.
While this seems logical, it’s not always the case with other rendering solutions. The reason is: It’s actually difficult to see a caustic through a specular element. In the case of the caustic at the bottom of the pool, we are looking at a caustic through refraction.

And now you fully understand how important caustics are and know both why we have been ignoring them for so long as well as how renderers have been faking it for many years.
YOU CAN NOW TEST OUT CAUSTICS IN CORONA TO SEE WHAT YOU'VE BEEN MISSING
Download a free trialIf you're eager to learn more: Listen to CG Garage Episode #237. Corona’s Founding Partner and Main Developer Ondřej Karlik, and R&D Partner Jaroslav Křivánek told me why caustics are so hard to compute. They also discuss the approach they took to make them work, their vision for the future of caustics — and whether the new solver will make its way to V-Ray. Listen now:
#237: 2019-08-12 Subscribe
Plus, check out Ondřej Karlík’s full presentation on rendering Caustics in Corona Renderer recorded at Total Chaos @ SIGGRAPH 2019 in Los Angeles:
