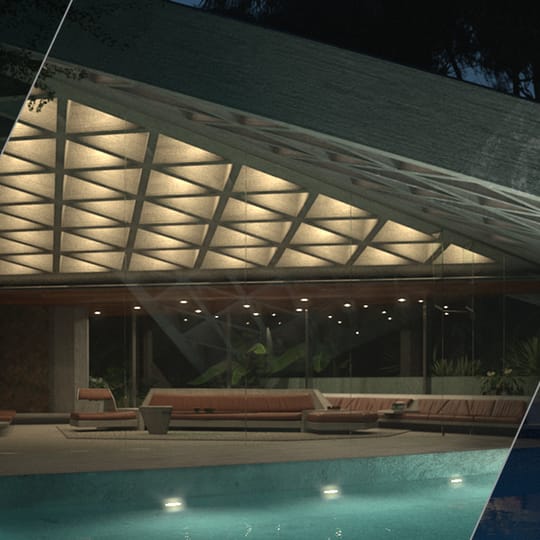
Light Mix lets you change the color and intensity of your lights after you’ve rendered your scene. Learn how it works in the new V-Ray Frame Buffer in V-Ray 5.
V-Ray 5 introduces new tools and a new look to the V-Ray Frame Buffer (VFB). In addition to its new icons, cleaner design and improved layout, you’ll notice two key new features on the right side of the interface — Layer Compositing and Light Mix. For this article, we’ll focus on how easy it is to relight a scene with Light Mix in V-Ray 5 for 3ds Max.
A bit of history
Imagine a scene lit by three lights: a key, fill and rim light. If you render a single image with all three lights turned on, or you render three separate images — one for each light source — and add them back together in compositing, the results are the same. Light is additive.

Enter ray tracing. With ray tracing, it’s possible to track the entire contribution each light has on a rendered scene: diffuse, specular, reflection, refraction and global illumination. When you combine this advantage of ray tracing with the additive nature of light, we can adjust the color and intensity of lights — even after they’ve been rendered.
Technically, V-Ray has had the ability to mix lights ever since the Light Select Render Element was introduced. And this previously required manual setup for each light (or group of lights), plus a trip to a compositing application to make the adjustments.
Wouldn’t it be easier if we could do all this inside the new V-Ray Frame Buffer?
How to use Light Mix in the new VFB
One of the cool things about the new VFB in V-Ray 5 is that it basically adds lightweight compositing and image-editing capabilities. This means that it can essentially take our Light Selects, as outlined above, and organize them for you. Then you can manipulate the lighting the way you want it — on the fly.
Here is how to manipulate your lighting using the Light Mix in V-Ray 5:
1. First, add the VRayLightMix Render Element. Then select how you would like your lights grouped — individual, instanced, groups or layers.
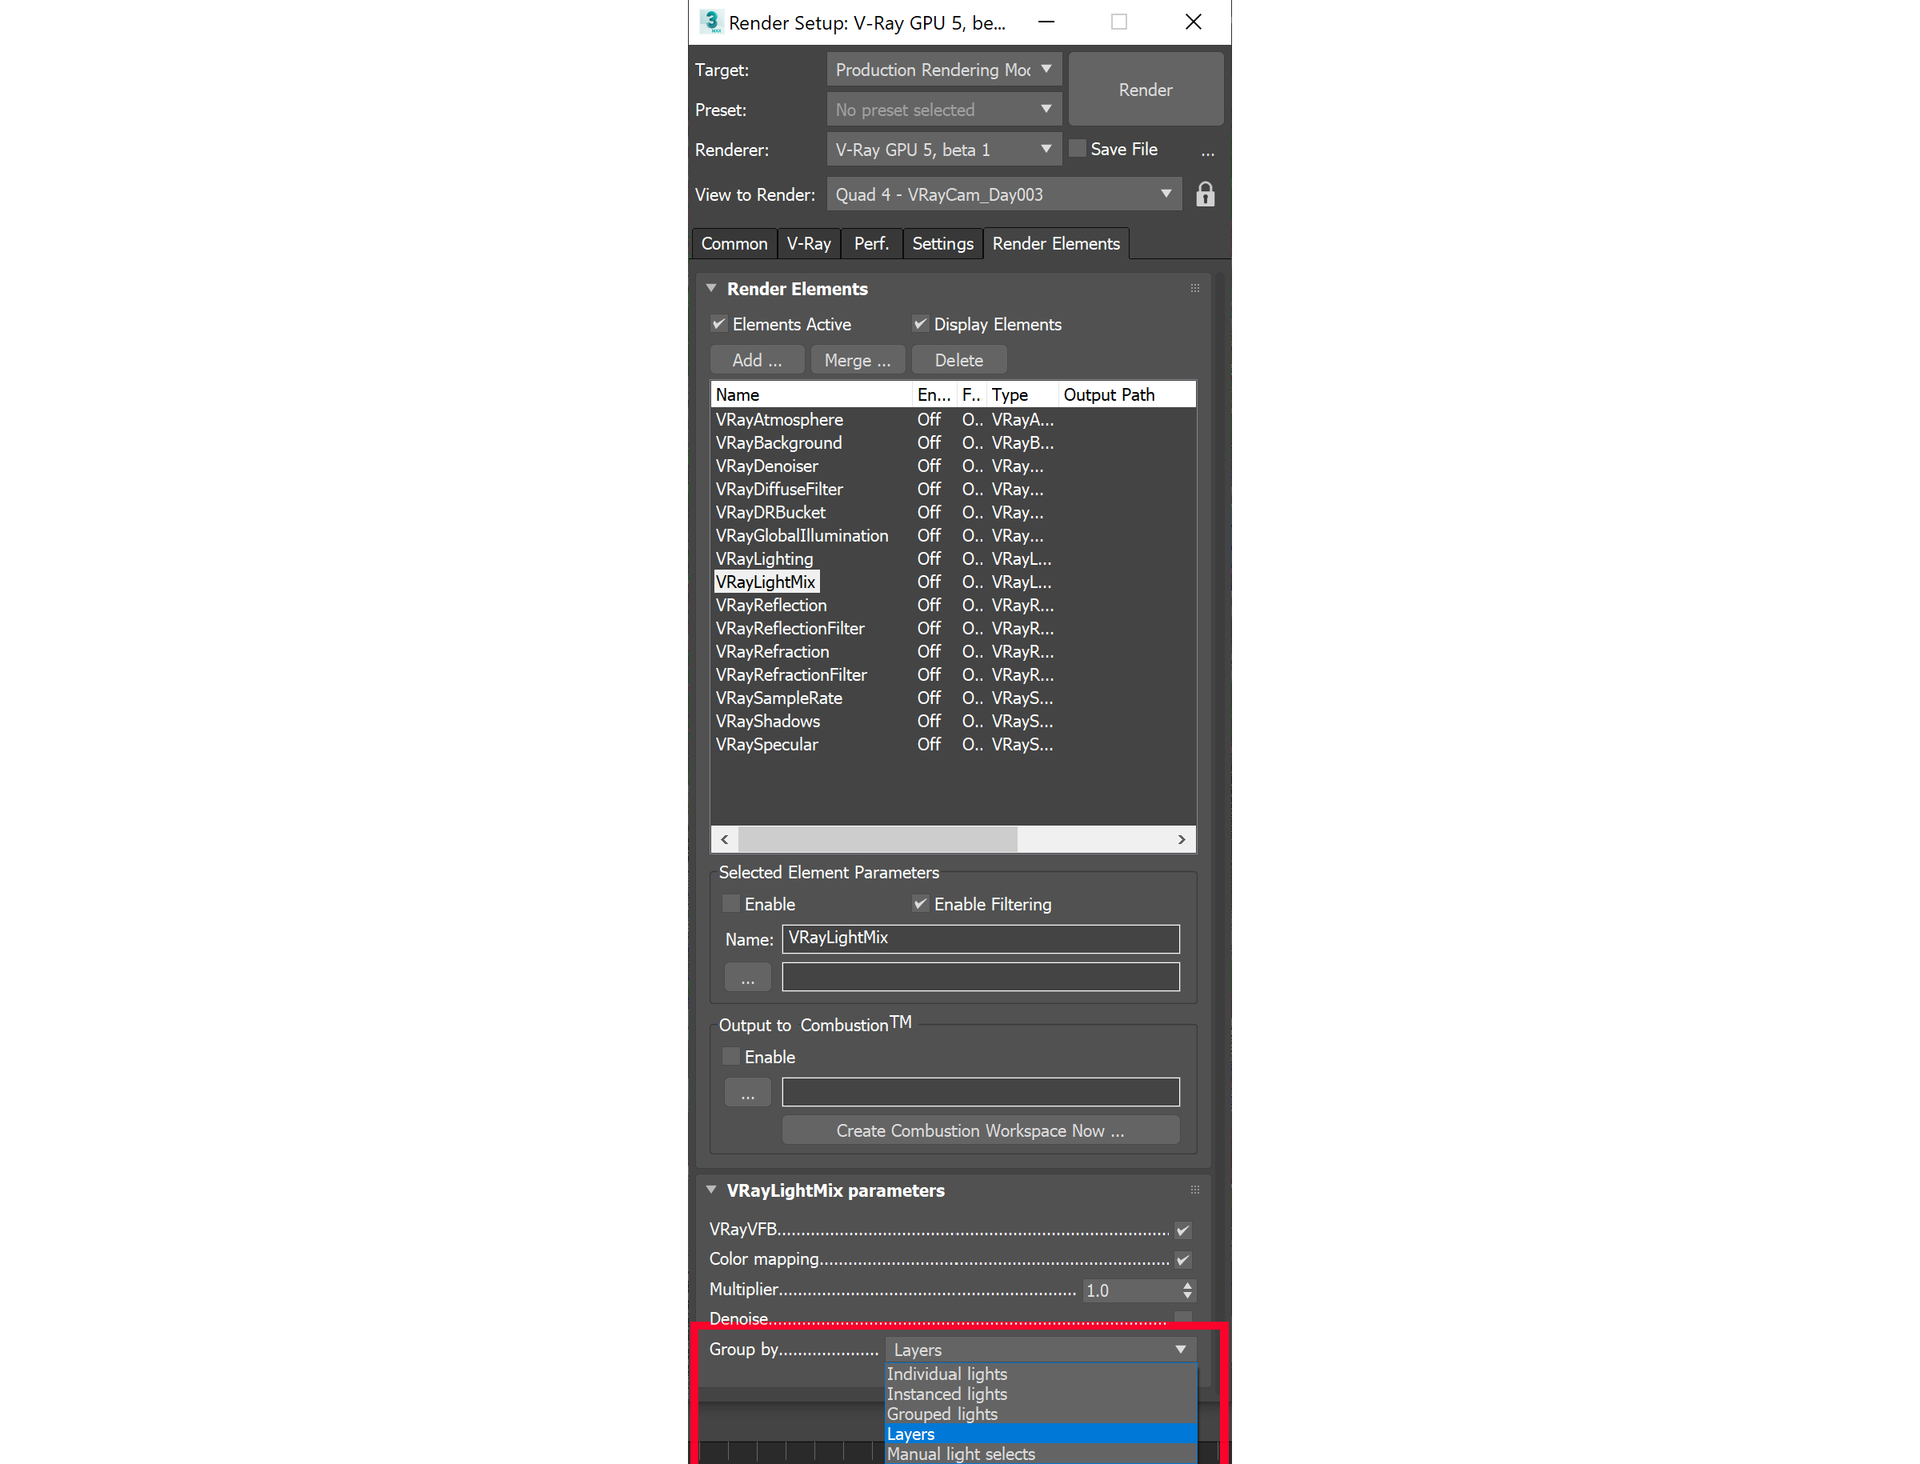
2. When you hit Render, V-Ray will automatically create the render elements for you — saving you the time of setting them up manually.
3. When the render is finished, you’ll see a list of layers on the right side of the VFB in the compositing section. Select the bottom layer: Source.
4. With the Source layer selected, choose Light Mix from the three modes. You’ll see all lights (or groups of lights) listed with their multiplier, color and on/off switch. Now you can tweak the lights however you want.
5. Once you’re done, you have a few options:
- Save the image as is.
- Send your Light Mix “To Composite” to break them into layers for compositing.
- Push the new values “To Scene” and re-render (this is especially helpful if you notice noise or artifacts from pushing the Light Mix too far).
Try V-Ray 5 for 3ds Max
Download the free public beta and experiment with Light Mix yourself.
A few Light Mix examples
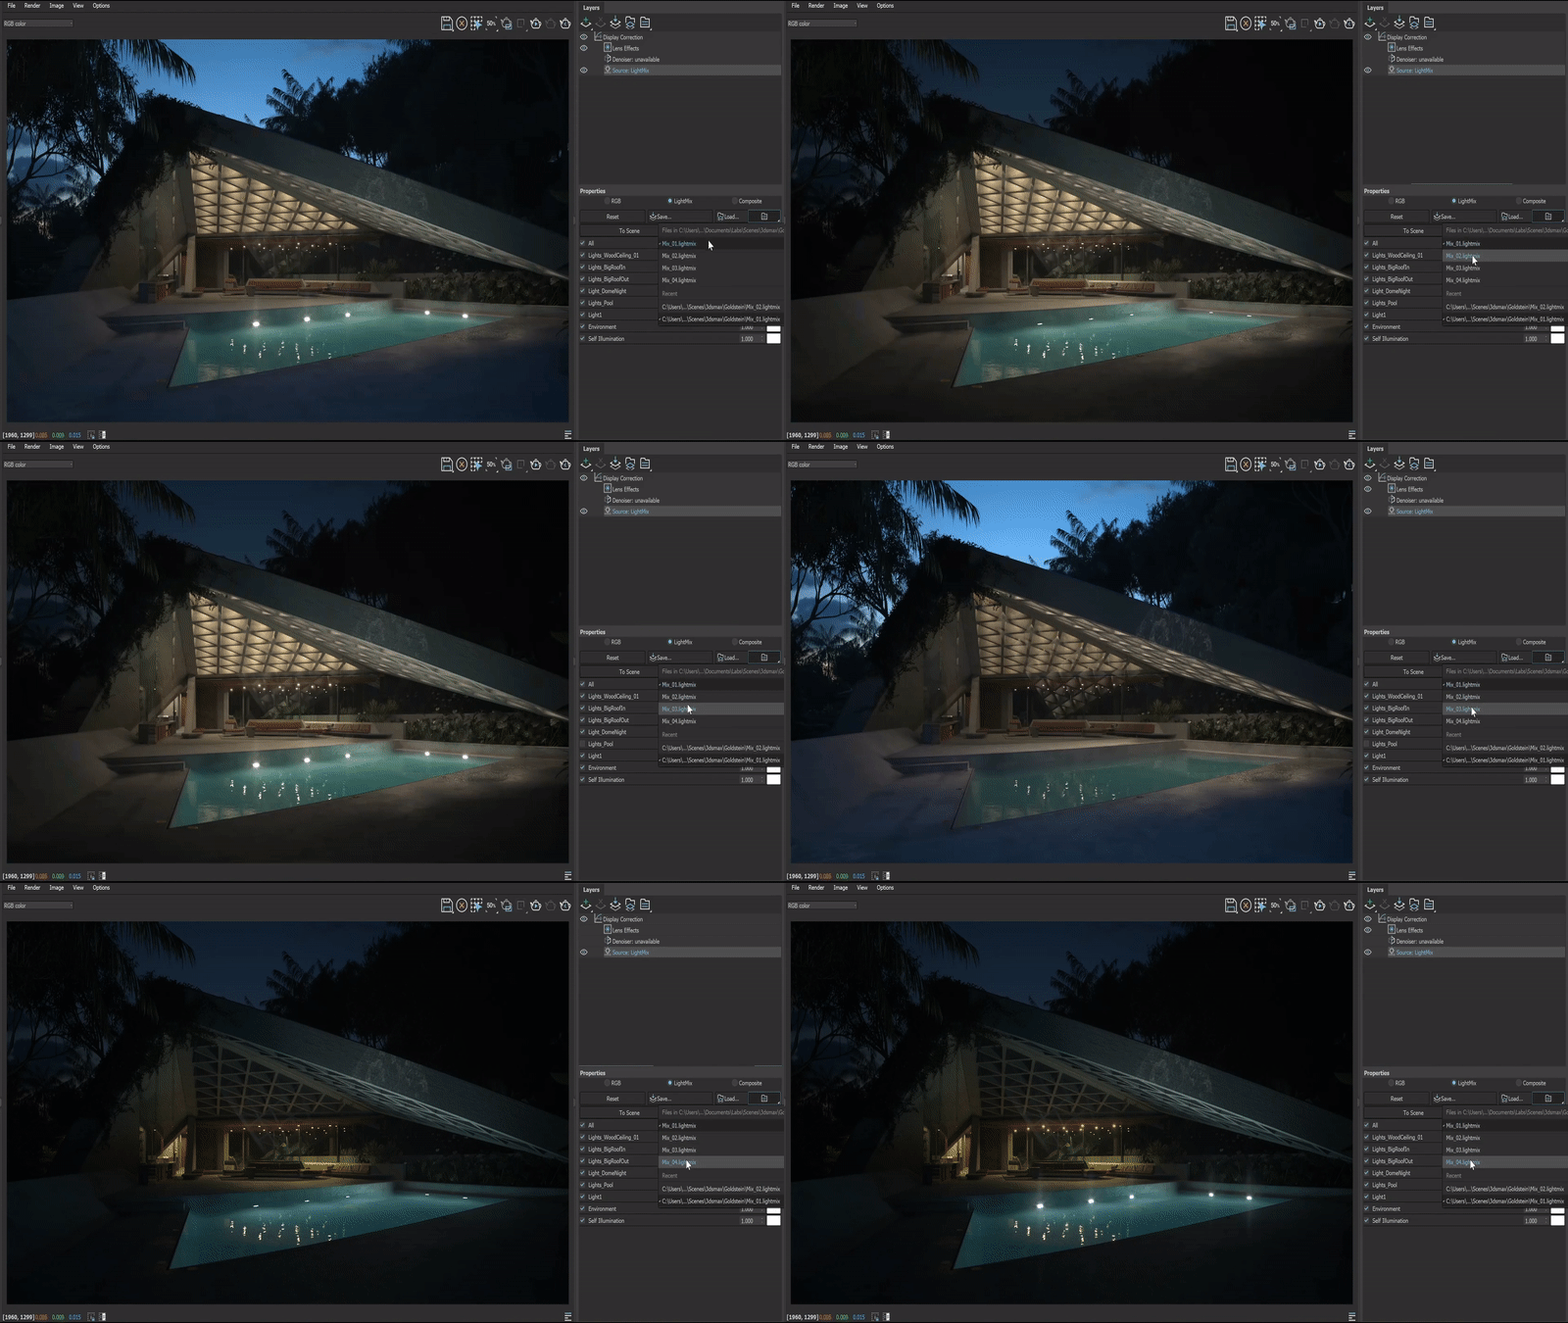
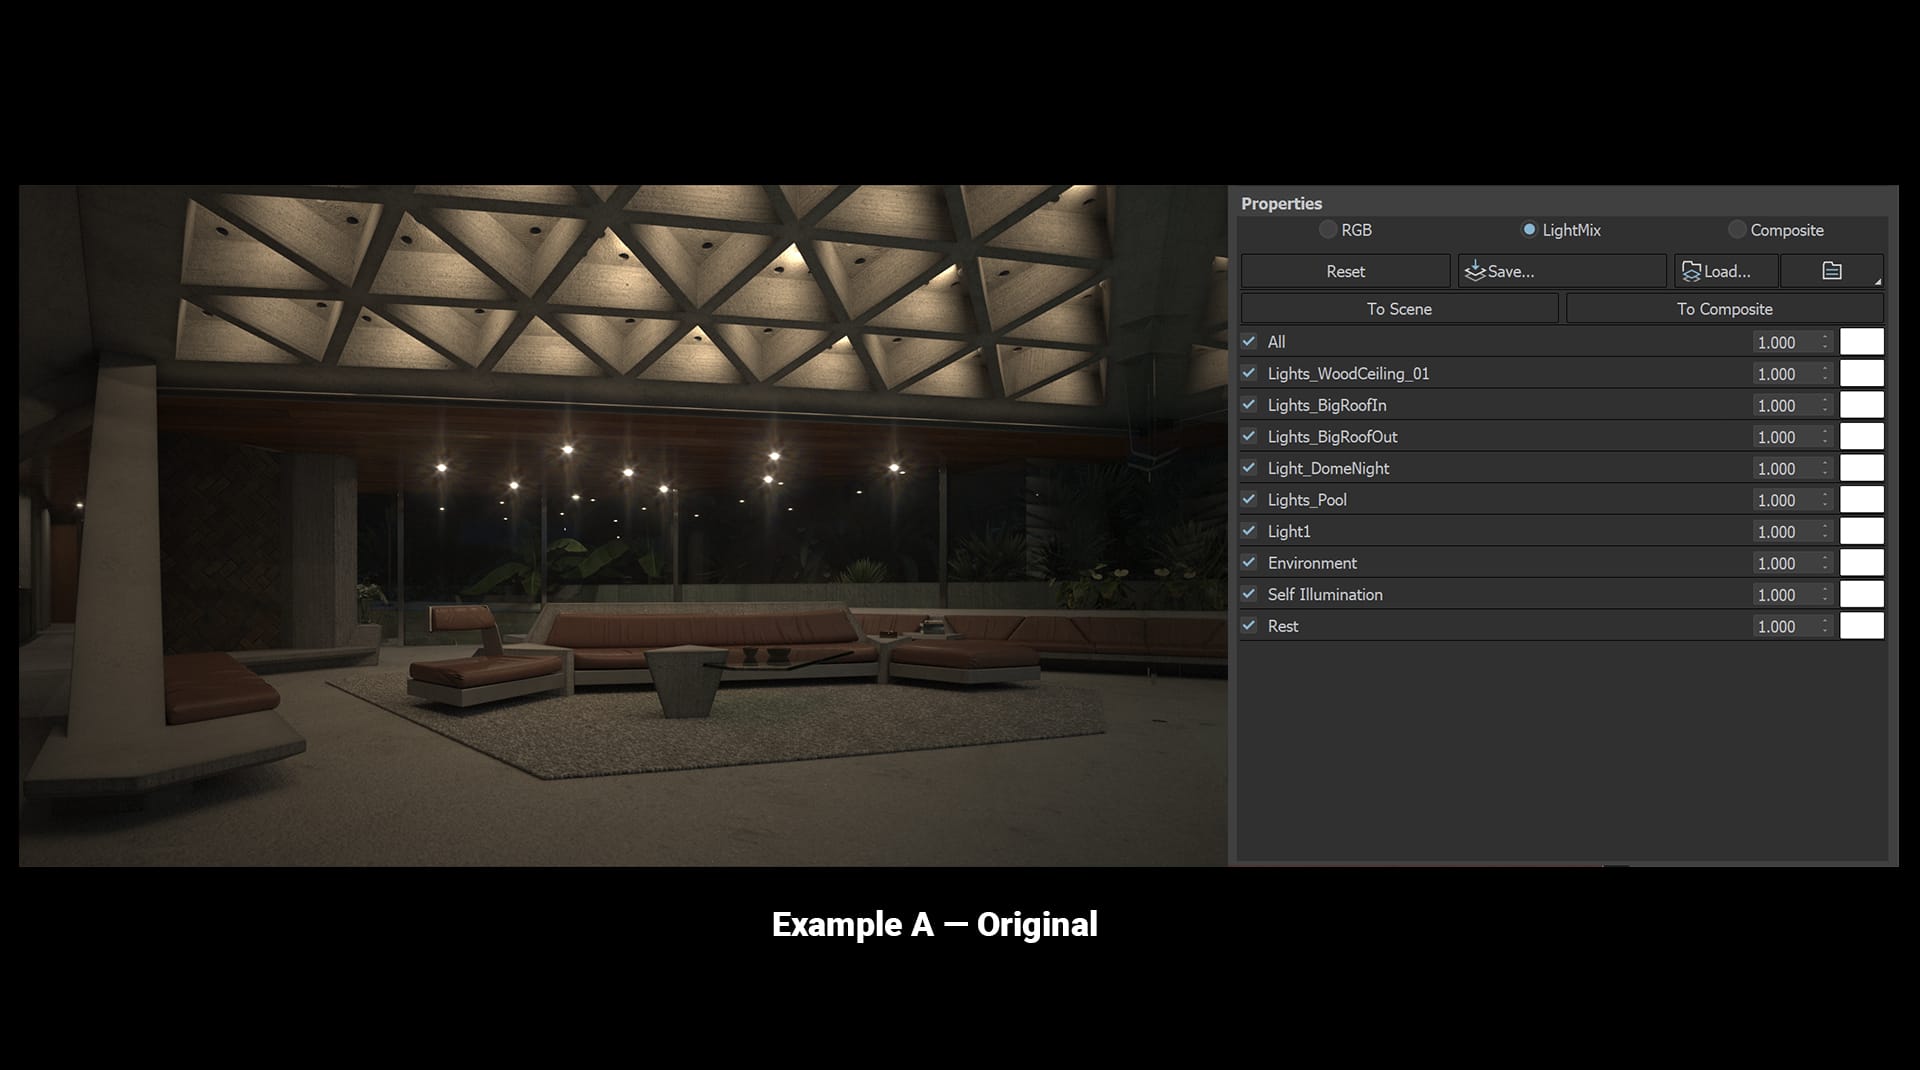
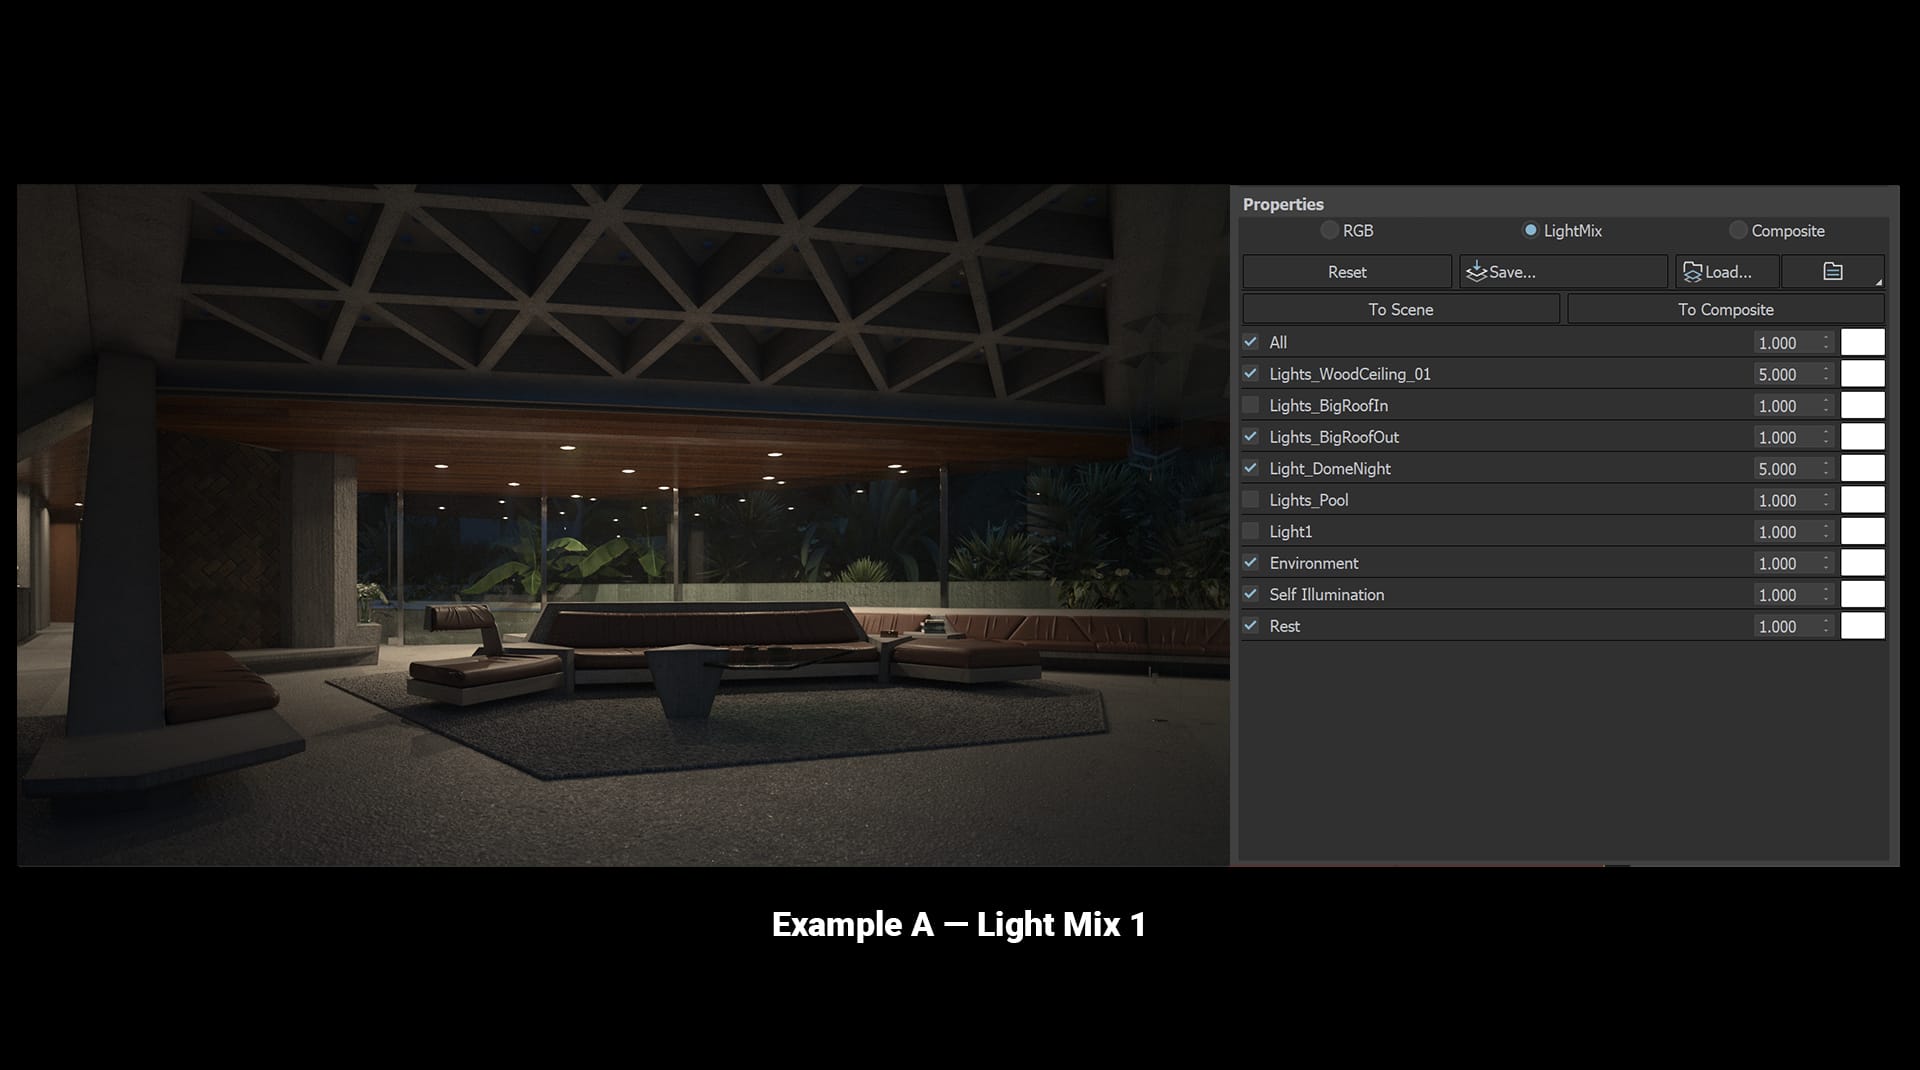
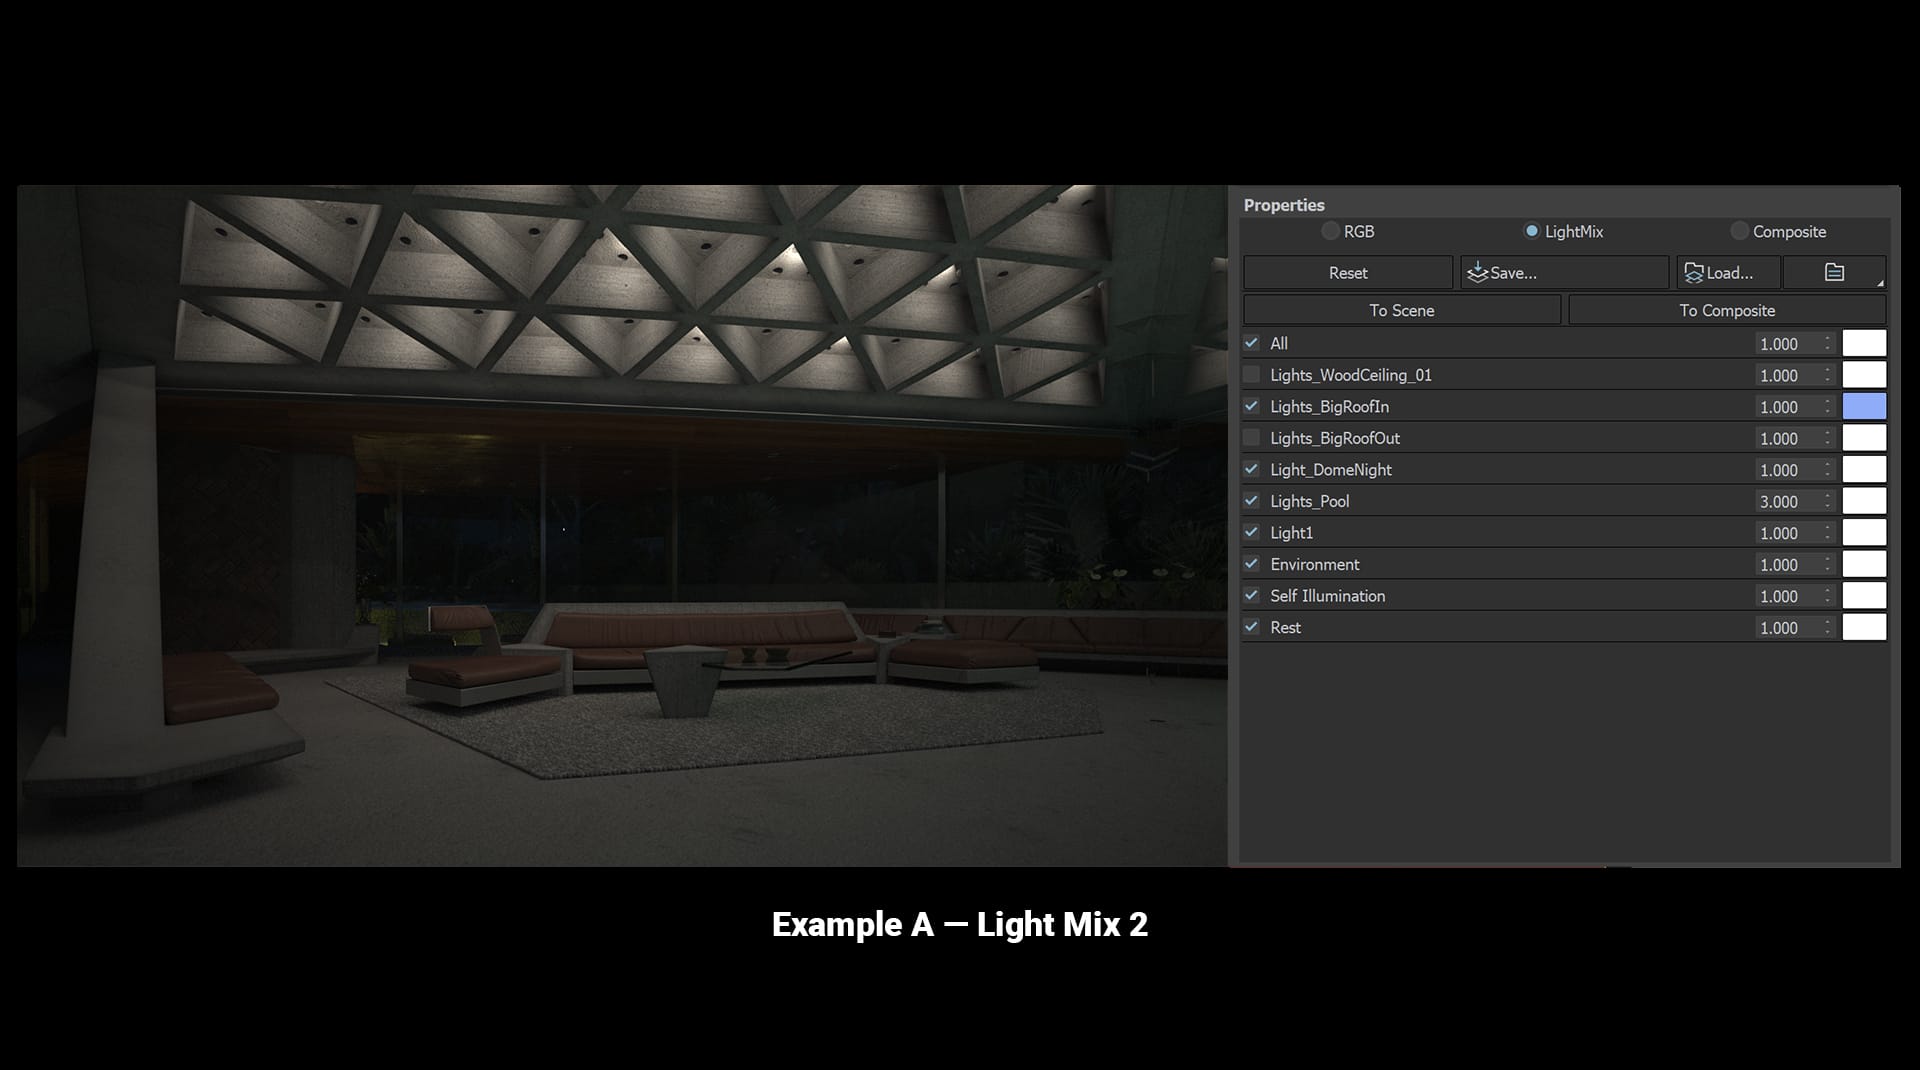
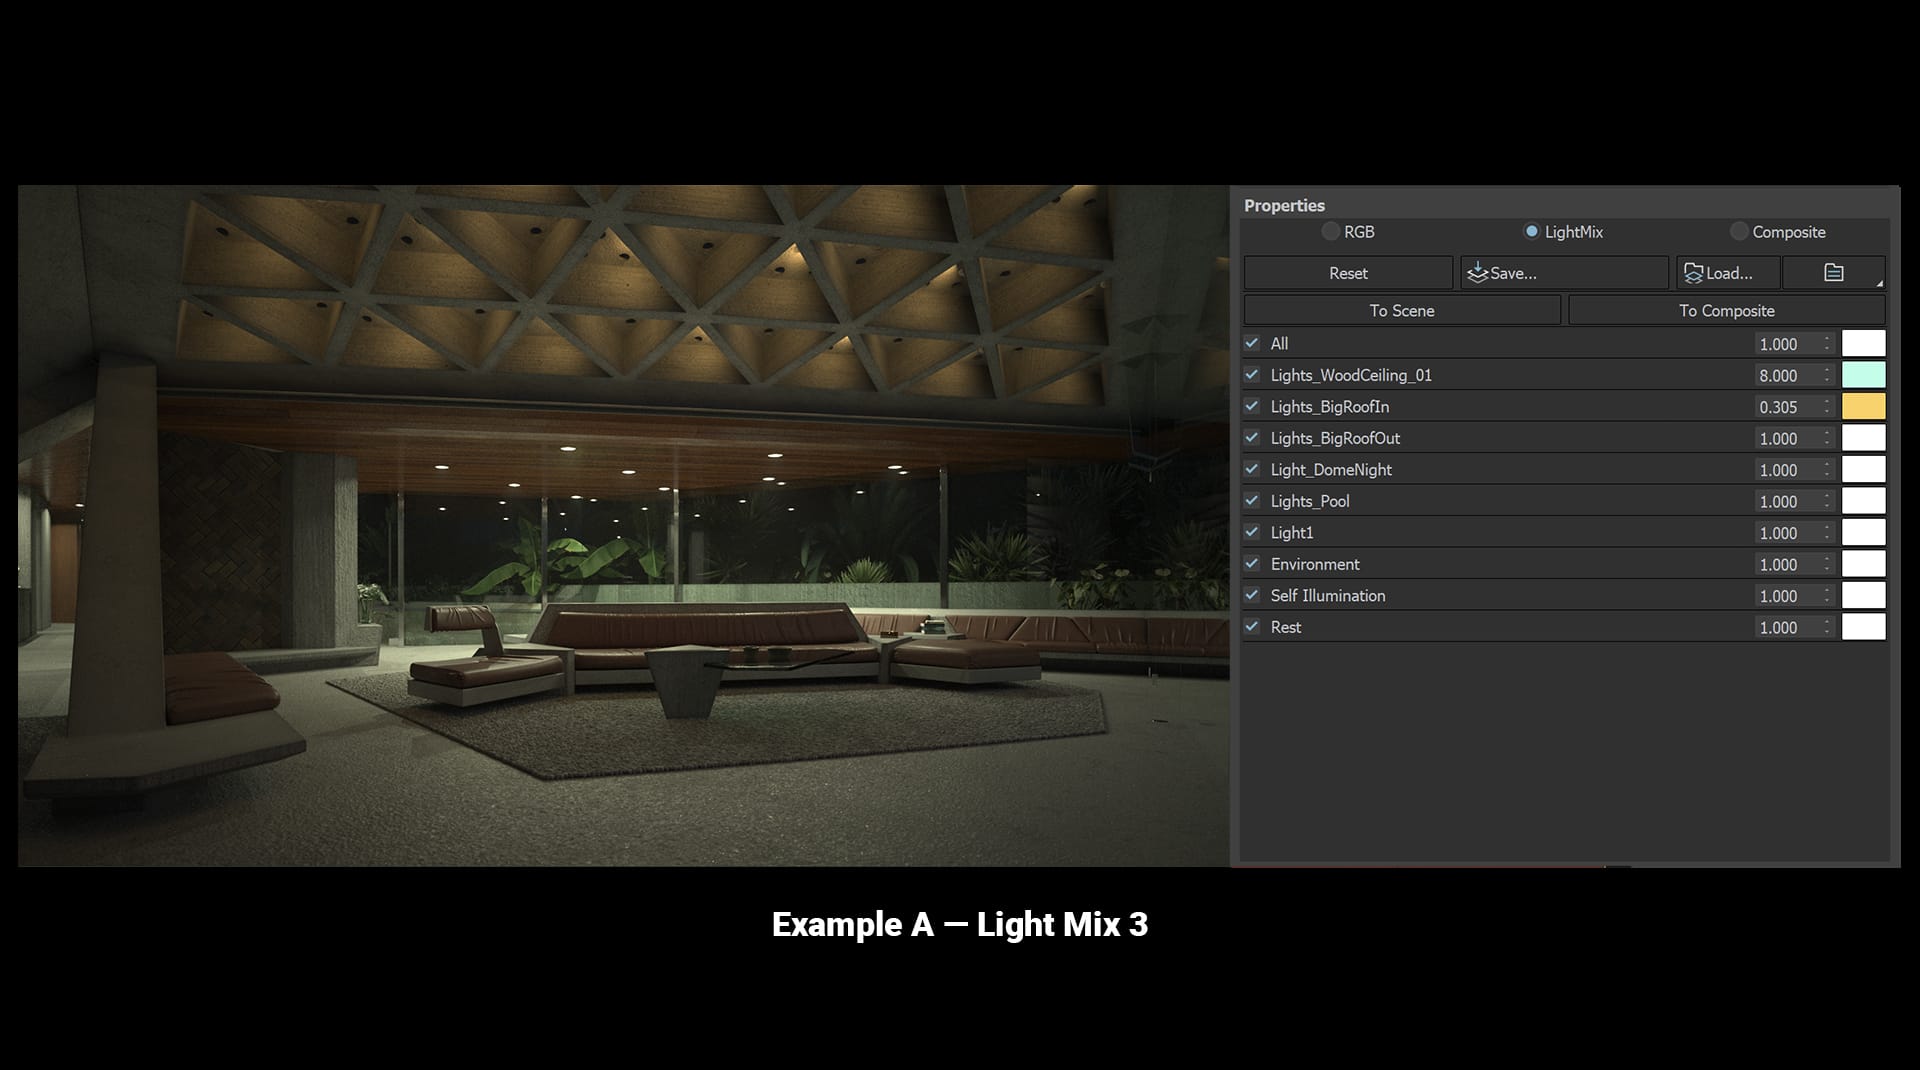
To see Light Mix in action, let’s look at an example from The Golden Sheats House (AKA The Big Lebowski house) by one of our favorite artists, Bertrand Benoit. There are several light zones in his scene — which makes it perfect for exploring a variety of lighting options.
Example A
Let's take a look at the first example. Use the sliders to compare the original with the Light Mix — the settings can be seen on the right for each.



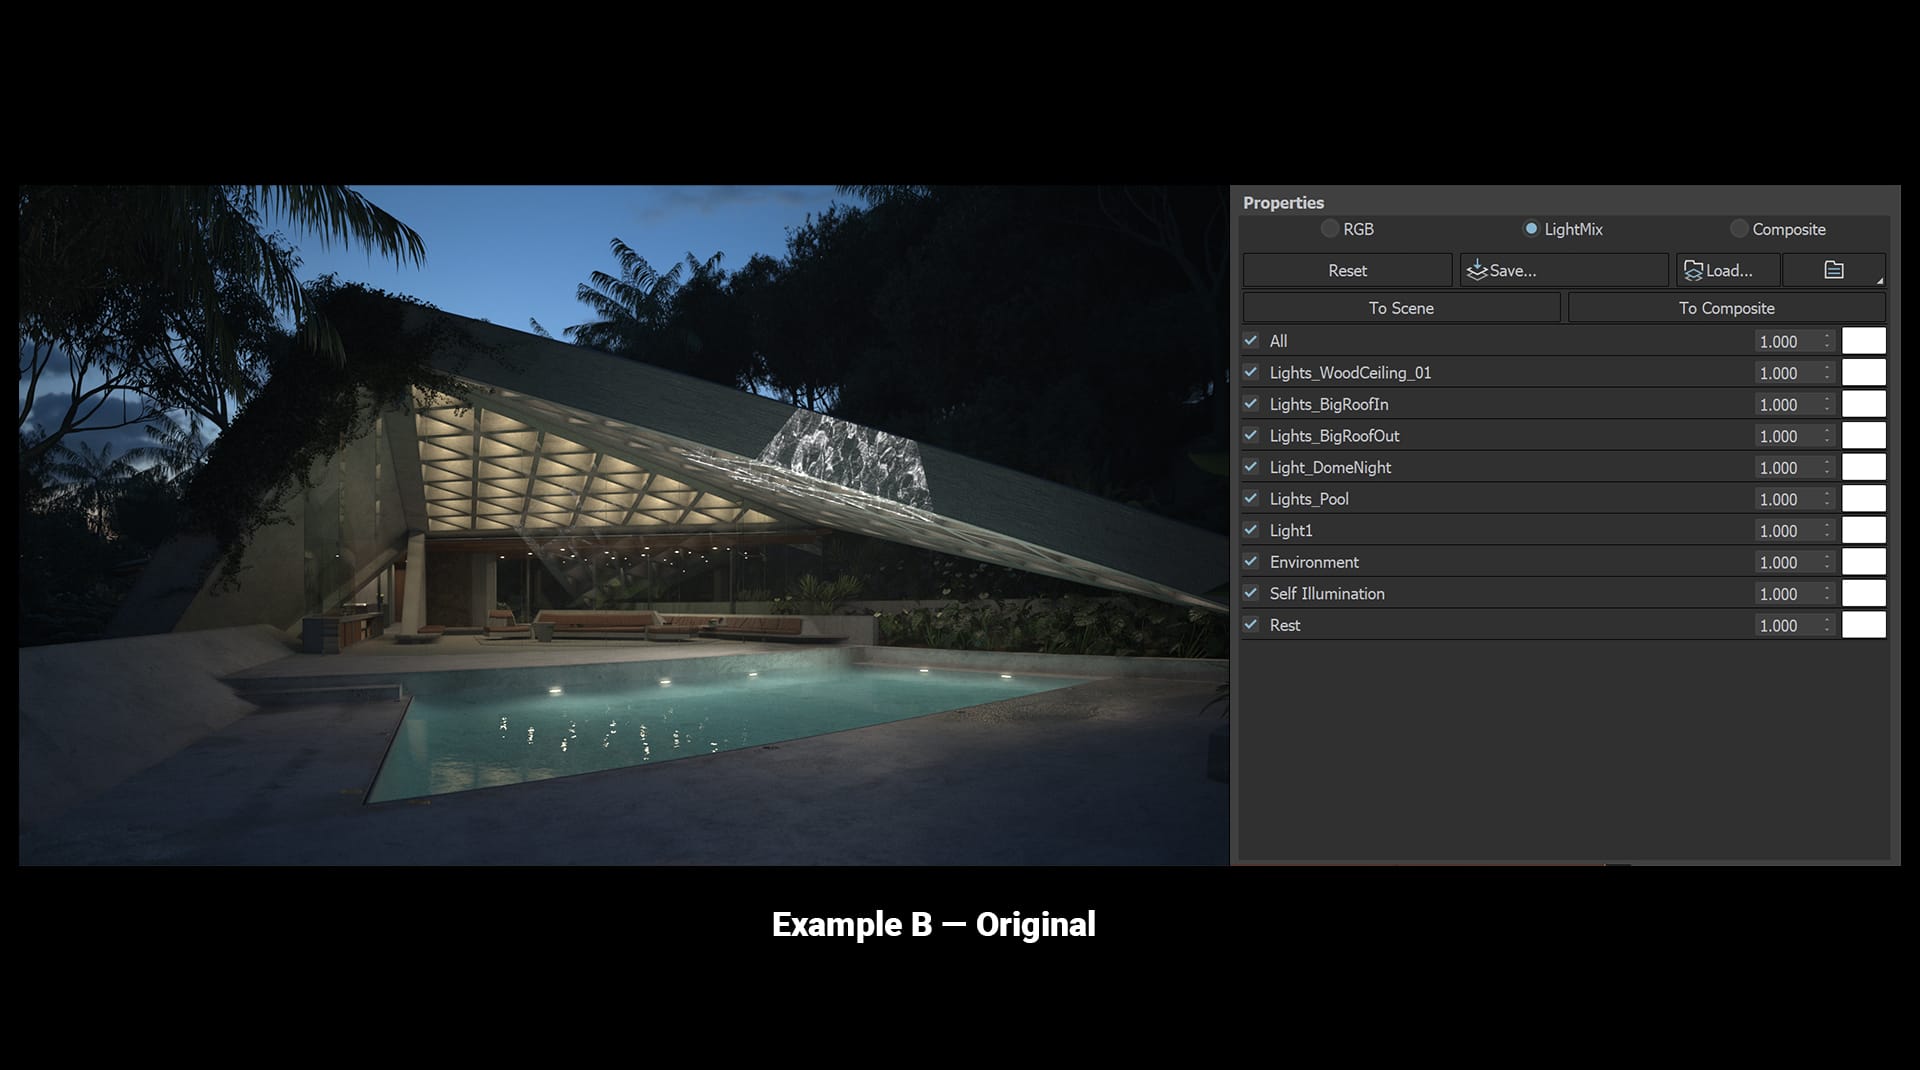
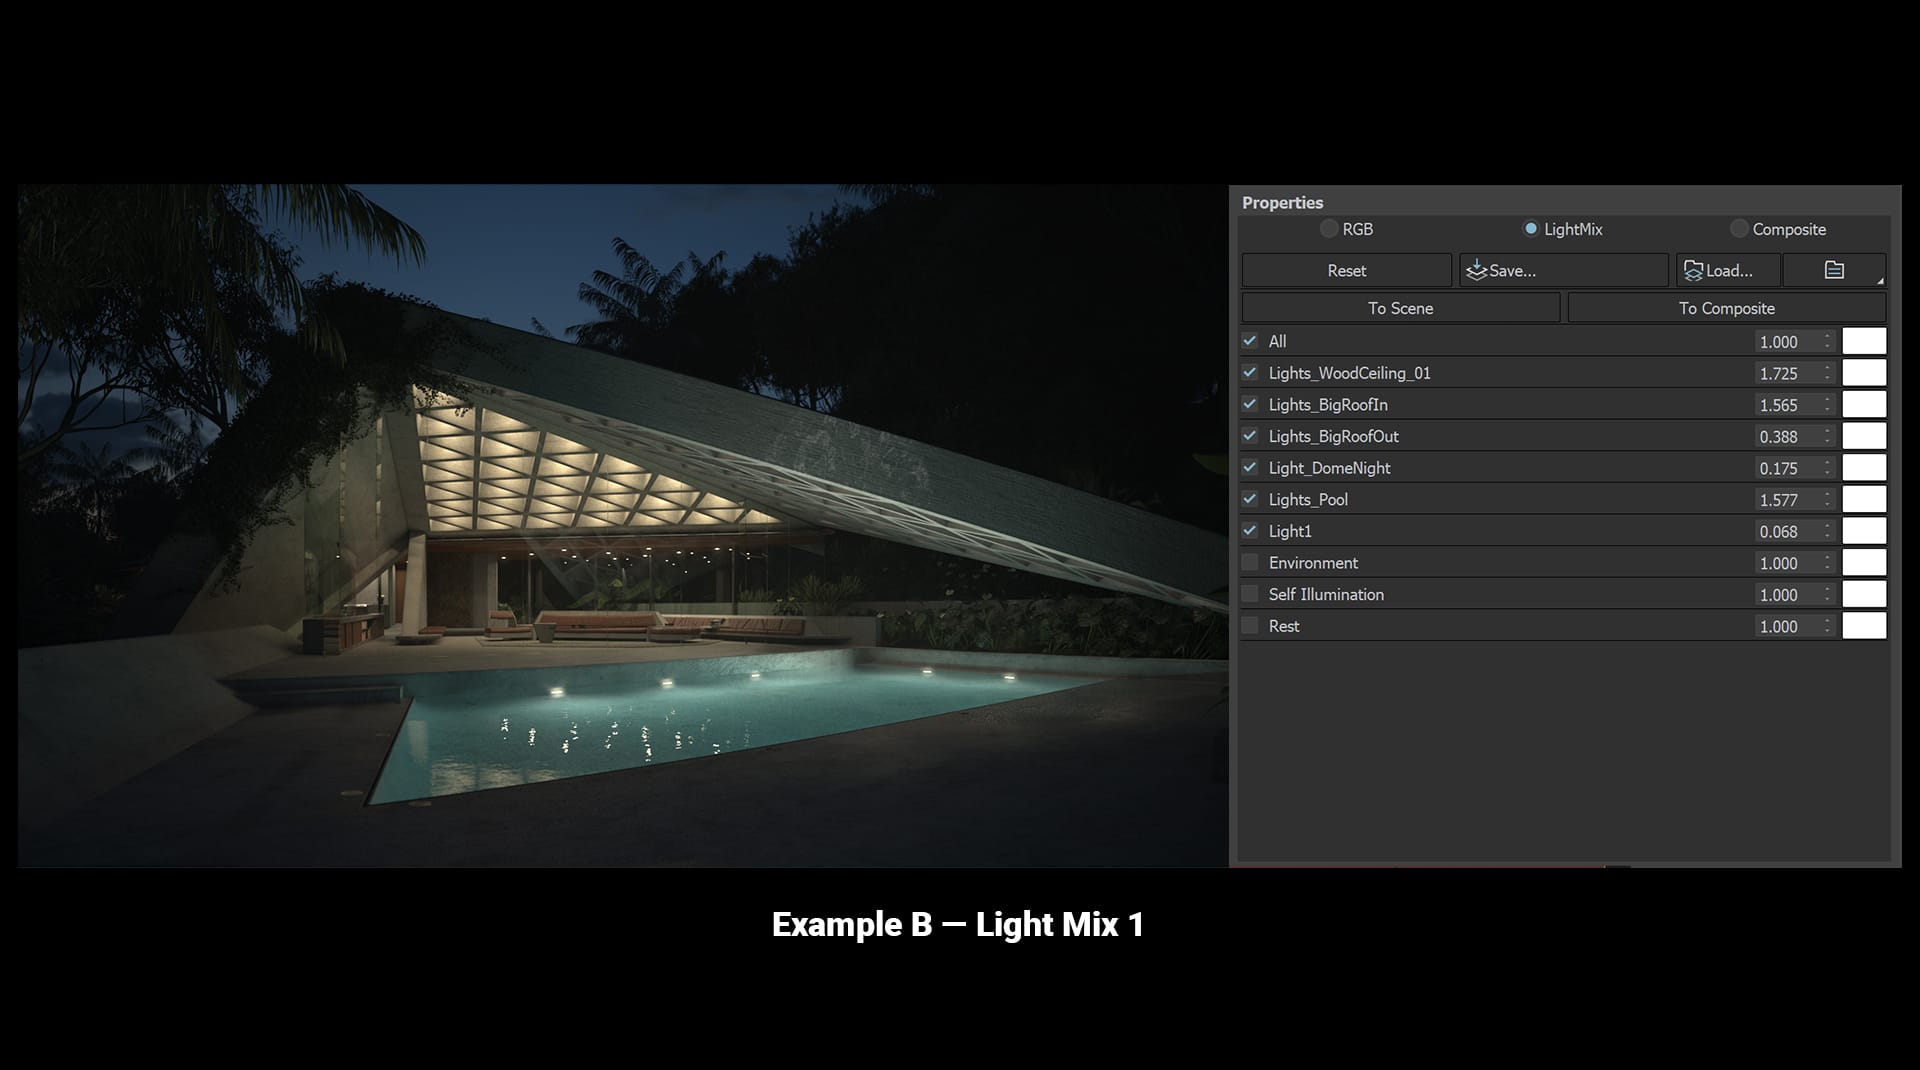
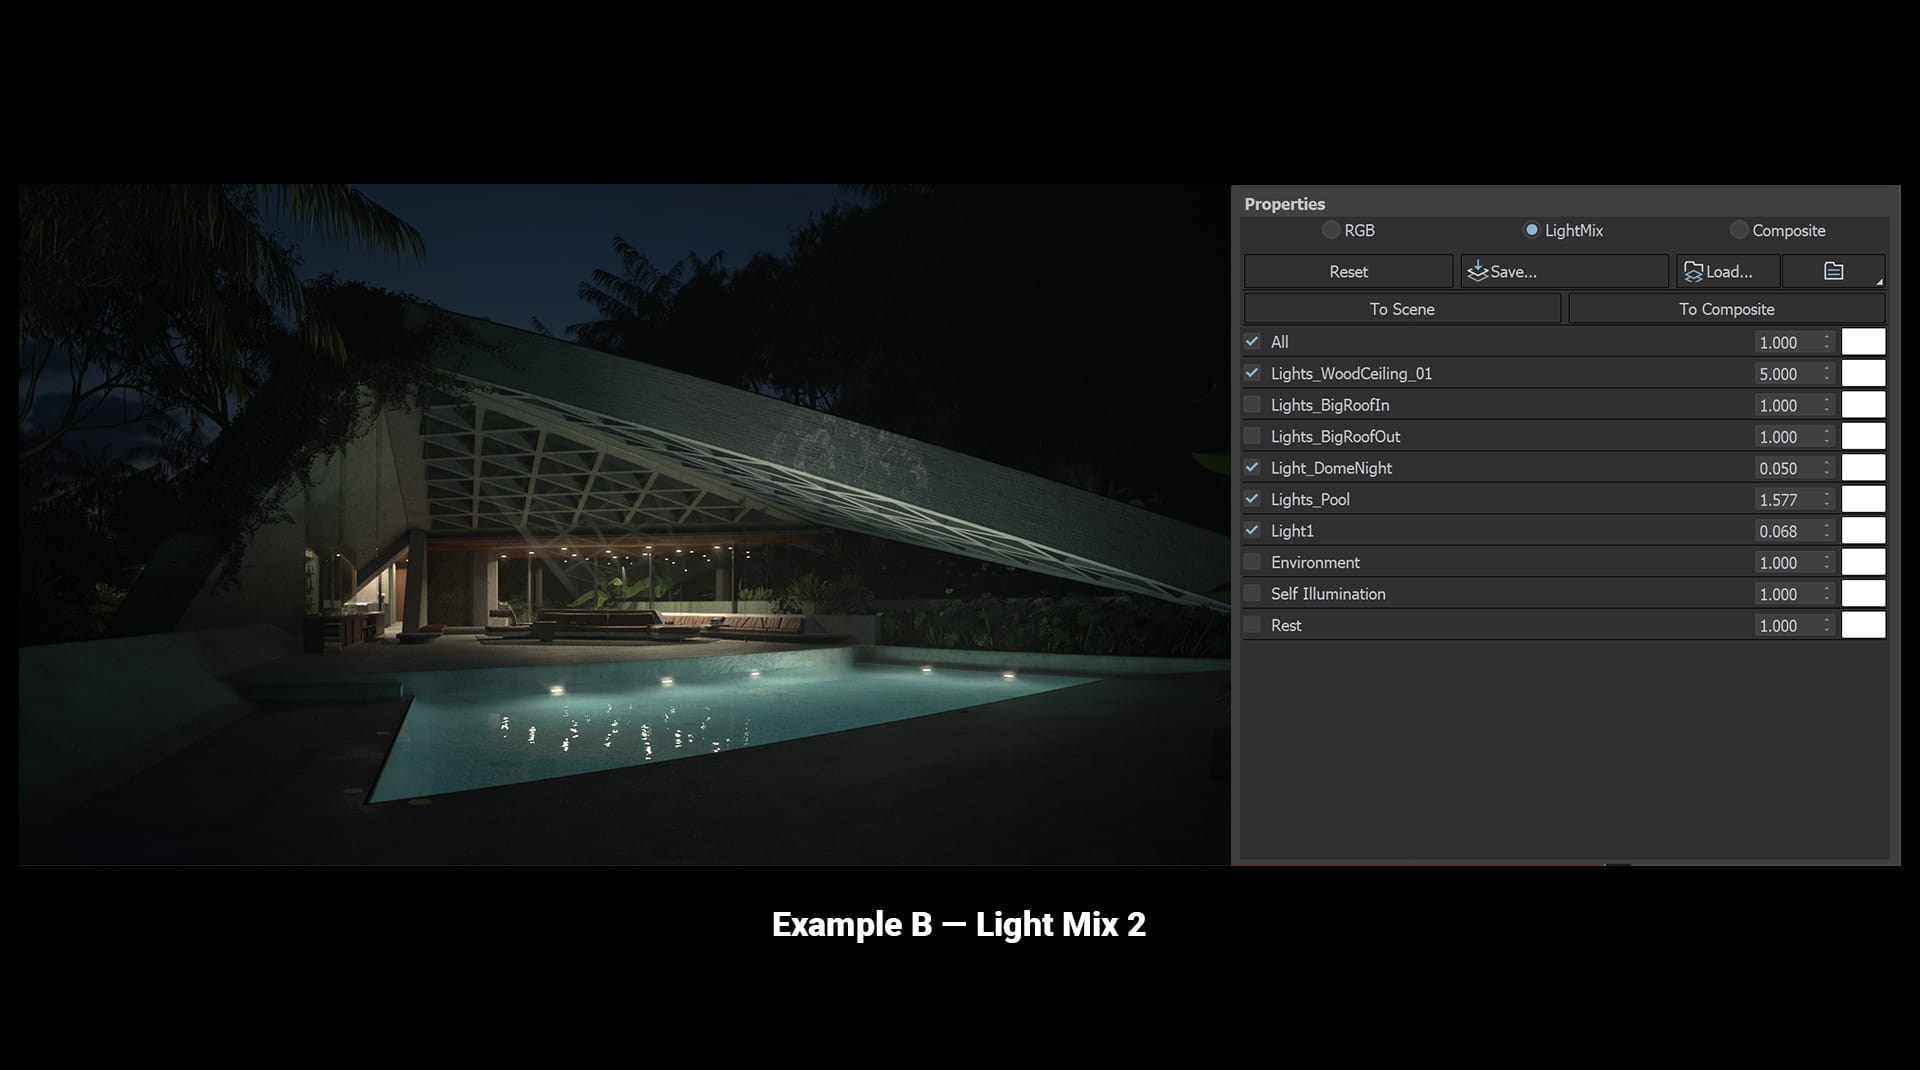
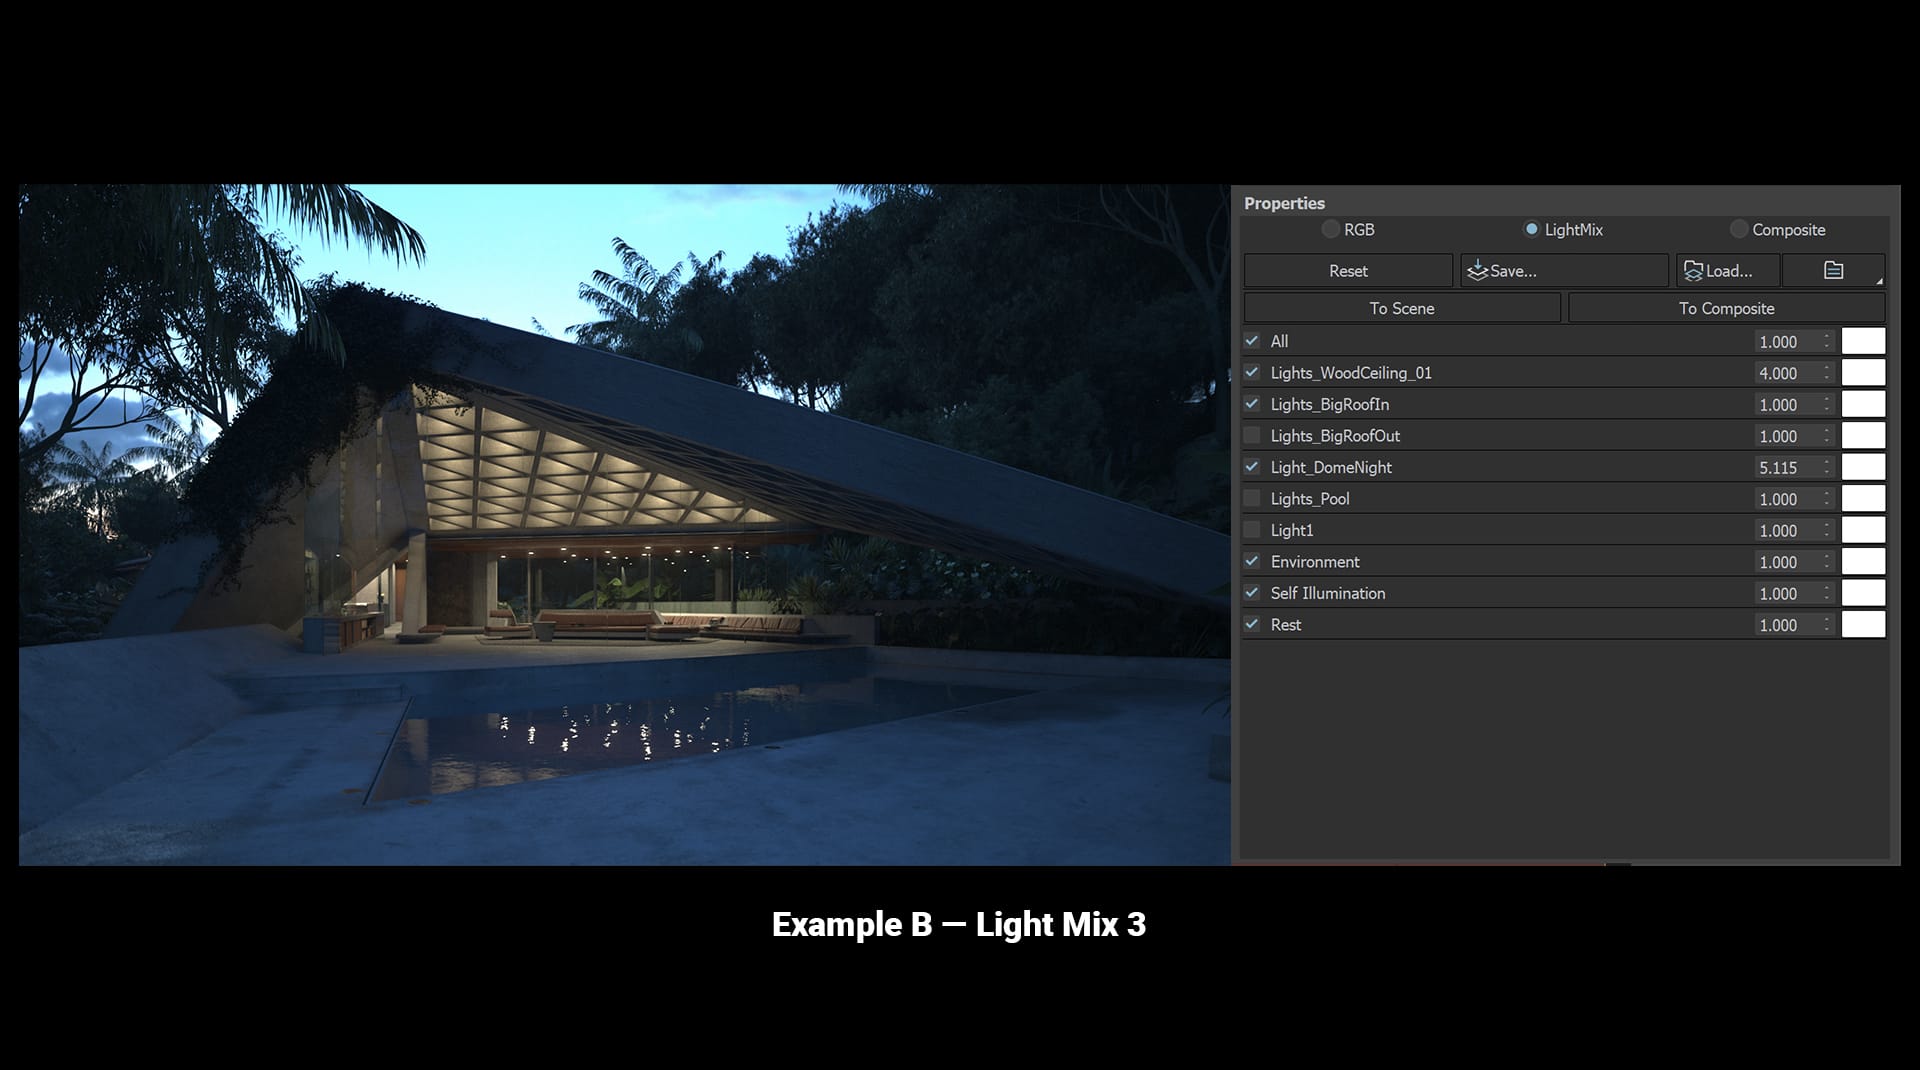
Example B
Now let's take a second example — this time an exterior shot. Again, use the sliders to scrub between the original and the Light Mix and be sure to check out the settings on the right.



How to get the most from Light Mix
Here are some helpful tips to help you set up your scene and work with Light Mix in V-Ray 5.
Organize your lights
If you have a lot of lights in your scene, you’ll want to keep them organized by instances, groups or layers. One of the best ways is to organize them as you would in real life — by switches or circuit breakers.
Make lights bright
Make sure lights are bright enough to easily see their contribution to the scene. Even if you want them to be dim, you can dim them later. In Light Mix, it’s cleaner to dim a light than it is to brighten it. That’s because brightening a light source after you render — especially if you turn it up a lot — can show more grain. So start out with a render that’s nice and bright and then dim it down to 1%, if that’s the effect you want.
Color your lights white
Keeping your light colors neutral white or gray makes them easier to adjust in the Light Mix. It may not be feasible to do this every time, but it’s helpful when you can.
Using Light Mix with Chaos Cloud
If you want to render several scenes at once and mix the lighting afterwards, it’s no problem. One of the easiest ways to do this is to set up your renders as outlined above and render to the Chaos Cloud. Once the EXR is finished, you can load it into the VFB, call up the Light Mix render element, and make your adjustments.
If you have the scene open locally, you push your changes “To Scene” to update it. And you can even send it back to Chaos Cloud to render again.
Light Mix one, fix many
Your Light Mix recipe can be saved as a file and reloaded, in case you’d like to reuse the same values across multiple shots.
Like switching to smart bulbs
The new Light Mix is like switching all the lights in your house to smart bulbs. Instead of running around from room to room turning lights on and off, you can simply adjust everything right from your phone — or in this case from the new V-Ray 5 VFB. Now, you can get your lighting just right even after you’ve rendered — all from the comfort of your couch.
To give it a try, join the V-Ray 5 for 3ds Max beta >
This is just the beginning. We have even more plans for the new VFB, including what’s possible with Light Mix, so stay tuned. And if you have any ideas for what you’d like to see, please let us know.

