What started as an R&D project evolved into a thought-provoking short film. Here’s how Nu Boyana FX used V-Ray for Maya to create a photorealistic digital human.
Nu Boyana FX has rapidly established itself as a go-to VFX studio. The company started in Sofia, Bulgaria (like Chaos Group), intending to specialize in commercials, but it switched to feature film work after creating a photoreal CGI dog for the feature film Unchained. It’s gone on to provide effects for Hellboy, Angel has Fallen and Rambo: Last Blood.
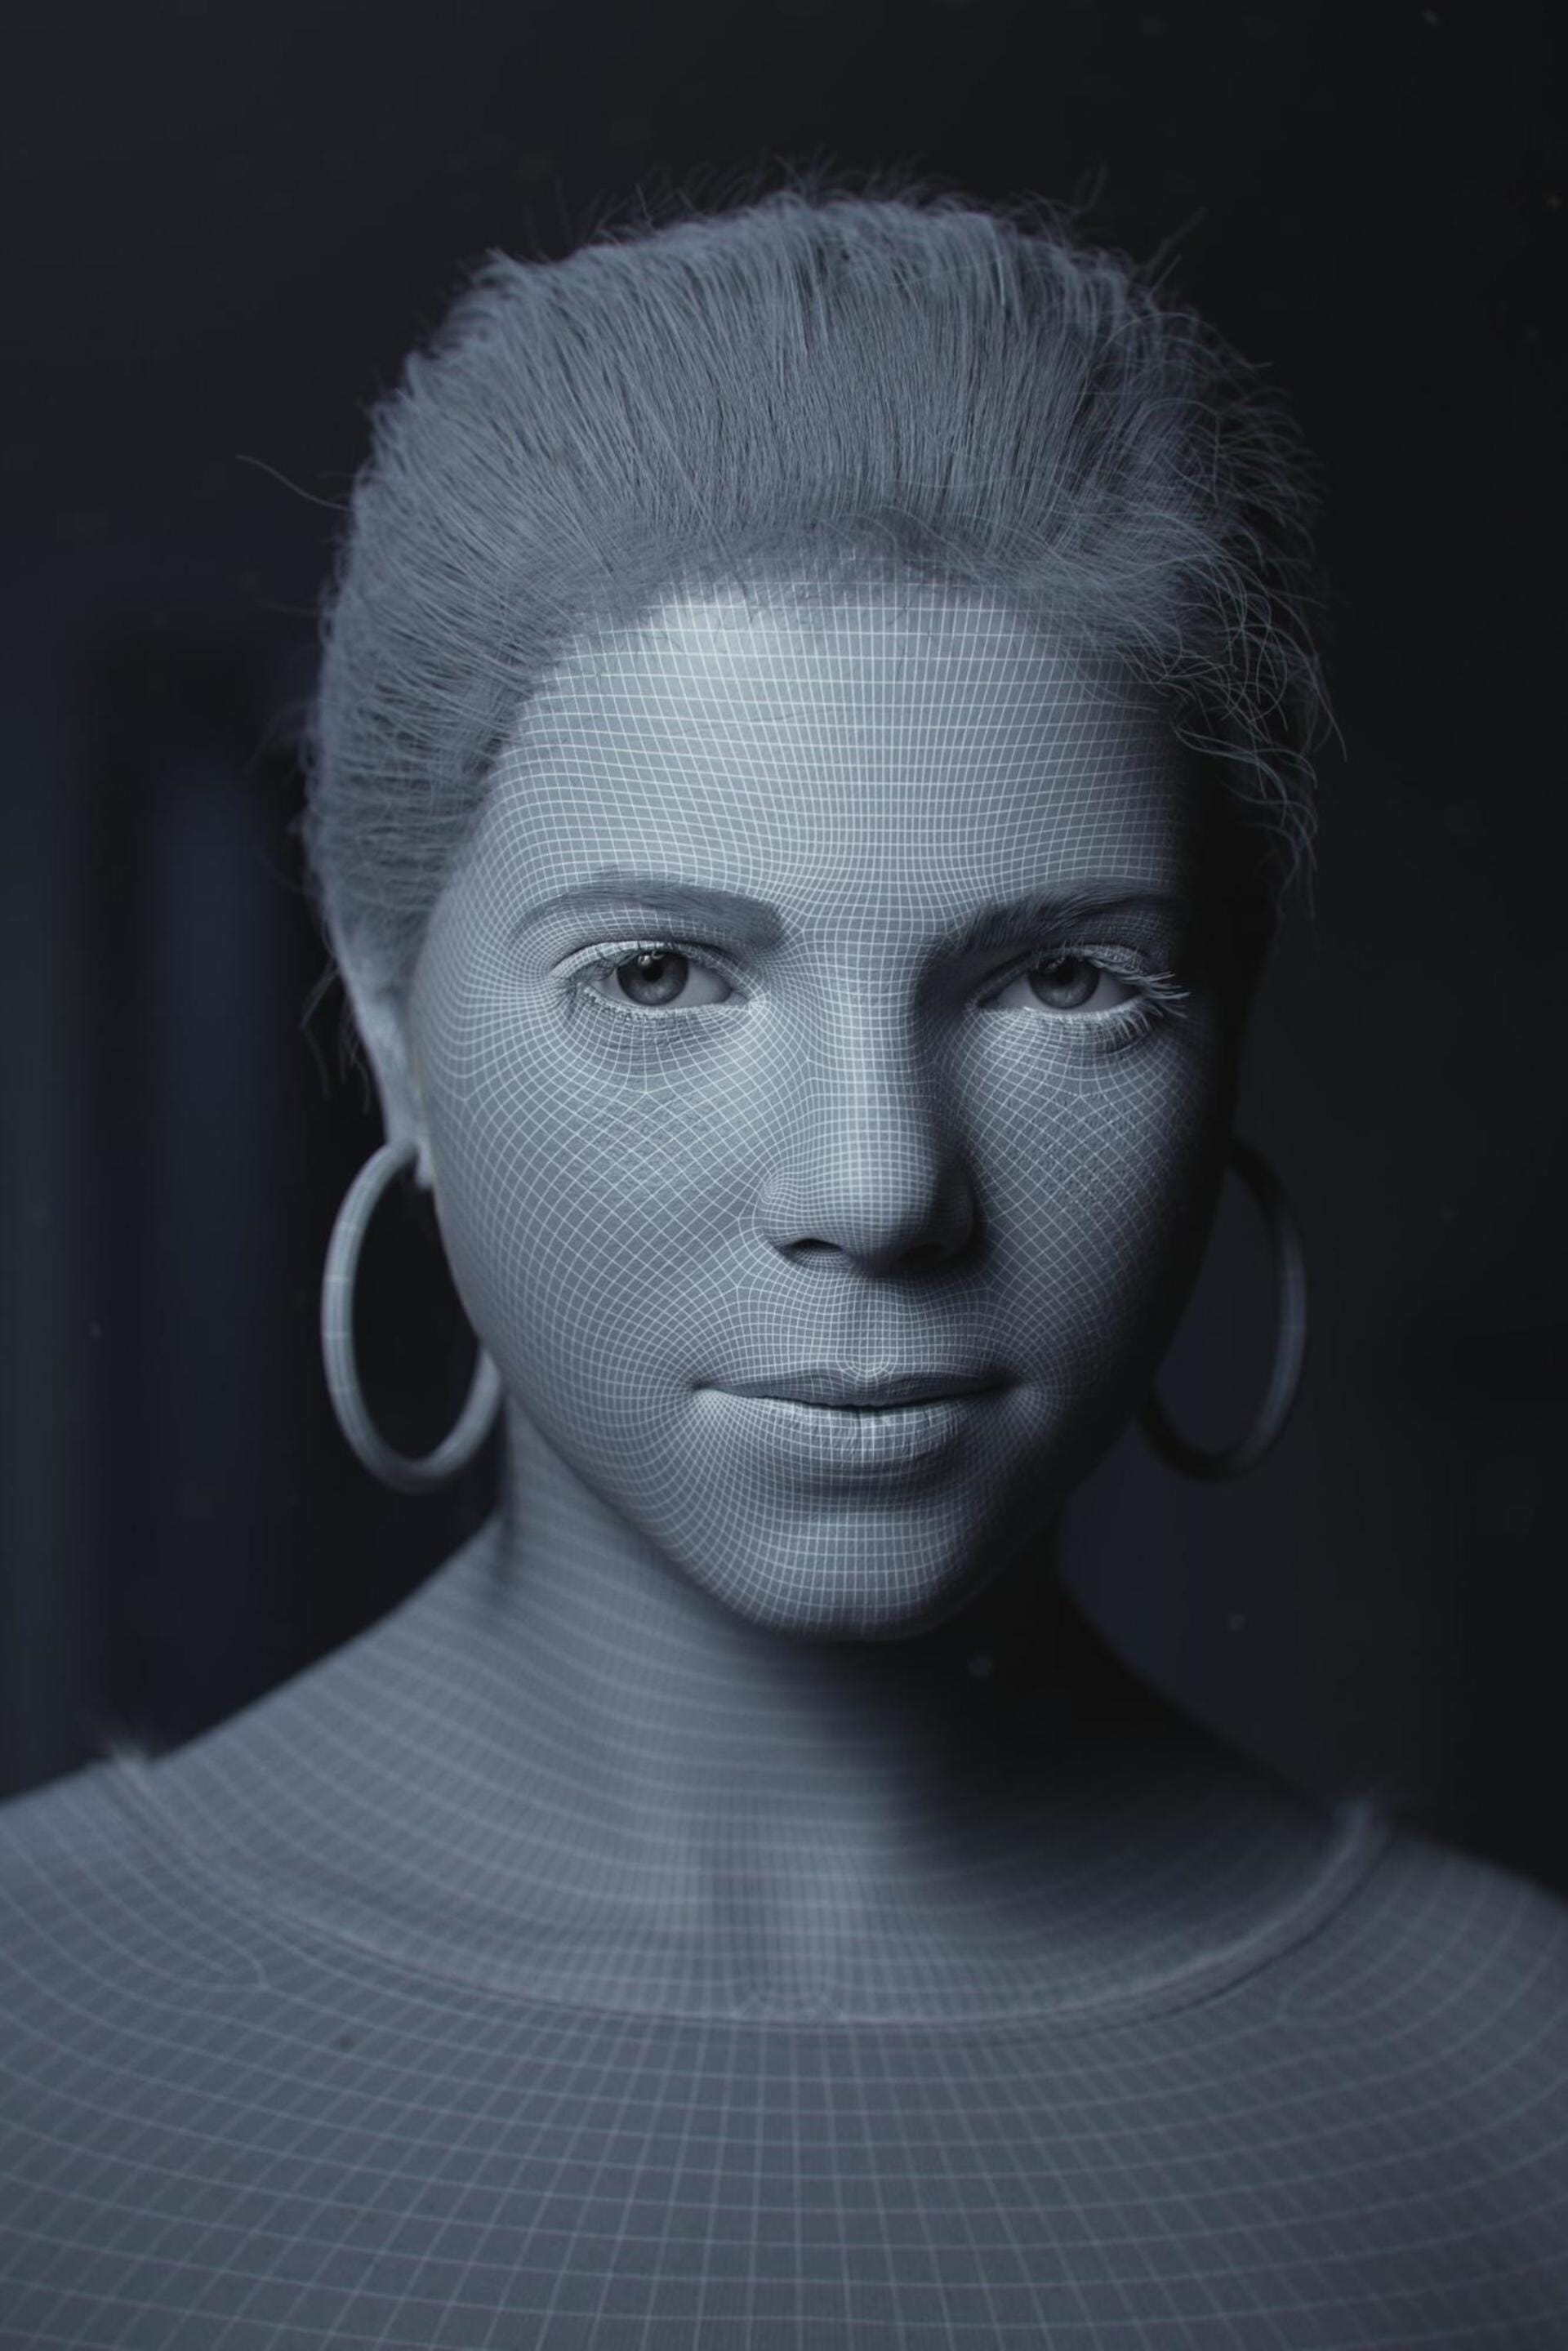
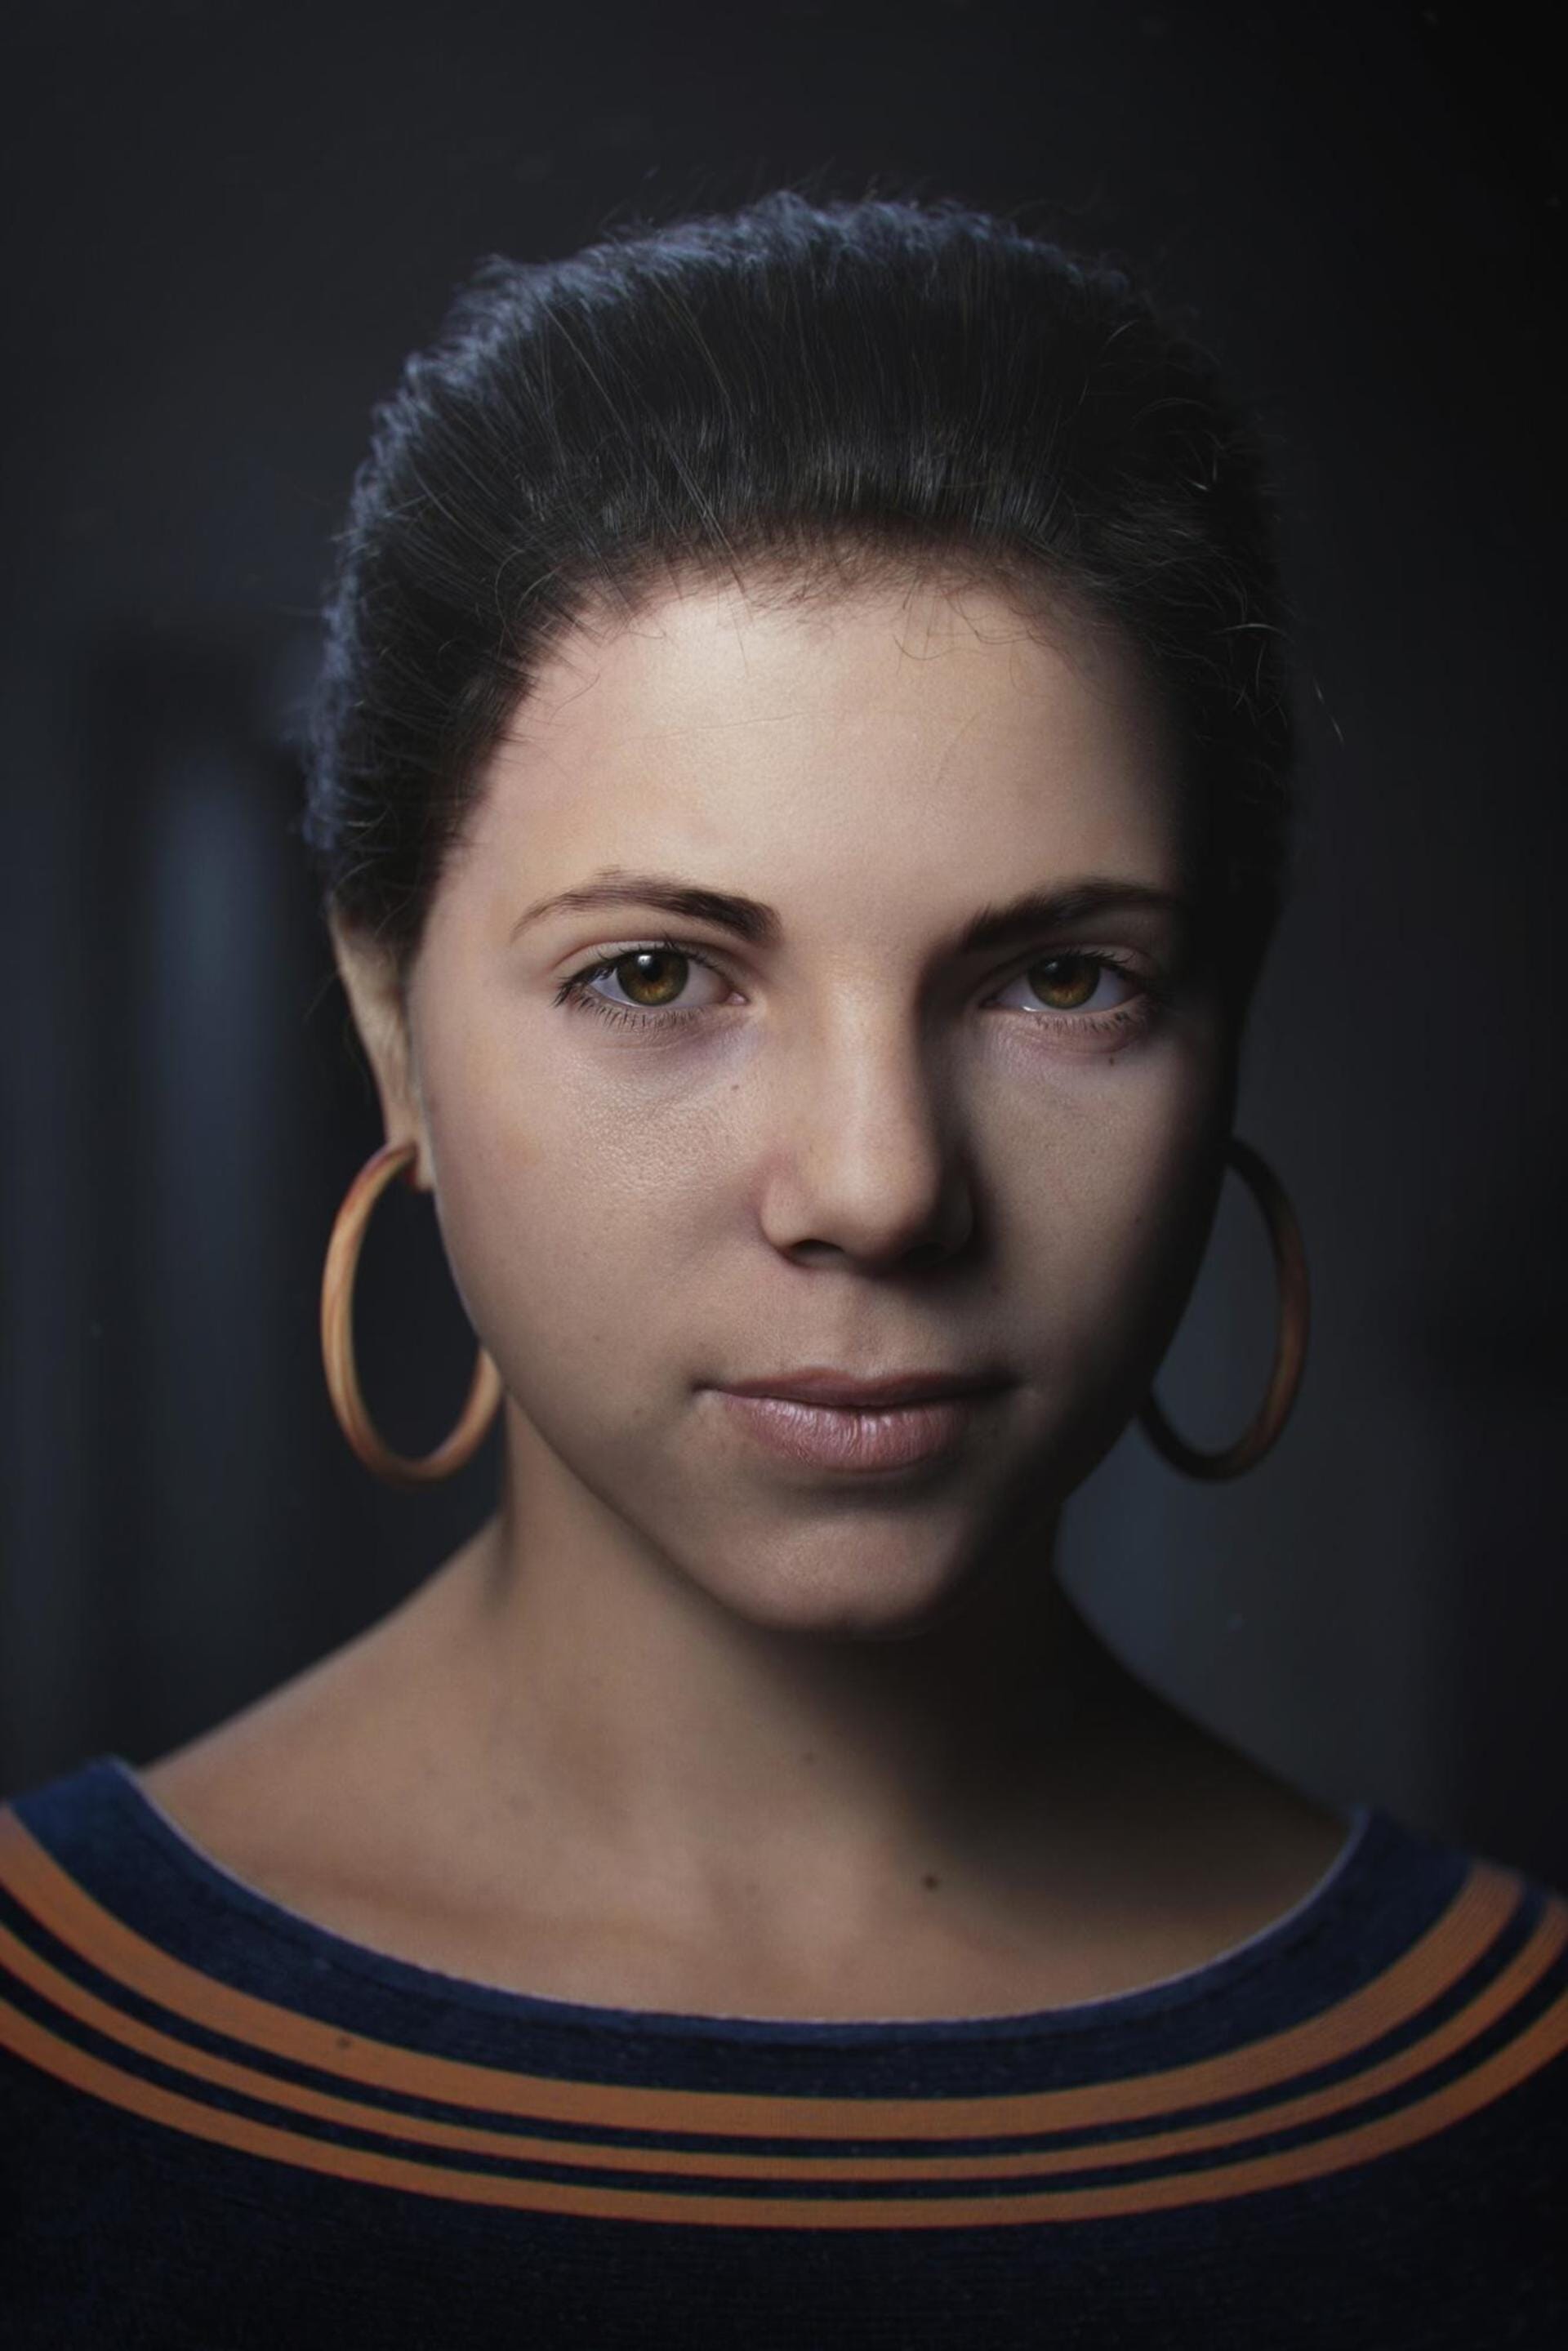
Now, Nu Boyana FX has released “I.D.A.,” its first-ever in-house research-and-development project. I.D.A. was based on a 3D scan of one of Nu Boyana FX’s employees, with actress Devora Wilde providing the voice and facial animation reference. The team painstakingly keyframed the animation in Maya and made use of V-Ray for Maya to render this astonishingly realistic human being.
Here, Nu Boyana FX’s head of VFX, Peter Dimitrov, tells us how V-Ray for Maya helped create I.D.A.

About Peter Dimitrov
Peter entered the industry as a generalist creating assets for video games and then joined Worldwide FX, where he worked on titles including Criminal and London Has Fallen. He’s been with Nu Boyana FX since 2017, going on-set as visual effects supervisor, handling the 3D part of the technical pipeline and serving as the company’s CEO.
I.D.A is your first in-house original project. How did it come to life? What inspired you to do it?
Peter Dimitrov: It started as an ordinary research-and-development project which was intended to go online at some point as portfolio work. We then decided we should go the extra mile and push it further into something more than just a reel. Since we are fans of spoken poetry at the studio, the idea of steering it in that direction came together.
What were some of the tools you used to create the project? How do they fit in your workflow?
PD: We used V-Ray for Maya to render the scene, Russian3DScanner to get the scanned mesh onto a premade facial topology. Texturing was done in Mari, rigging and animation in Maya and final comp in Nuke.
How does your work on I.D.A. compare to your other projects? Did you do anything on IDA for the first time?
PD: We had to develop a very capable facial rig to allow us to animate very subtle facial movements. So bringing it to a level that we felt it could deliver was definitely a first and very time-consuming process.
In our line of work, every project is unique by itself but we aim to utilize the overlapping bits from different projects to optimize certain processes. This is what we try to do on a project-by-project basis.


What were some of the challenges you faced? What helped you solve them?
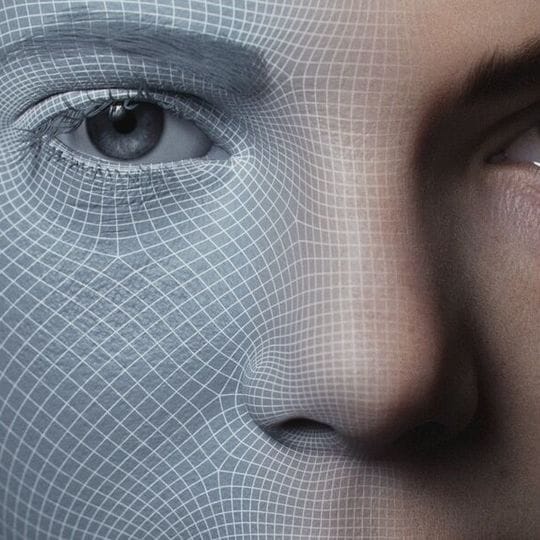
PD: The goal was to make a digital human with believable facial animation. The rig was probably the hardest part. It is based on 45 facial expression scans, which are required to work smoothly in all the intersecting areas. We had small iterations in specific areas until the very last few days before release.
The other challenge was the lookdev. When working with animated characters, the lookdev must be bulletproof from every angle. We decided to go for a closeup shot, to push our abilities a bit more.
V-Ray's instant feedback during lookdev is very impressive. Even with high-resolution textures and closeup shots, the rendering times are really fast, giving us the ability to test shading and lighting with almost instant results."
Peter Dimitrov, Nu Boyana FX
You mentioned you’ve used V-Ray for Maya for rendering. What would you say is the biggest benefit of working with it?
PD: We've been using V-Ray since we opened doors and some of us, many years before that. V-Ray's instant feedback during lookdev is very impressive. Even with high-resolution textures and closeup shots, the rendering times are really fast, giving us the ability to test shading and lighting with almost instant results. And, with the debugging mode, we have complete control over complex shading networks, which otherwise would be very time-consuming.
Mari and I.D.A.
Check out this interview to discover how Mari, Foundry's 3D painting software, helped add incredible detail to I.D.A.'s digital skin.
How did you use V-Ray to create accurate hair and skin?
PD: We used the AlSurface shader for the skin. We painted Diffuse, refl bump, SSS mix and two reflection roughness maps. All the detail comes from sculpted displacement mixed with texturing XYZ maps. For the AlSurface we used only colors with different radiuses for the three layers of the skin SSS. We used different VrayHairNext shaders for the hair and facial groom. For the hair in particular we used some attributes in Yeti to guide different shaders in different sections of the hair groom.
What are your top tips for creating digital humans that don't fall into the uncanny valley?
PD: Always have good reference close by.
Understand anatomy.
Pay special attention to the eyes. They are the first thing we look at when we see a face and if something’s wrong, they give it away immediately. It's an area we wish we could have pushed a little bit more if we had the extra time.
Don't be afraid to go into three-digit iteration versions in terms of animation.
Study the skin. You can easily underdo or overdo it in terms of detail, and you end up with skin that's not particularly believable.
What do you hope your experience creating I.D.A. will lead to?
PD: I honestly hope it will lead to creating many more digital humans as it's actually great fun. It’s helped optimize certain processes within our pipeline along the way and increase accuracy — which is a never-ending journey.
What’s next for Nu Boyana FX?
PD: We have a few very interesting projects lined up which we really do hope can take the full benefit of what was done so far and push it even further. As a character- and animation-focused studio, we’re staying true to what we’re good at and we’ll continue improving it.


