Rendering parametric designs with V-Ray for Grasshopper
With V-Ray for Grasshopper, included in the latest version of V-Ray for Rhino, users can create photorealistic imagery from within Grasshopper. We asked Imago Design founder Jan Kokol to explain what’s new, and how it’s going to change his workflow.
V-Ray 3.6 for Rhino delivered major improvements in functionality, ease of use, rendering speed, seamless multi-platform communication, and support for Rhino 6. With VRscans material integration, it’s easy to add incredible realism in a few clicks. And V-Ray can now directly be used within Grasshopper for Rhino. Excited by this new integration, I took a dive into V-Ray for Grasshopper to see how it works, and what it can do.
V-Ray is a huge timesaver in the parametric design process
Why is this such a big deal? Before this integration existed, any geometry created in Grasshopper had to be baked (translated to Rhino geometry), before it could be rendered inside of Rhino. However, the real power of Grasshopper is its parametric environment, with real-time shape shifting and countless iterations.
Imagine that you have a very complex parametric model, and you’d like to visualize six different iterations of the design. That’s a lot of baking. With V-Ray for Grasshopper you no longer need to do that. Instead, you can render Grasshopper geometry directly inside Grasshopper, in full V-Ray quality.
Countless iterations can be rendered directly within Grasshopper for final showcase renderings, and progressive interactive real-time visual feedback can aid the design process.
Jan Kokol, CEO & Founder, IMAGO Design
Faster feedback
If you’re familiar with Grasshopper, you’ll know that large Rhino scenes are often a combination of Rhino and Grasshopper geometry. Imagine that you are modeling a whole building within Rhino, and adding a parametric façade in Grasshopper. Now, all the Rhino geometry can be imported into Grasshopper via the Geometry node and connected to V-Ray within Grasshopper. The rendering inside Grasshopper will contain all the geometry, with the flexibility to carry out real-time parametric façade adaptations.
When I was working for UNStudio, we frequently had to present different design variations to Ben van Berkel, the company’s founder. All those options had to be baked and rendered, which was very time consuming. Now, countless iterations can be rendered directly within Grasshopper for final showcase renderings. And progressive interactive real-time visual feedback can aid the design process.
Using V-Ray in a Rhino and Grasshopper workflow
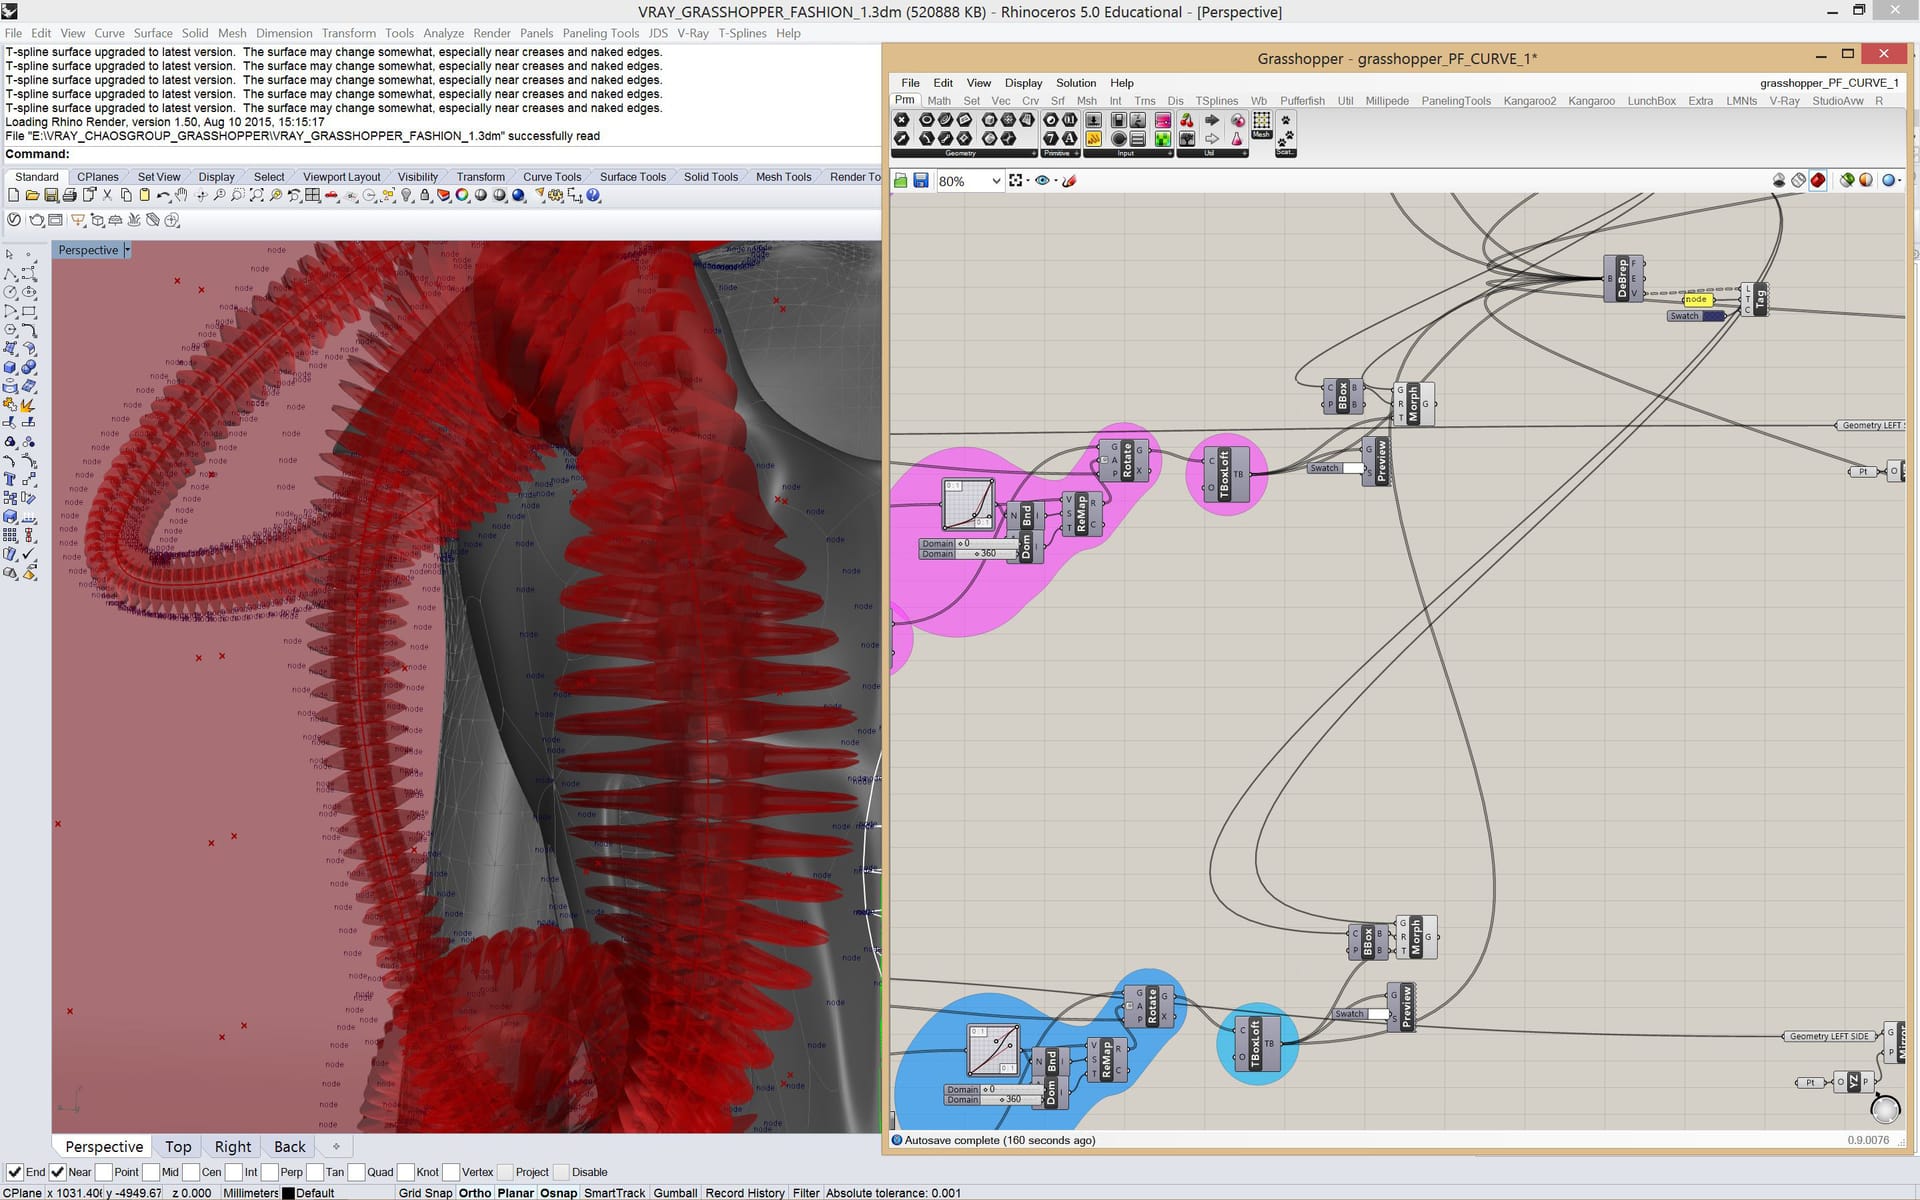
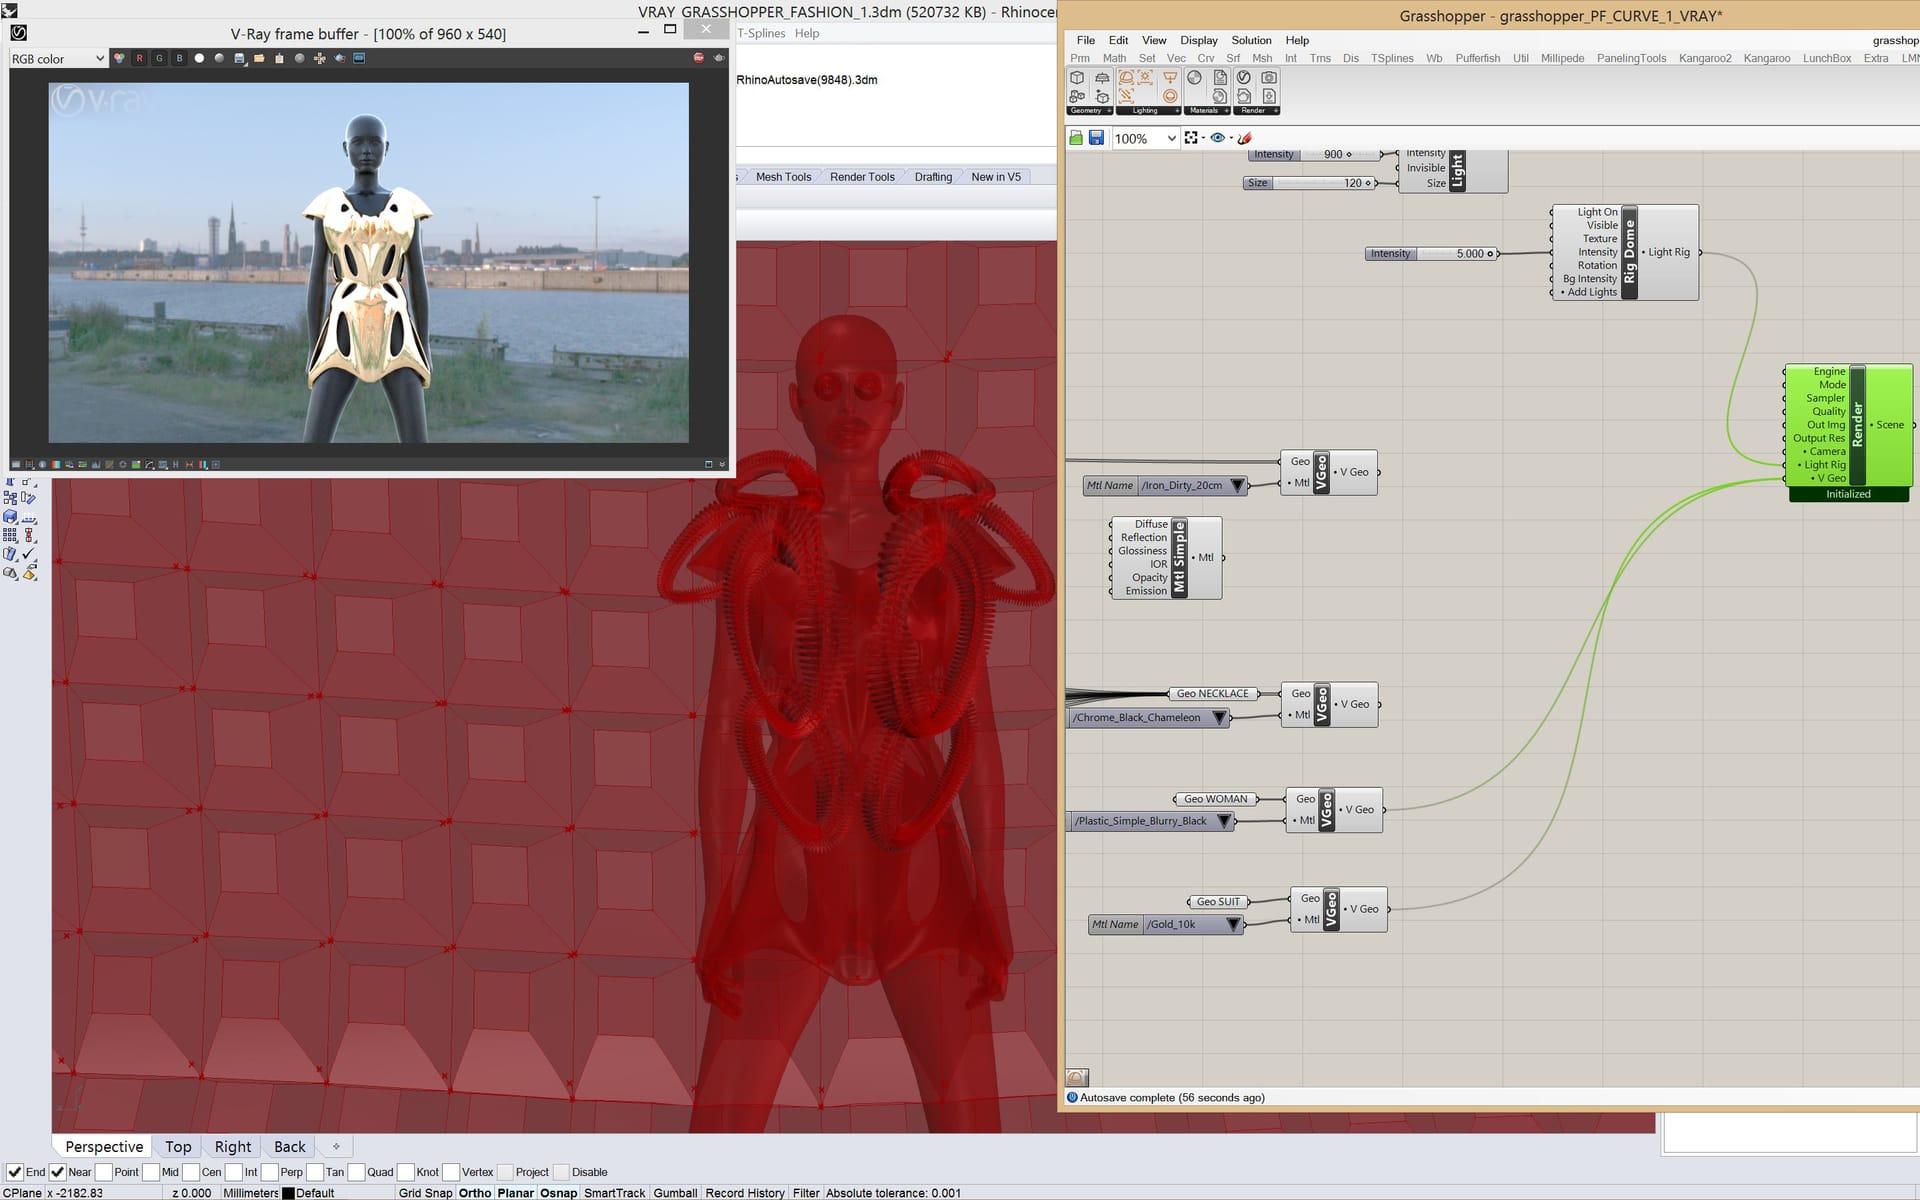
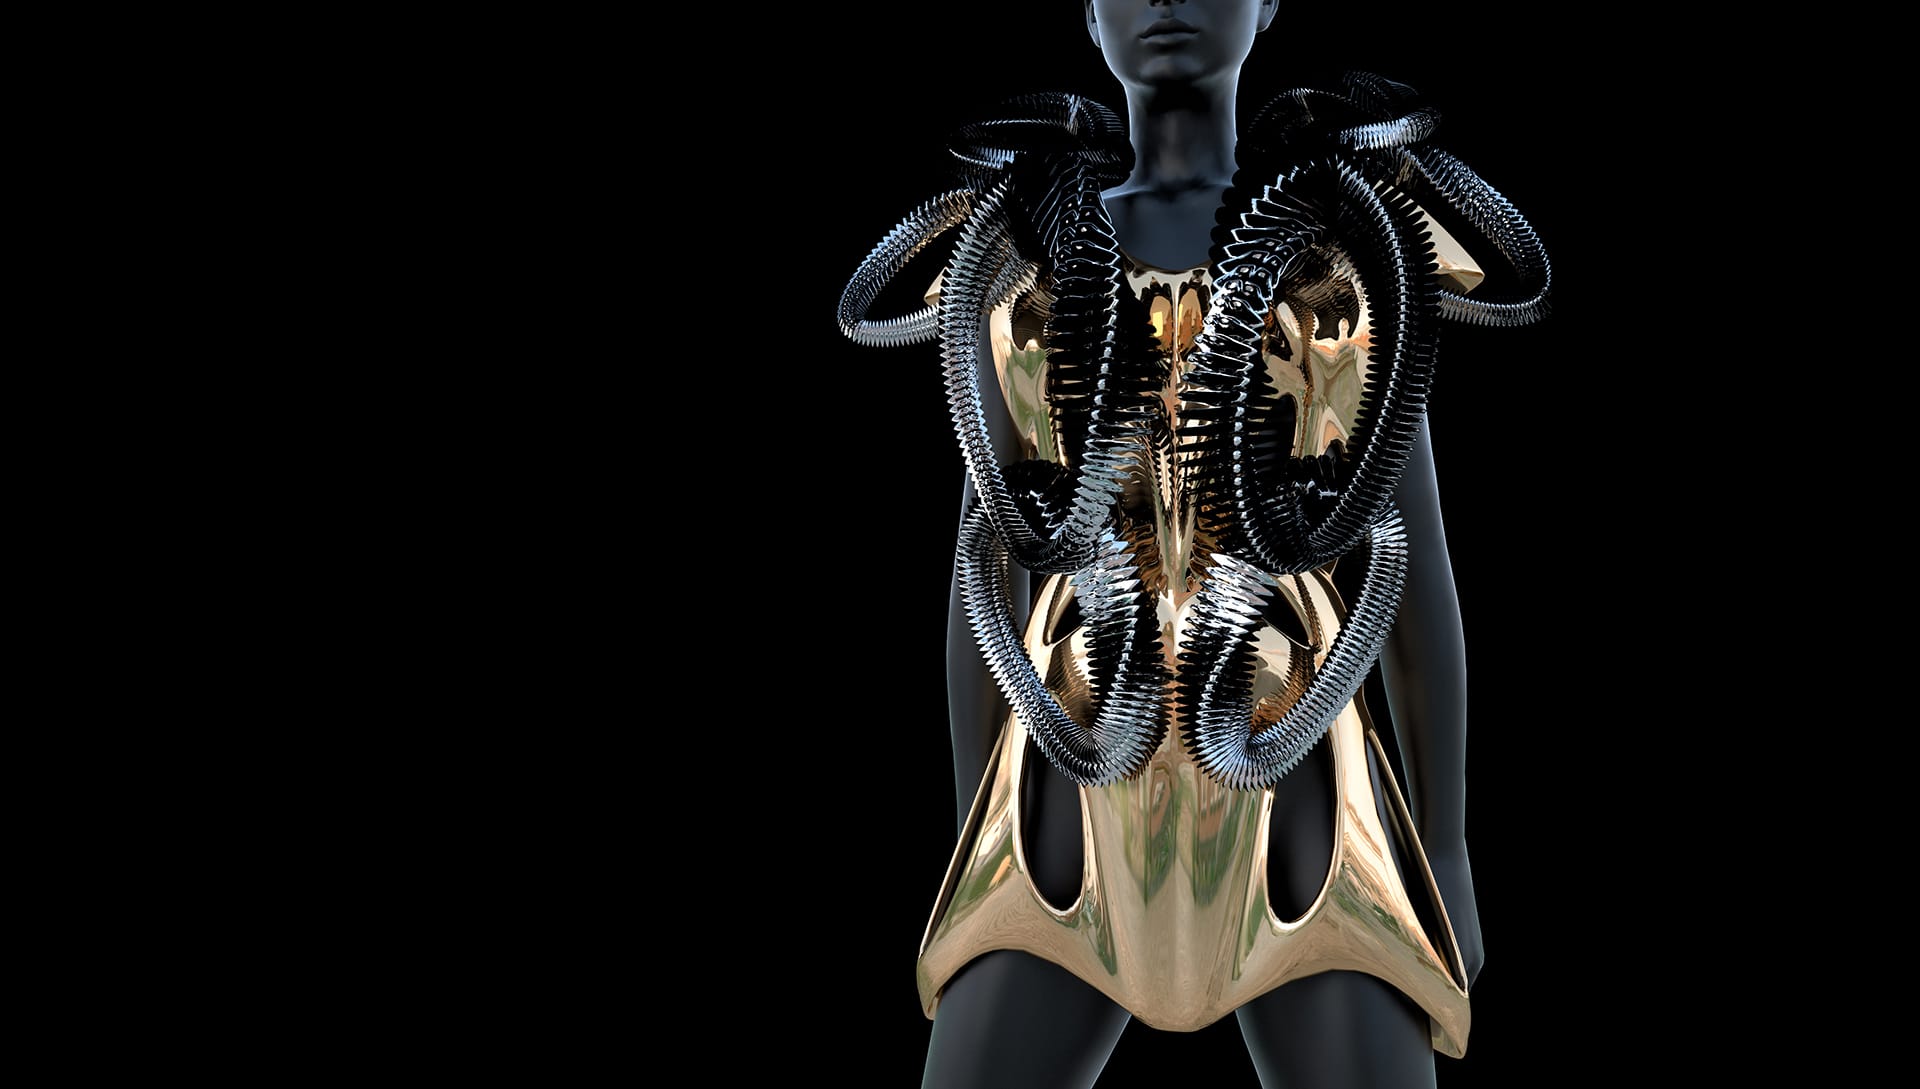
I created two designs to showcase the V-Ray and Grasshopper process in Rhino. The first design, “NOOK Suit,” references a 3D model of a woman and a space suit into Grasshopper via a Geometry node, with the outer chain layer on top of the suit generated directly in Grasshopper. Then, all the geometry is rendered inside of Grasshopper to test the coherent proportions of the fully parametric outer chain layer.
Using V-Ray in a Grasshopper-only Workflow
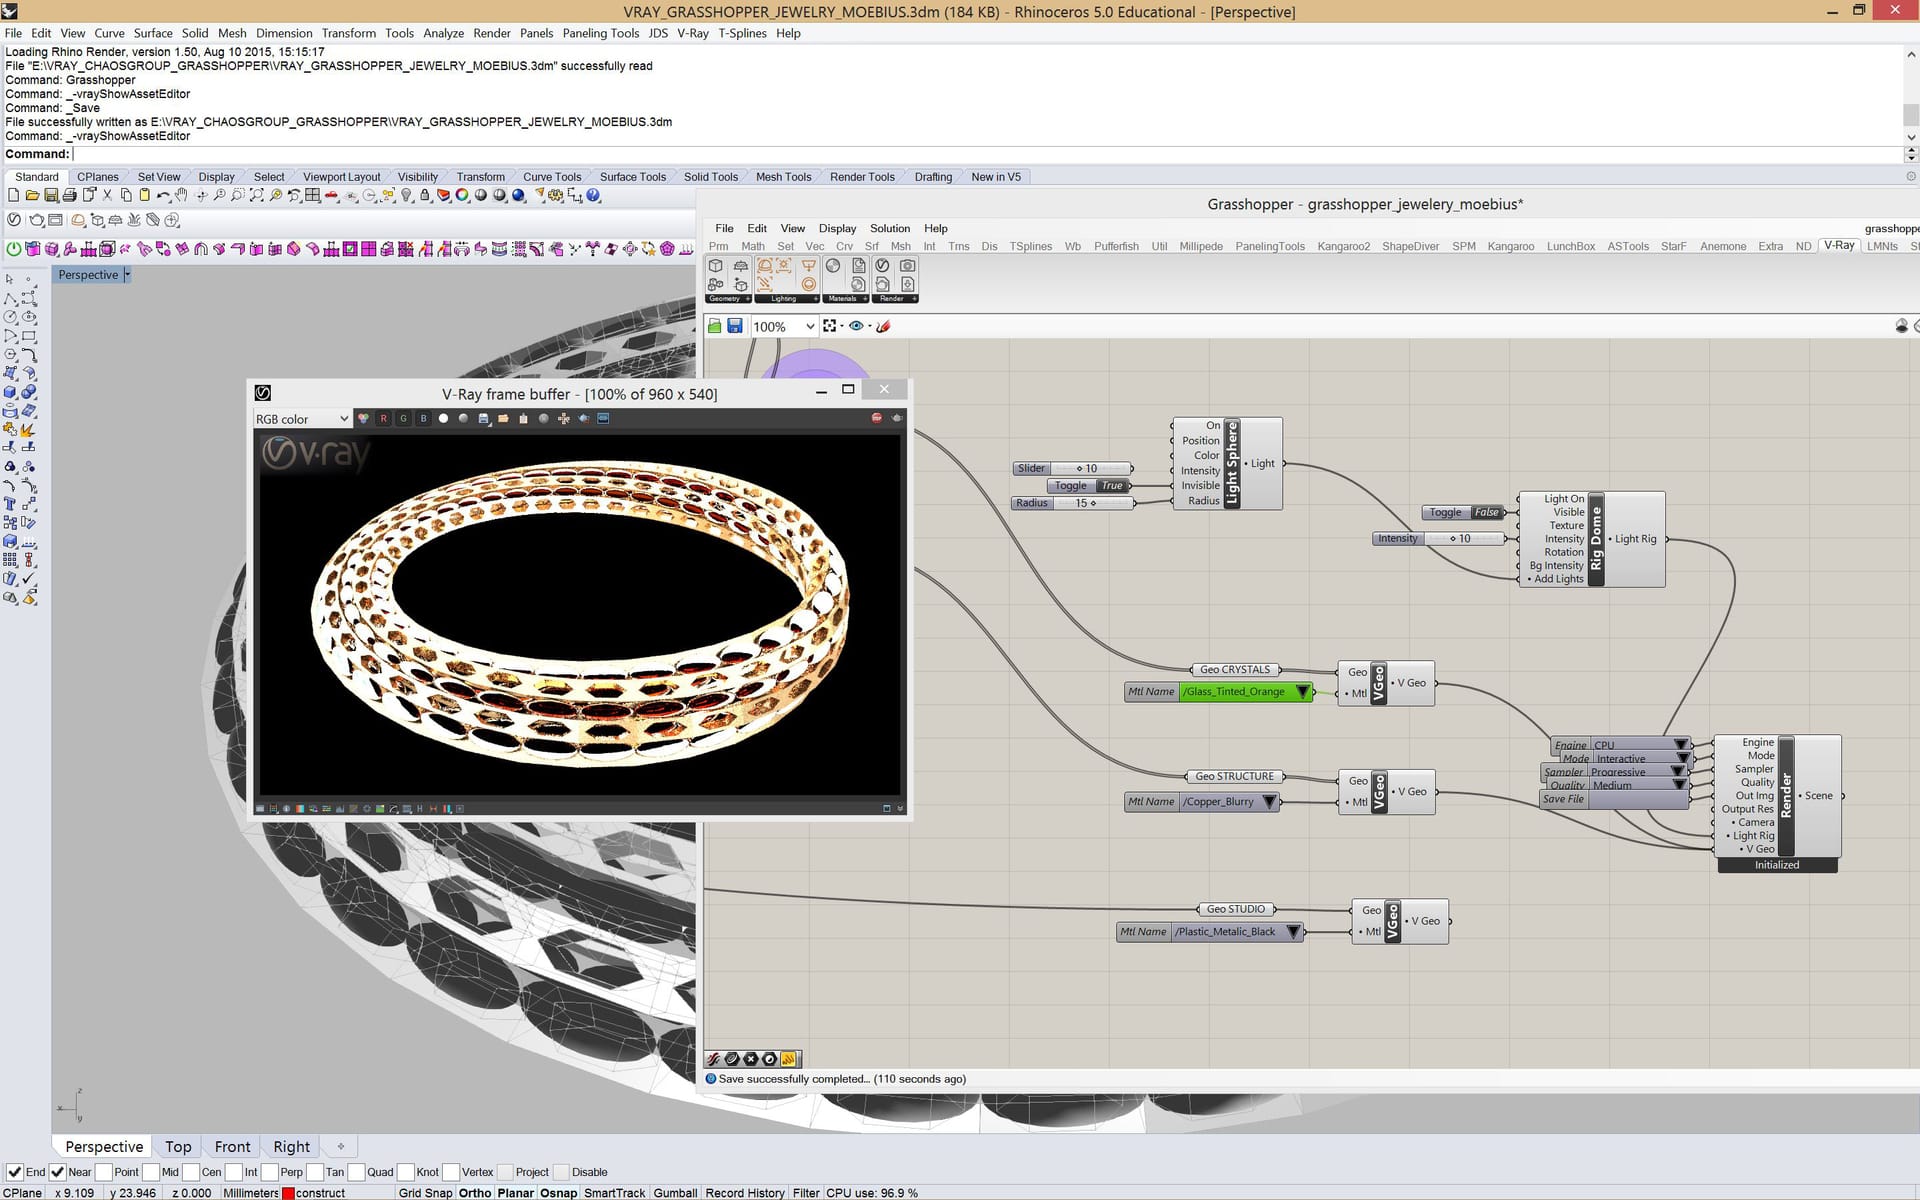
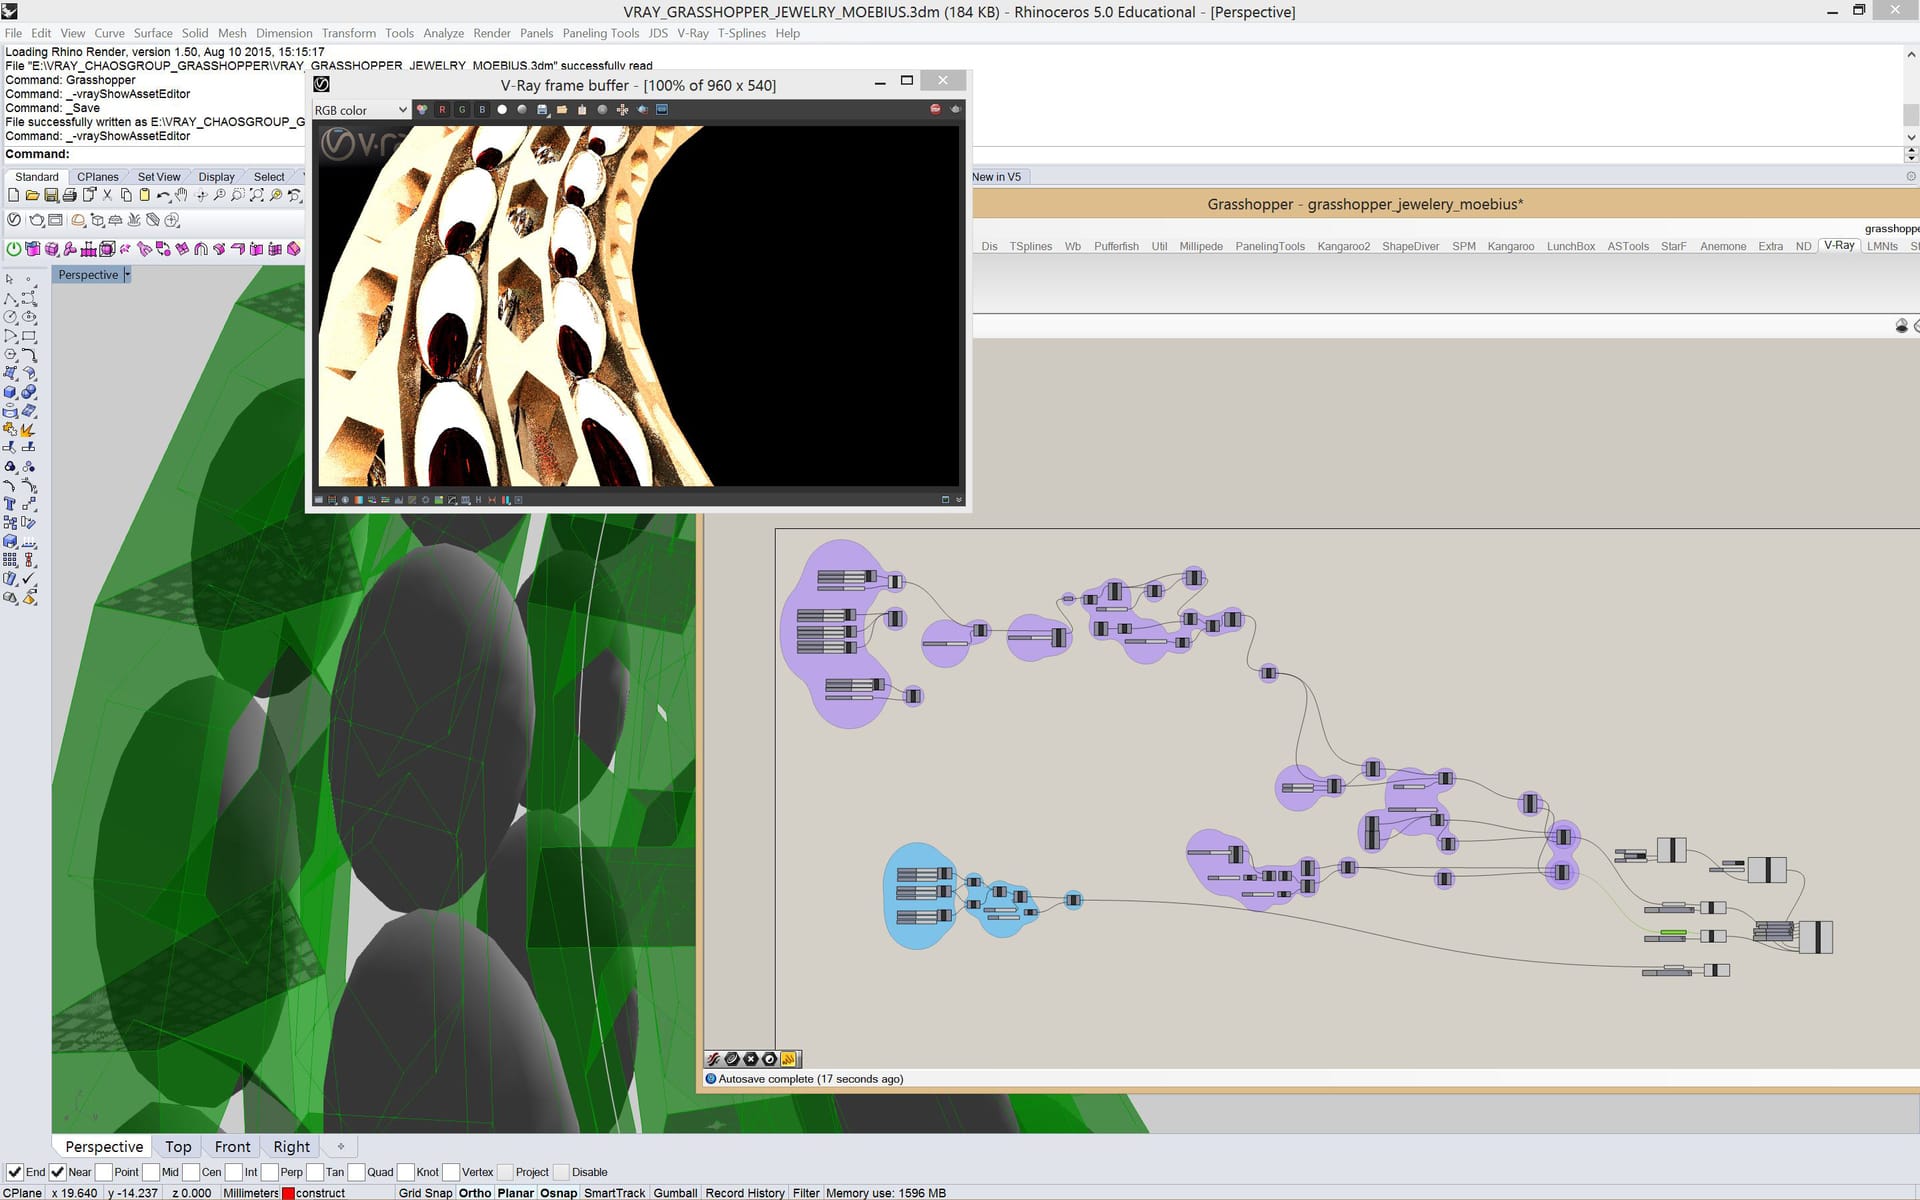
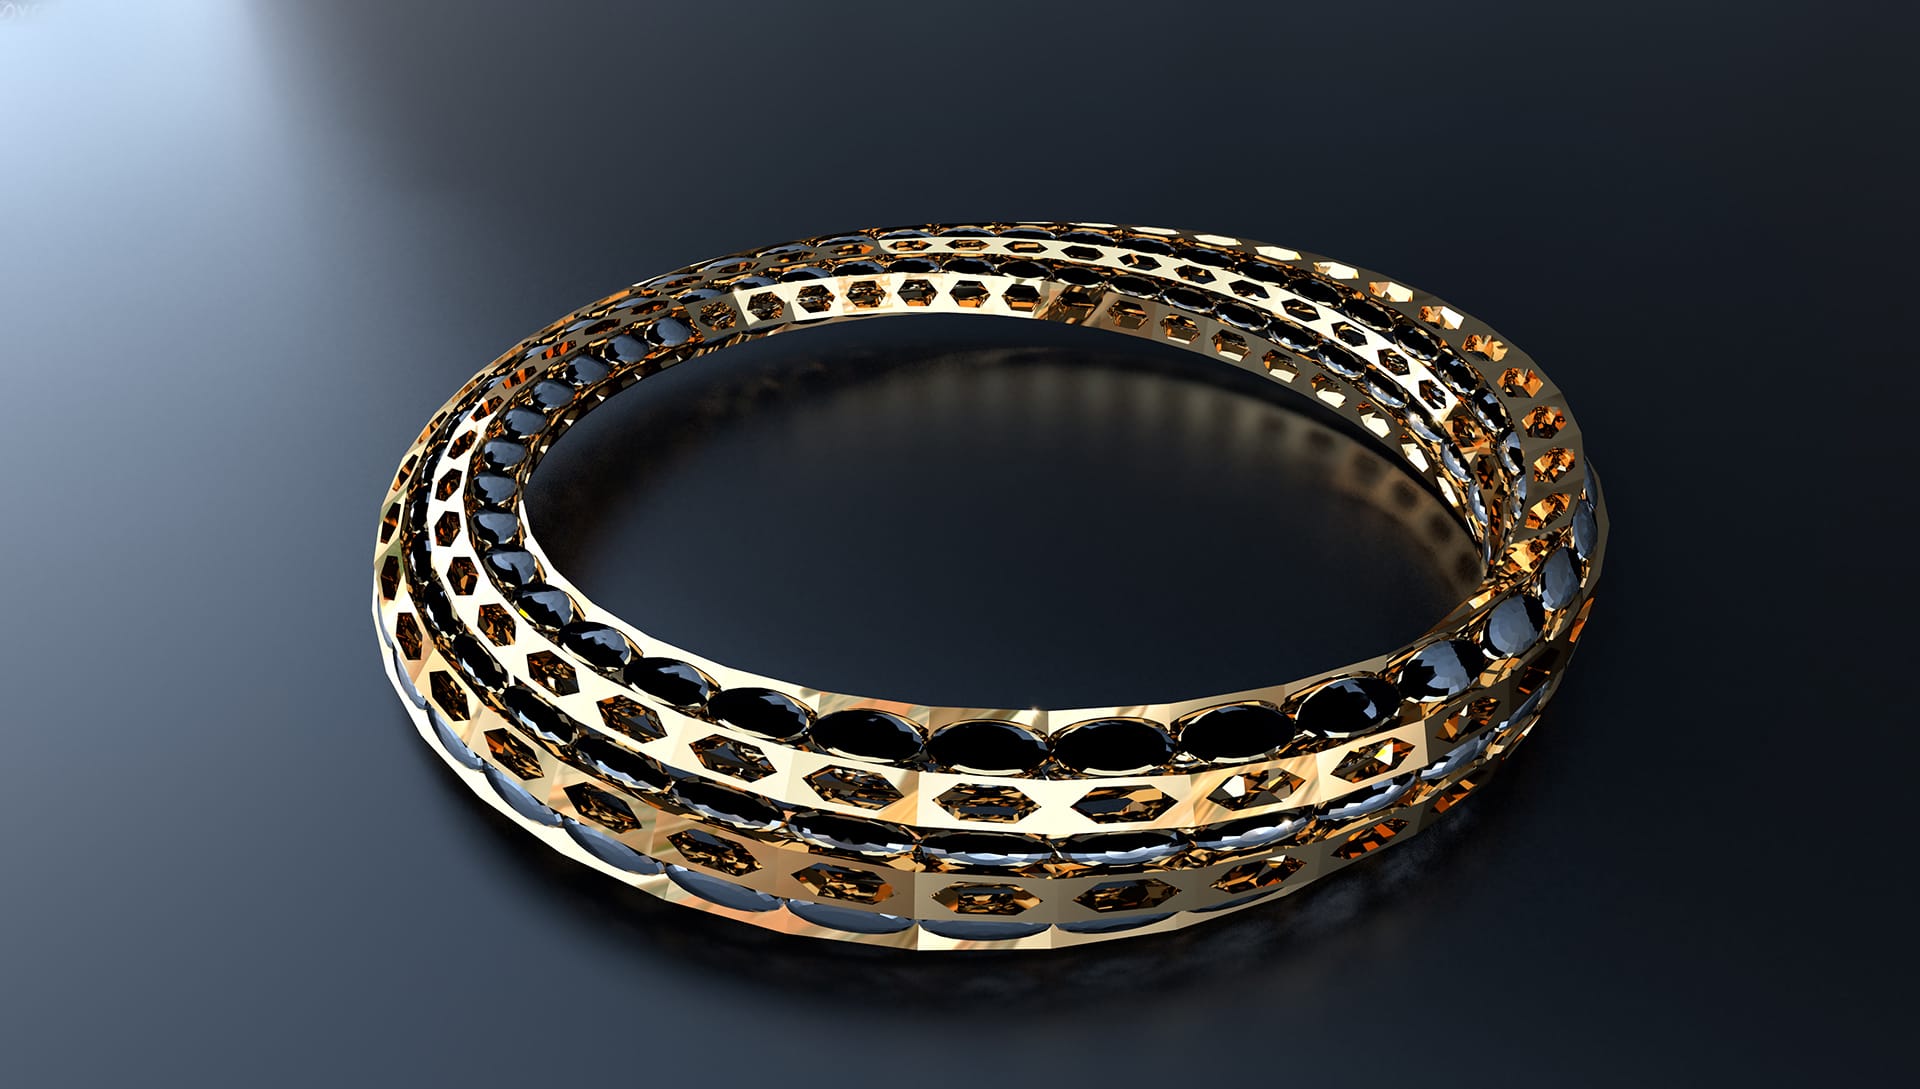
“Moebius Ring” is generated entirely within Grasshopper, with no additional geometry referenced from Rhino. A studio lighting setup was created with a key light, a fill light, a back light, and a reflective side surface. The studio floor has been parametrically defined in Grasshopper. The ring design is a moebius strip, and it remains completely flexible within the Grasshopper parametric environment.
Simple but powerful
Grasshopper can be quite simple to use, but because of the abundance of extensions and limitless possibilities it can quickly become complex. The good news is that V-Ray for Grasshopper is easy to use and set up.
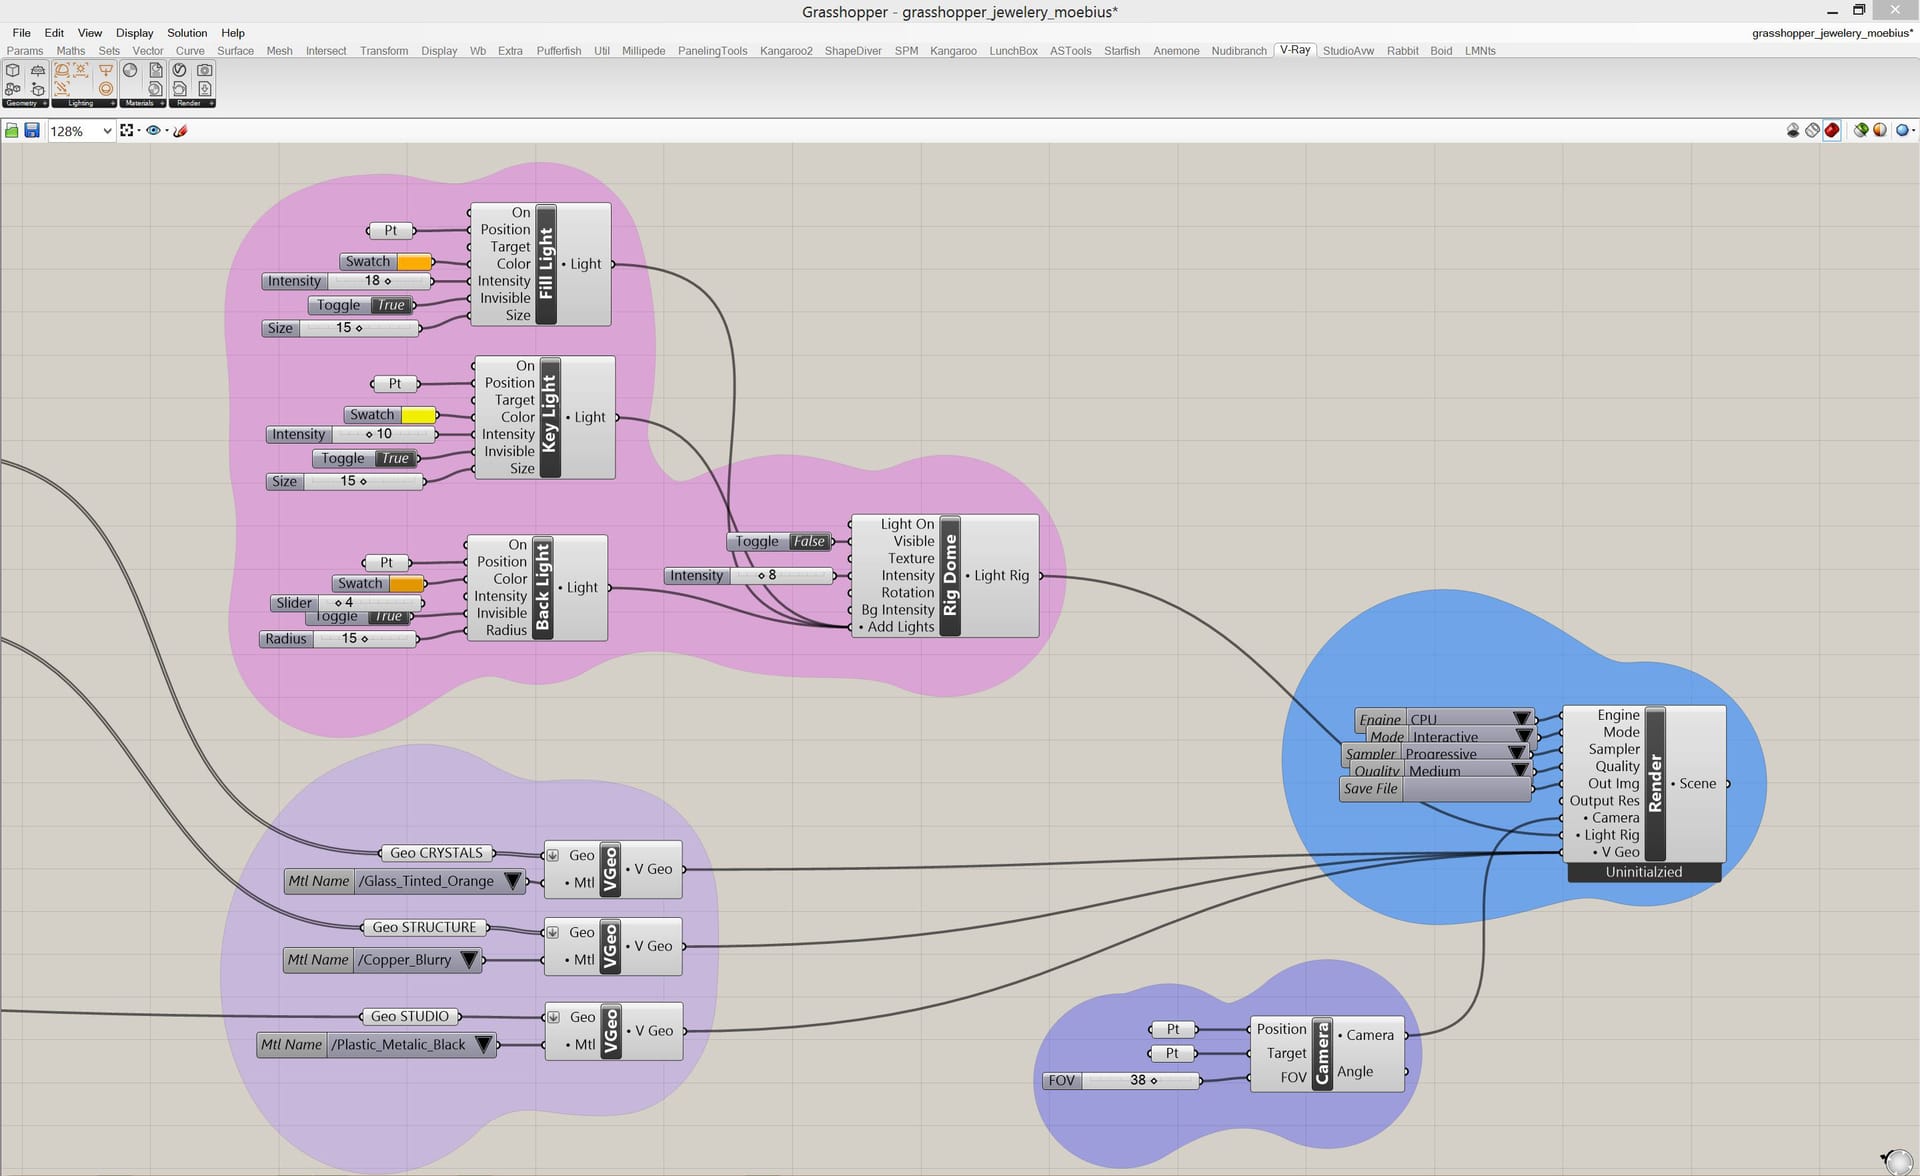
V-Ray for Grasshopper adds four Node groups to Grasshopper, divided into Geometry, Lighting, Materials and Render. In order to render the Grasshopper geometry, a V-Ray Render node from the Render group has to be added to the Grasshopper canvas. This controls the entire process, with settings such as quality, engine, and output.
The next step is to add a Light rig from the Lighting group. This can be a sun system rig, HDRI lighting rig, or a simple light rig. Additional rectangular or spherical lights can be added to the light rig at any time.
Next, we connect each piece of Grasshopper geometry data to a V-Ray Geometry node from the Geometry group, which also defines the material for this geometry group. The material can be created within Grasshopper from the Materials group with simple parameters, or directly imported from the Rhino scene (including VRscans materials) or an external V-Ray material file. The V-Ray Geometry node as well as the Lighting rig node are then connected to the V-Ray Render node.
Camera, import, and export
The addition of a camera node from the Render group is an optional connection to the V-Ray Render node. The rendering process is triggered by activating the V-Ray Render node, and the V-Ray Frame Buffer is displayed on the screen providing real-time direct progressive feedback of the Rhino screen cut-out, unless a V-Ray camera node is activated. If an output image in a custom resolution and quality is required, the image can be rendered and stored to an external file controlled in Grasshopper. An entire V-Ray Scene file can be either imported to Grasshopper or exported via the import and export nodes. This is a very powerful feature ensuring seamless scene integration across several platforms.
V-Ray for Grasshopper is excellent for power Grasshopper users who need real-time visual feedback without the need for baking, and beginners who can get started very quickly with the tool. I highly encourage you to explore the fantastic world of parametric design expression with V-Ray’s photorealistic rendering capabilities.
To give V-Ray for Grasshopper a try, download a 30-day free trial of V-Ray for Rhino.

