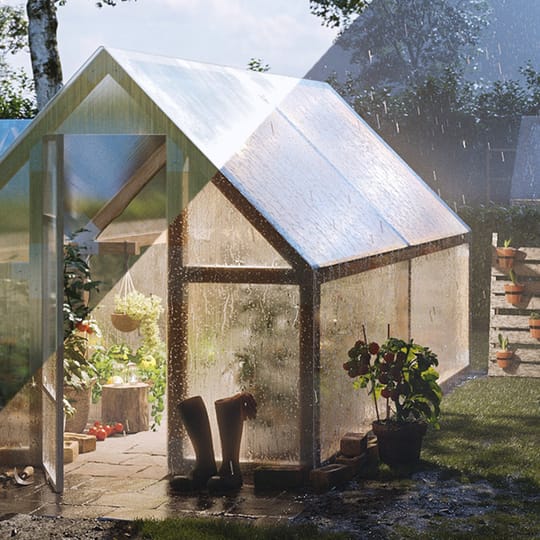
Artist Jiří Matys used V-Ray for 3ds Max to transform a day scene into a dramatic rainy night. He reveals his secrets for creating glass, grass and greenhouses.
Multi-talented freelance artist Jiří Matys has tackled everything from dinosaur skulls to cartoon snowmen to interior and exterior renders. For a recent commercial project, he was tasked with creating renders of an innovative modular greenhouse system — but it grew into an interesting personal experiment in turning day to night and sun to storm.
In this tutorial, Jiří reveals how he created the original scene, added grass with Forest Pack and then plunged it into the middle of the night. For this project, Jiří used V-Ray Next for 3ds Max, but he also offers some tips on how the new features of V-Ray 5 for 3ds Max can help save time and produce great results.
About Jiří Matys
Jiří has been interested in graphics and 3D for over 25 years. He started on an Amiga computer (with 14 MHz!) and LightWave 3D. With no tutorials on YouTube or elsewhere, Jiří had to teach himself everything. Jiří fell in love with V-Ray, which he uses mainly for arch-viz, although he sometimes works in product visualization, motion design, animation and 2D print graphics. Jiří combines his work with looking after his two children with his wife.
Jiří Matys on Artstation
Jiří Matys on Instragram
Jiří Matys on YouTube
Modeling
The modeling mainly concerned the greenhouse that dominates the scene. Creating it was straightforward because the whole greenhouse is a modular system consisting of prisms and various types of joints. Everything had to be modeled according to reality. The prisms are basically just blocks that are slightly tapered at the ends to fit the joints. The joints are of many different types so a wide range of structures can be created from a modular system. You can see some joints in the picture. Chamfer was used everywhere so that the edges are gently rounded to create nice reflections.
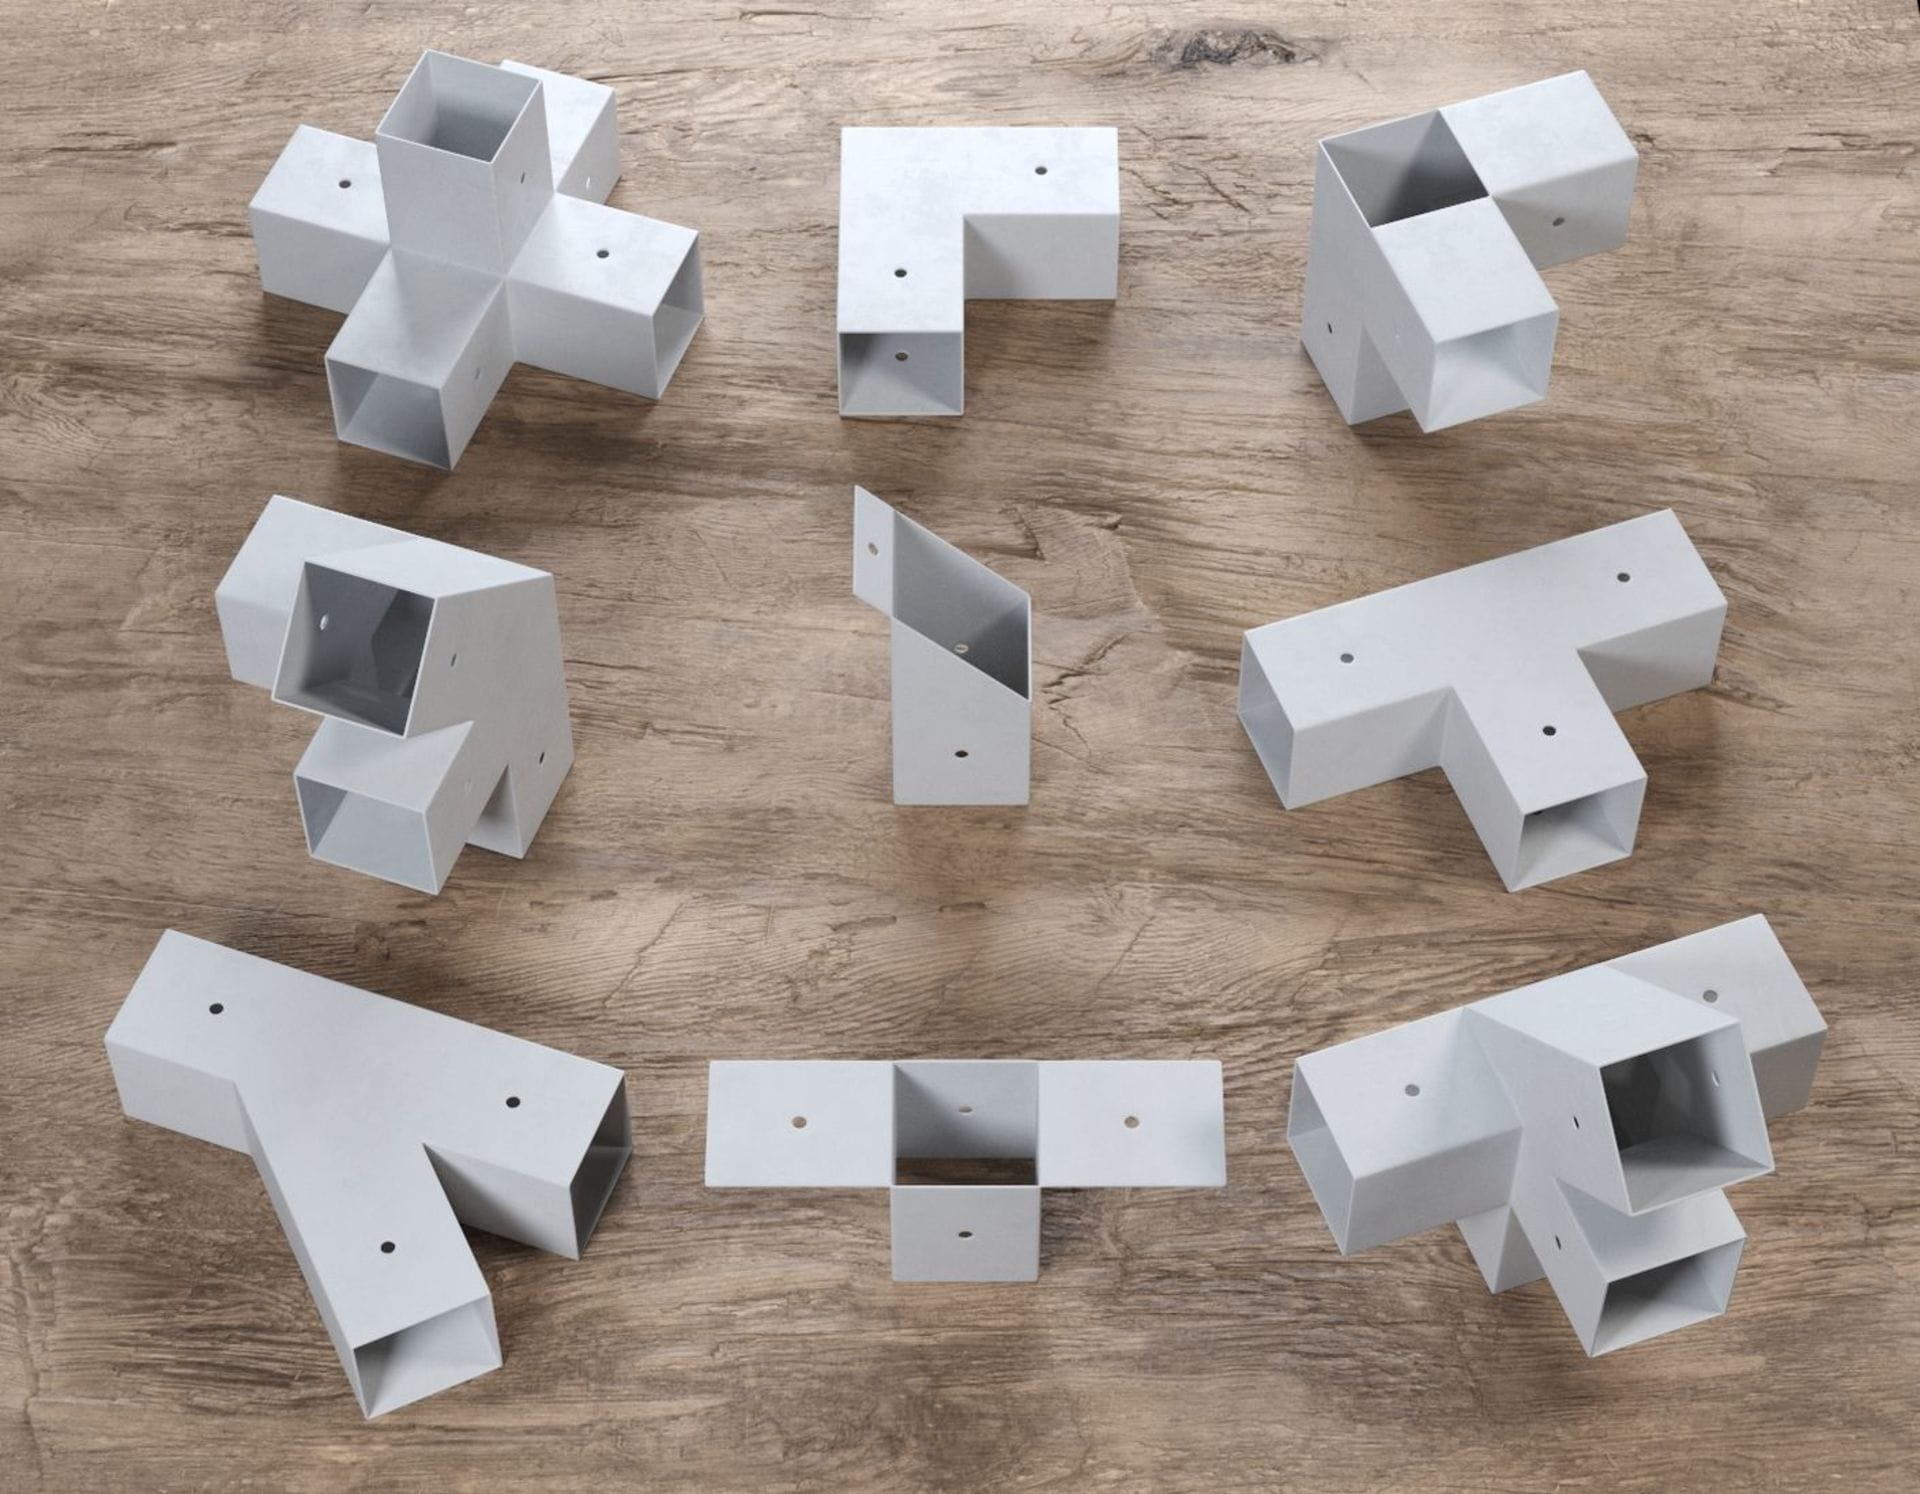
Because I cloned the prisms, they all have the same texture — which would be very noticeable in the render. Therefore, I had to manually move UVs on every prism or use various scripts for randomization.
Making use of V-Ray 5’s UVWRandomizer
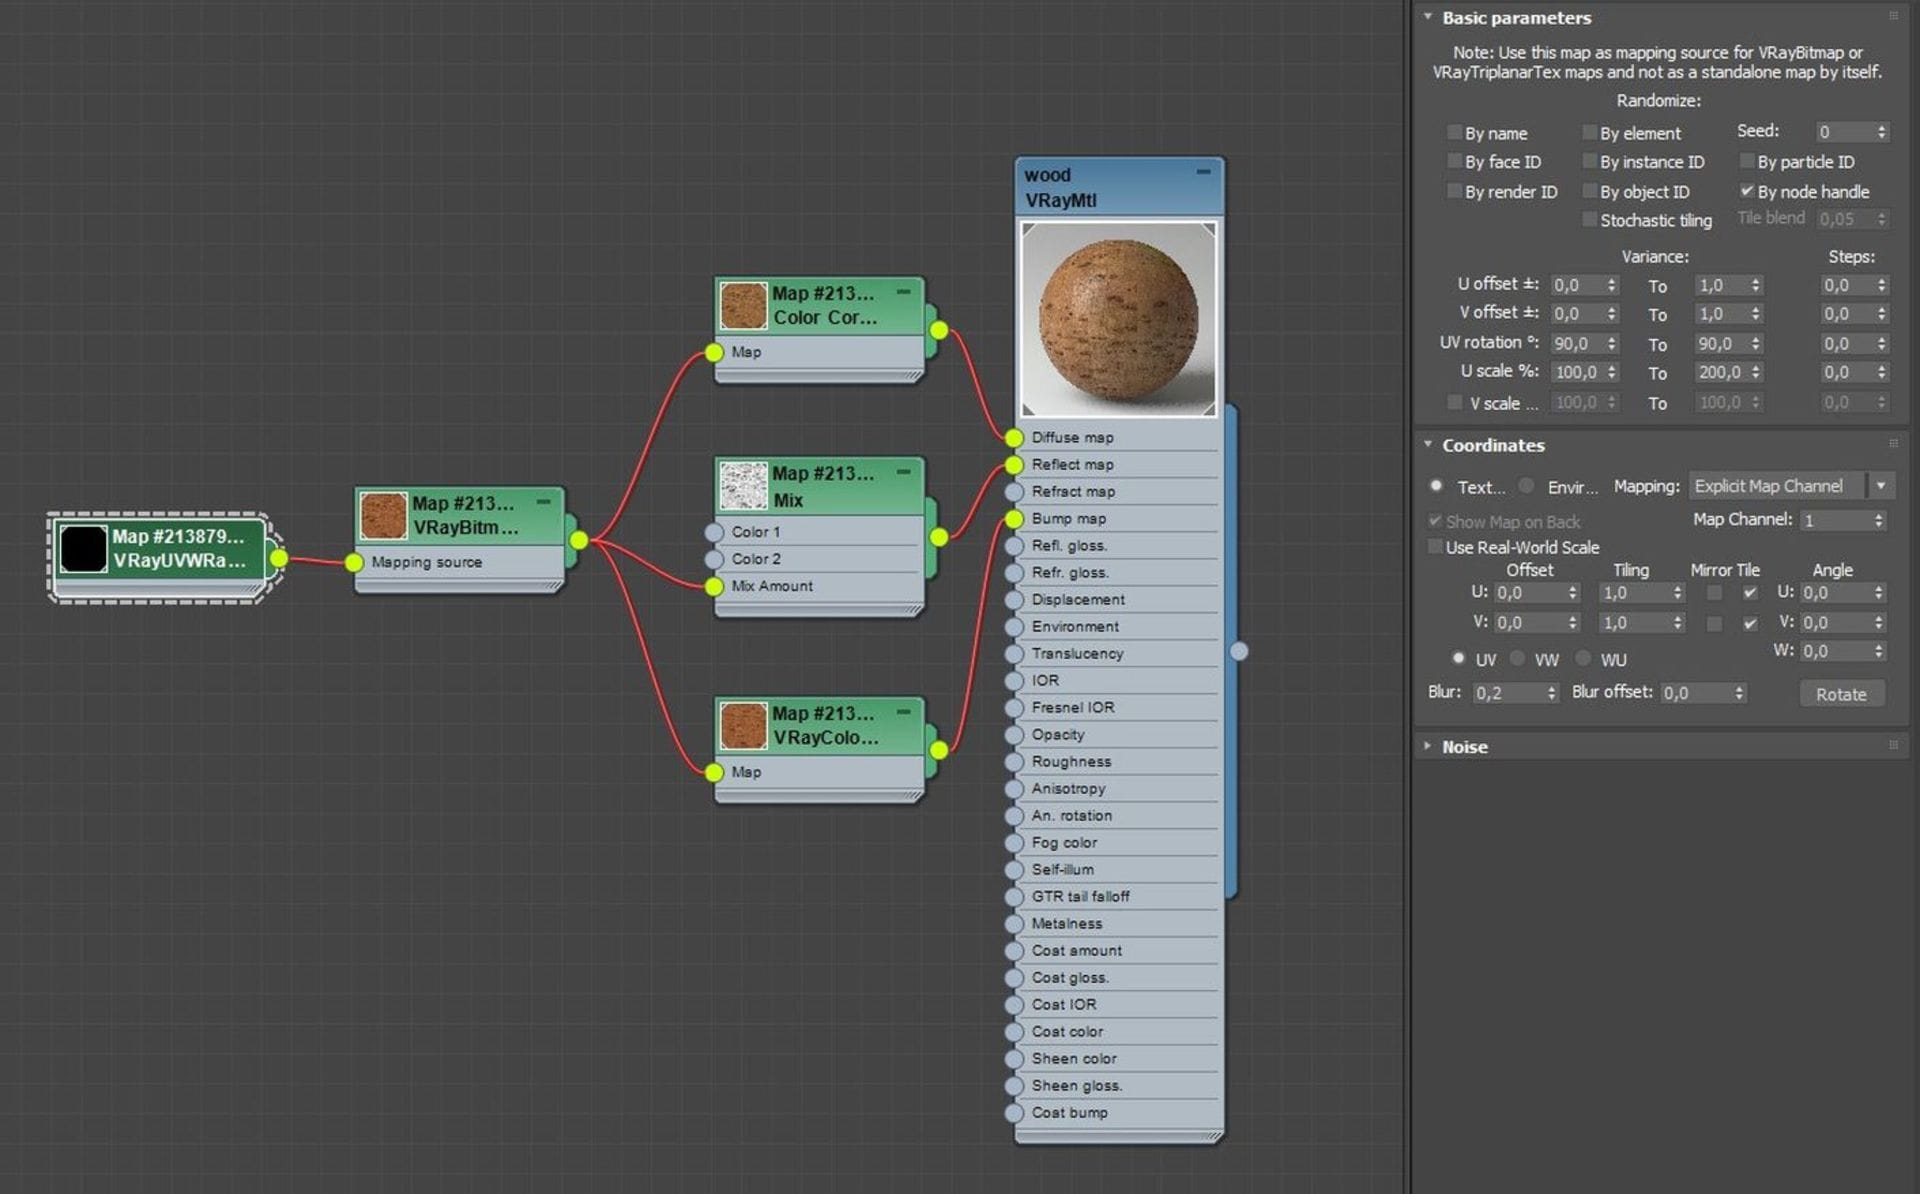
In V-Ray 5, creating randomized textures is very simple thanks to the UVWRandomizer map. To demonstrate, I made a simple wood material and used the new VRayUVWRandomizer map from V-Ray 5 on top of the wood texture to randomize texture placement on all prisms. It’s very simple and super fast. Here, you can see the randomization settings:
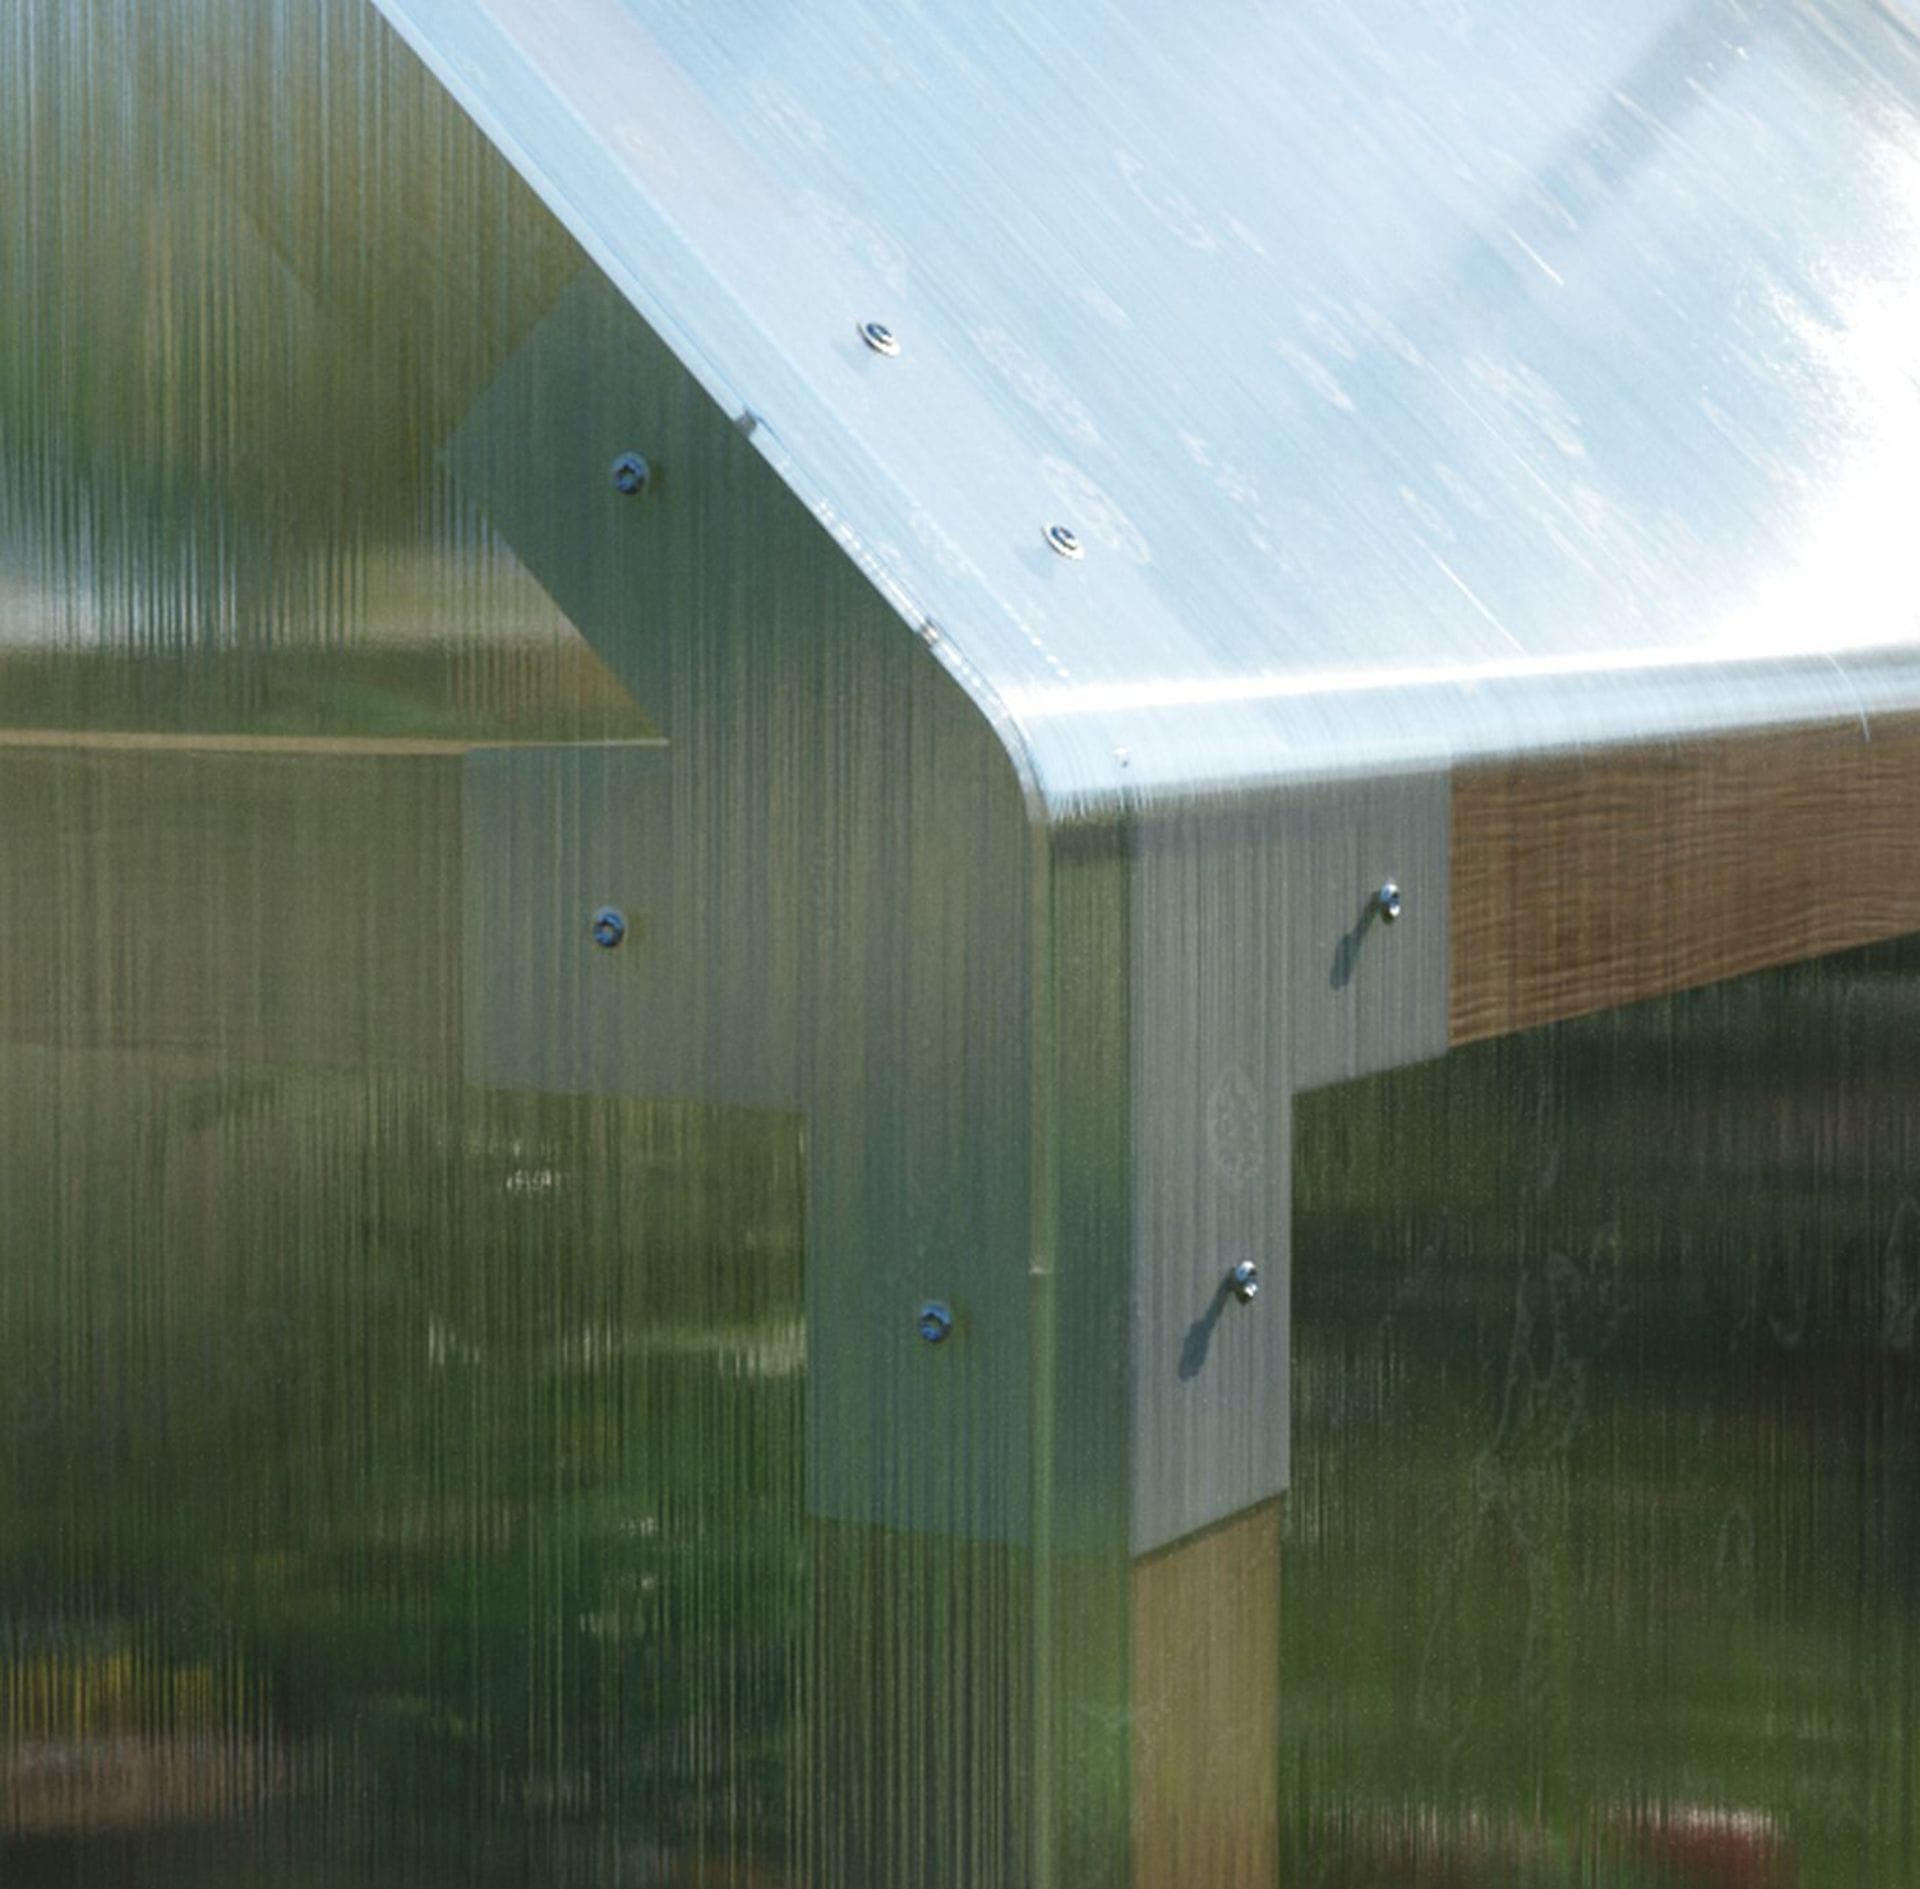
I wanted the polycarbonate greenhouse “glass” to be detailed, with enough polygons for an accurate reflection of the surroundings and the sun. At the same time, I knew in advance that I would need UVs to properly map textures to the entire surface. I did the front and back side, and the sloping roof separately. Subsequently, I used the Shell and Chamfer modifiers to round the edges between the side and the pitched roof, and to create a small radius on all the edges of the whole glass cover.
Originally, I also created a larger number of polygons on flat surfaces due to displacement; however, during tests, I found this was unnecessary. Finally, I created a screw with a washer, which I cloned along the cover of the greenhouse. This holds on the glass with joints, as you can see in the image.
References and materials
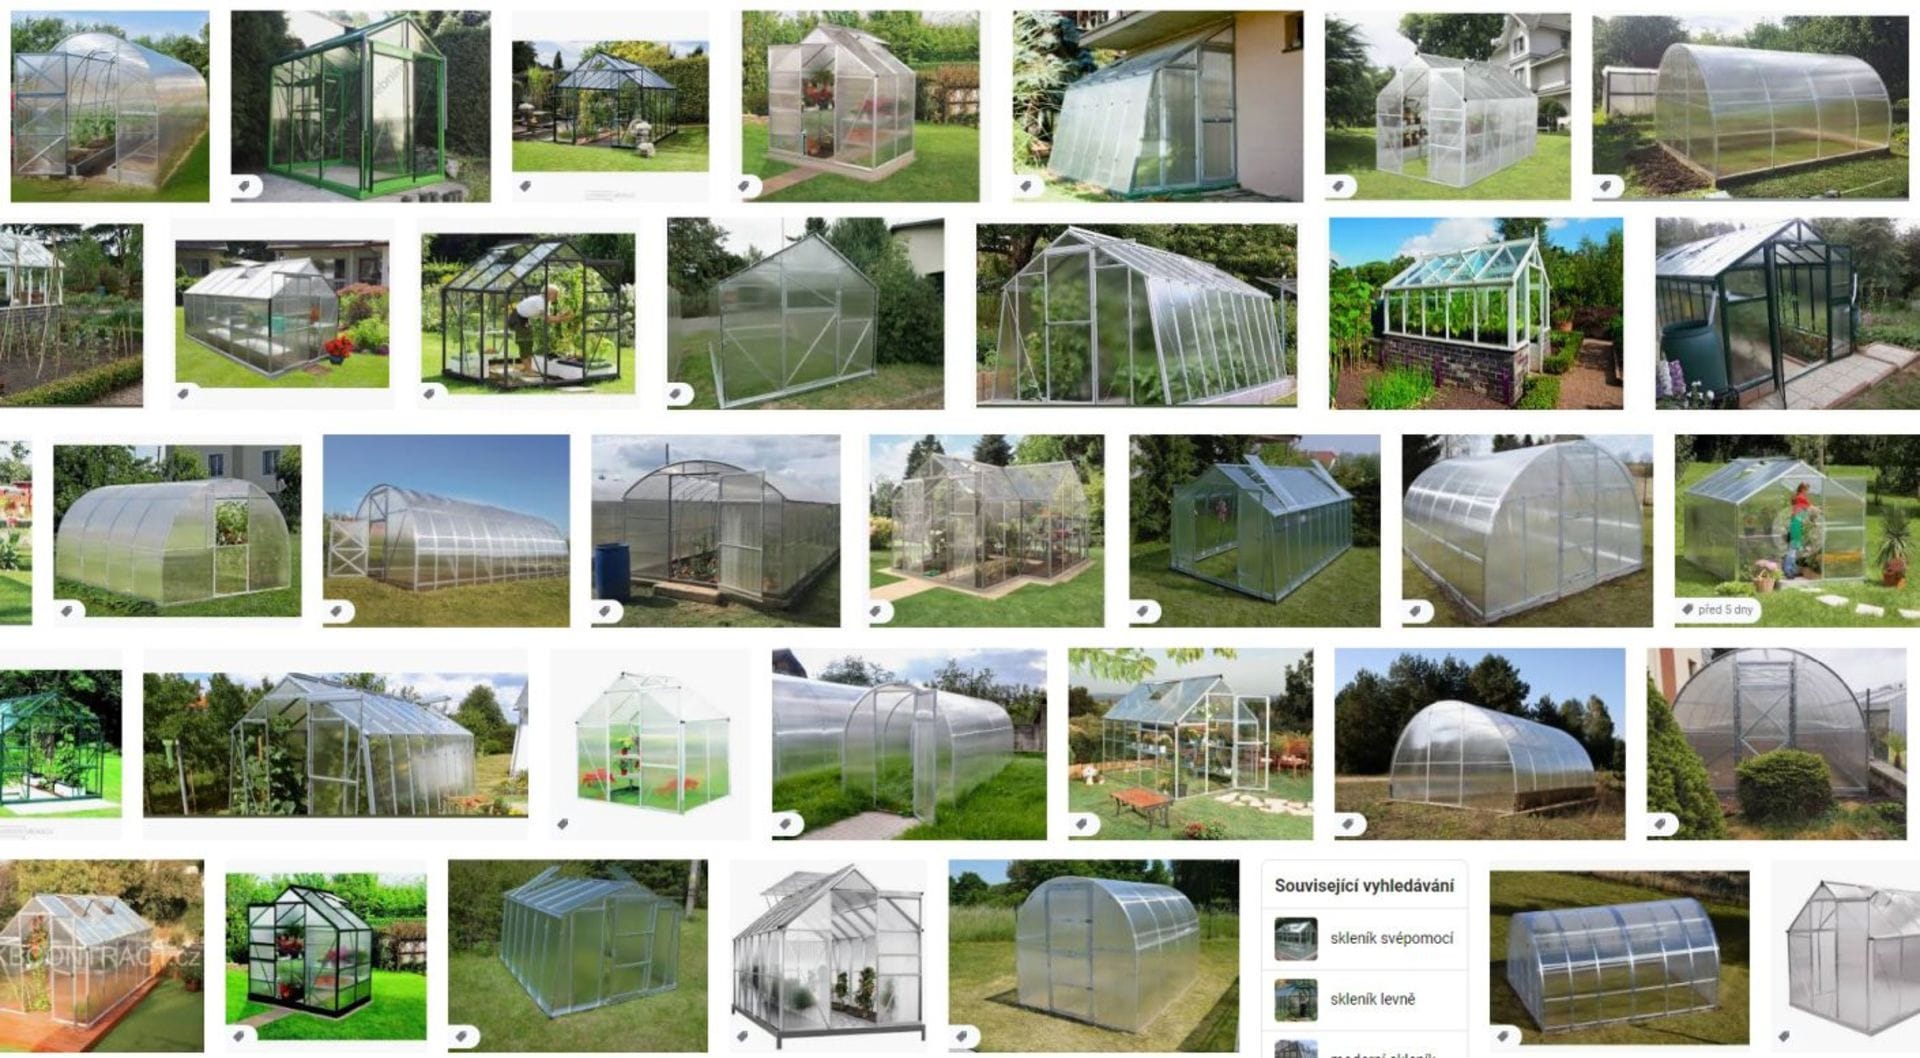
References for believable glass design are very important. Polycarbonate has a very specific appearance due to the highly reflective but irregular surface caused by its fine grooves. The creation of this material was not easy.
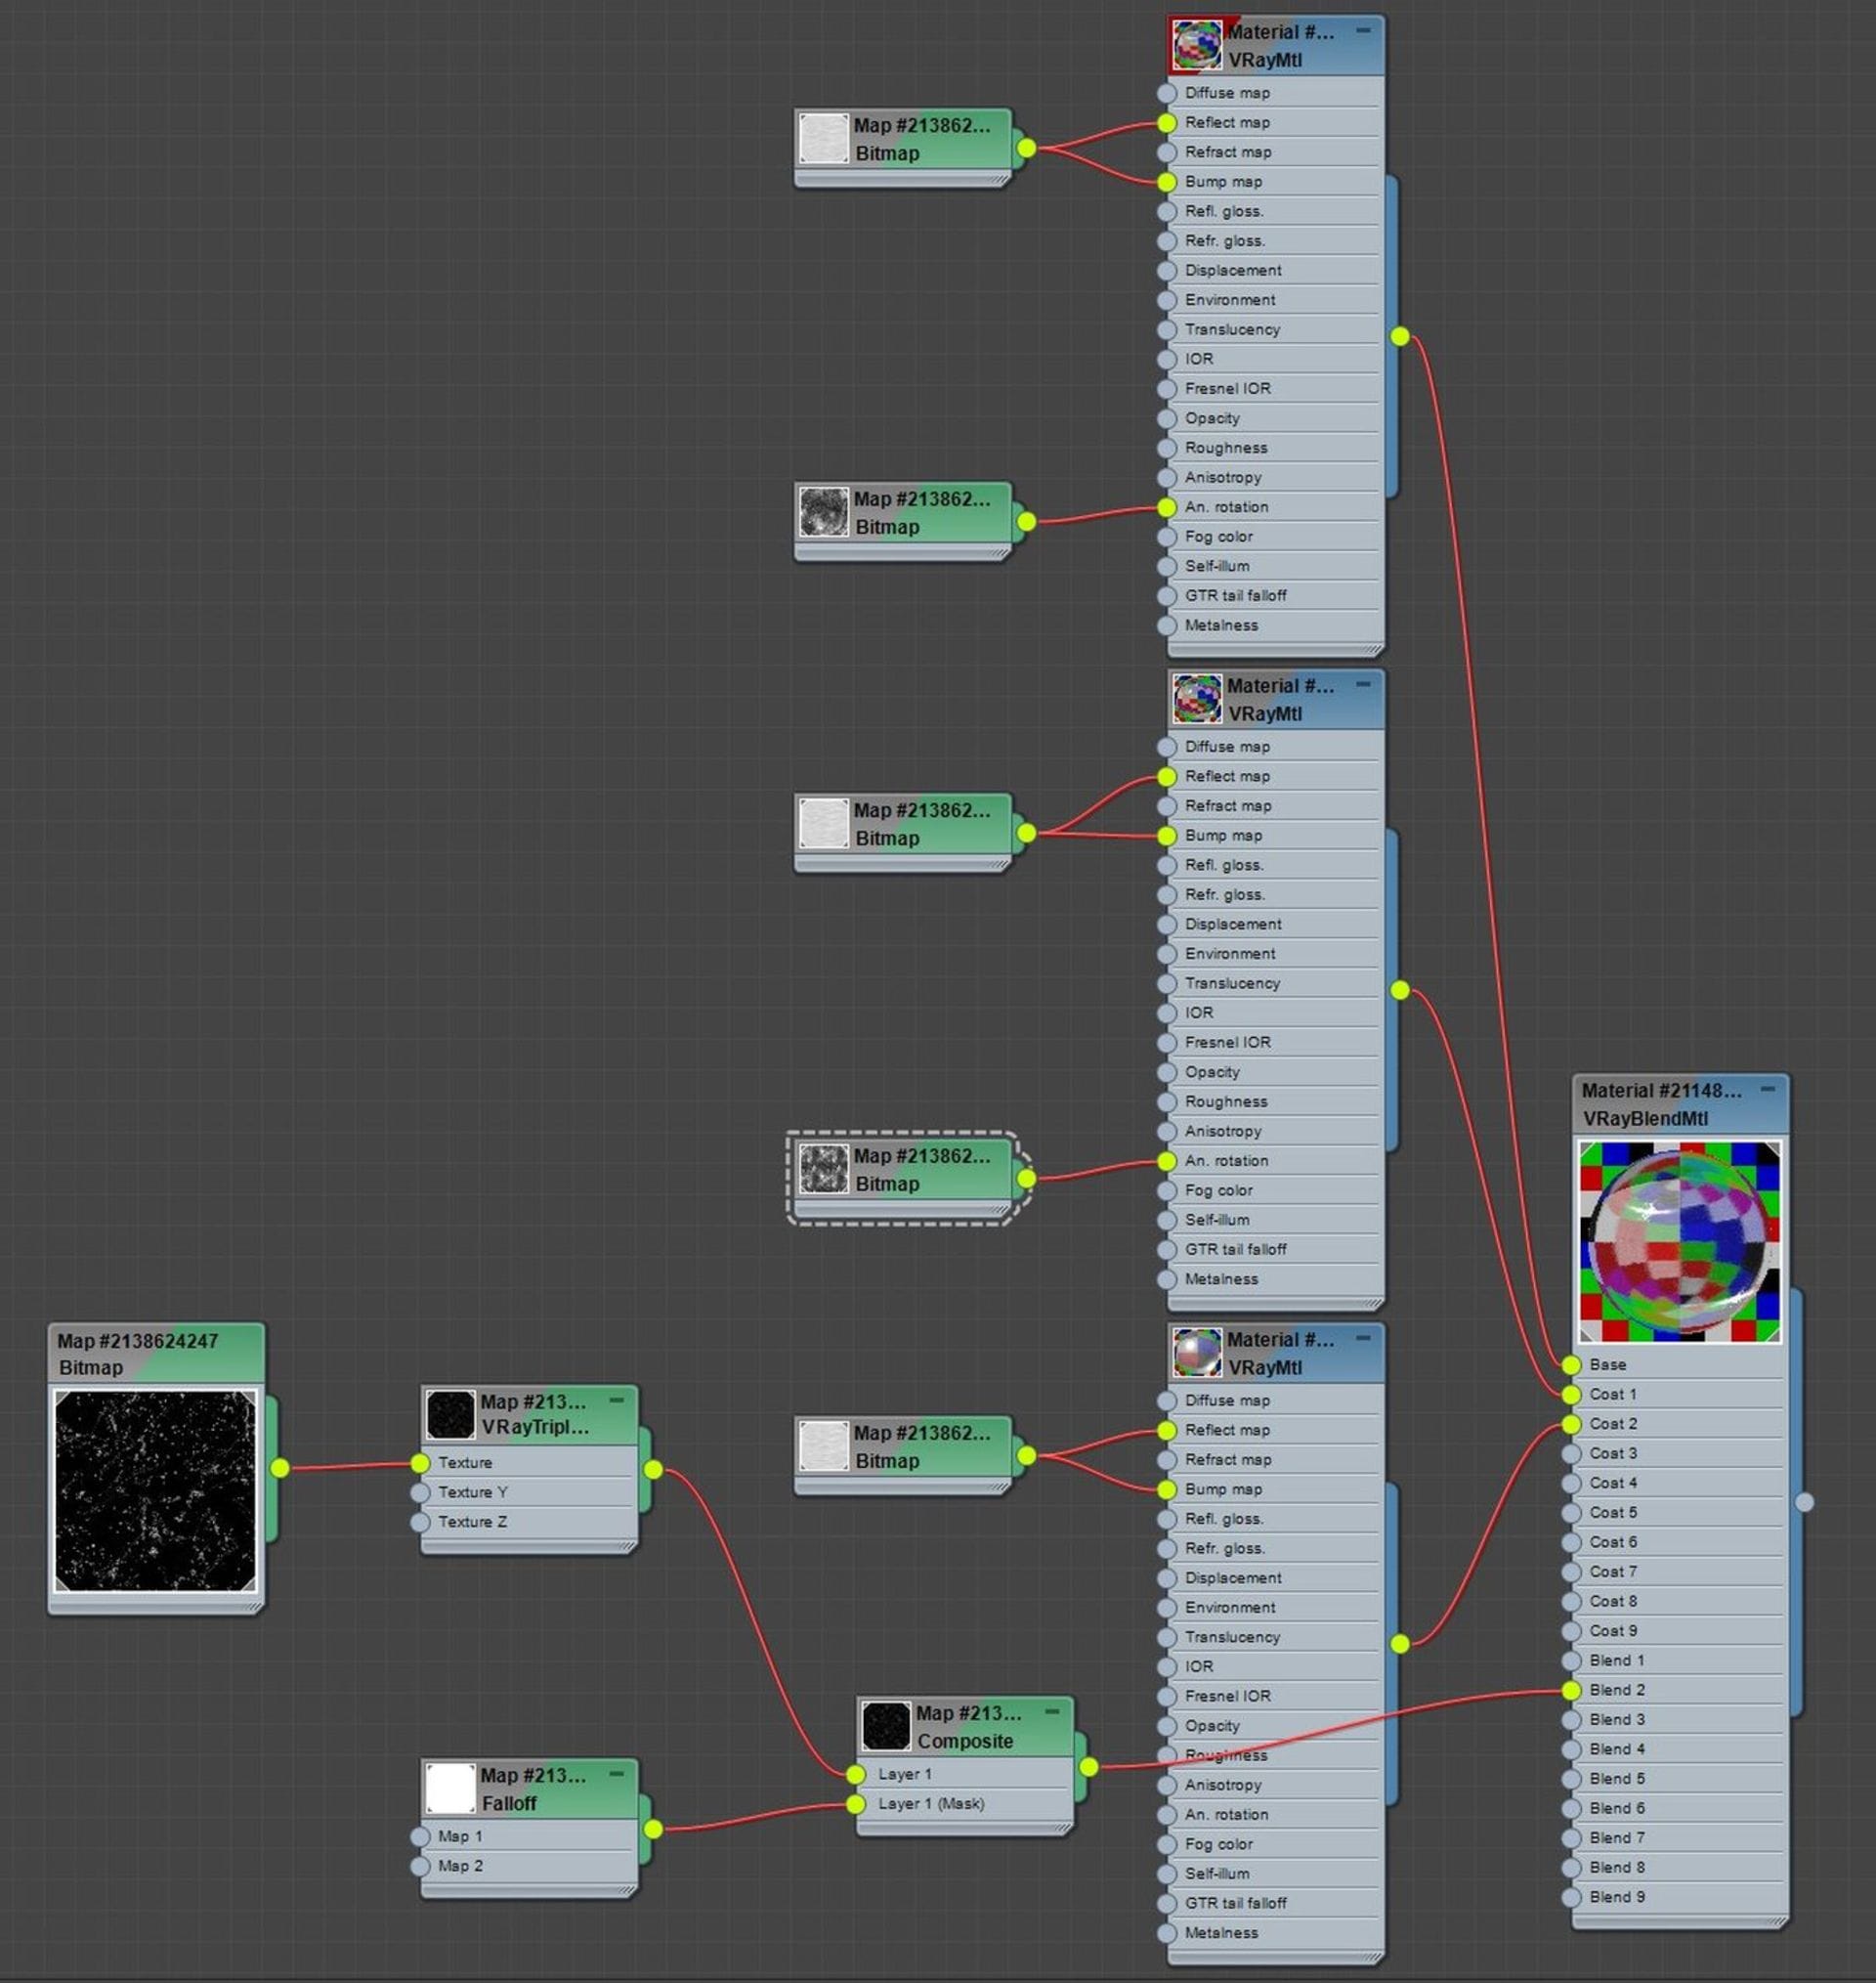
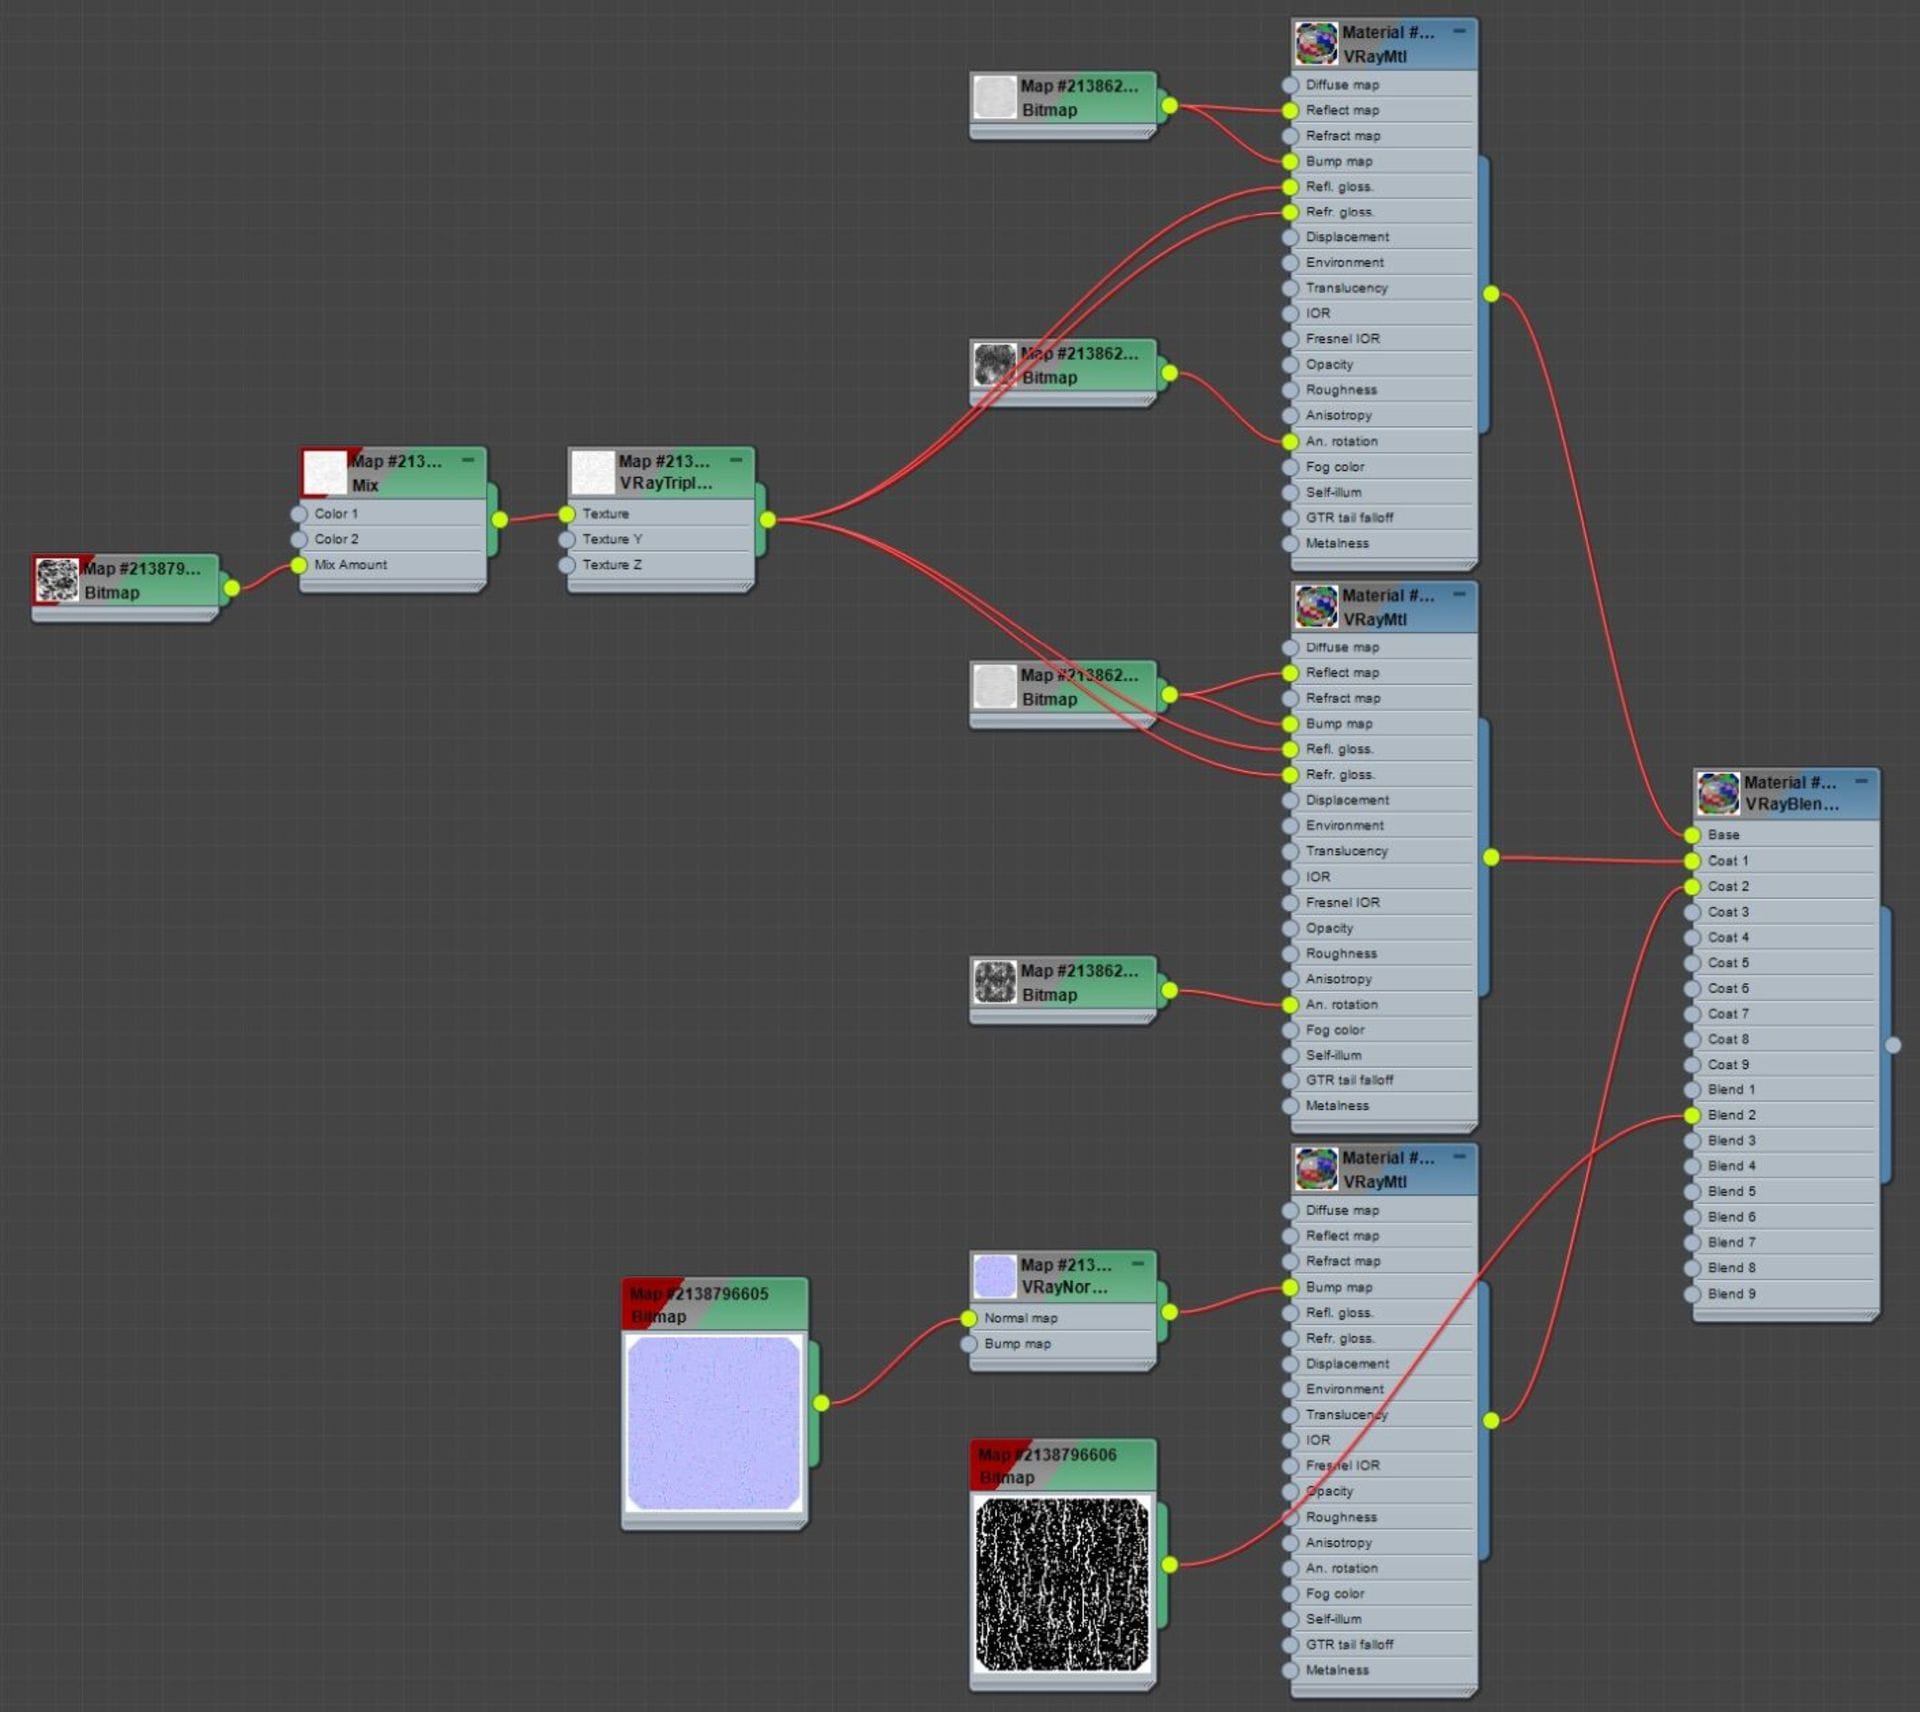
To achieve the right look, I used VRayBlend material with three V-Ray materials. The base material is the most transparent and reflective with a fine-line texture in the reflection and bump. But the most important thing is to use a black and white texture in Anisotropy Rotation and set Anisotropy to 0.7. This breaks an otherwise perfectly straight reflection from the sun.
The second V-Ray material is basically the same, only with a modified texture in Anisotropy Rotation for a more realistic look.
Finally, the third V-Ray material simulates dirt. It has only partial reflection and transparency, but I suppressed its intensity to get the desired effect. For this material, I used the dirt texture as a mask in VRayBlend, which I further masked using a Falloff map.
Thanks to the Perpendicular/Parallel, World Z-Axis and Mix Curve settings, the dirt appears mainly on the roof of the greenhouse and only partially on the sides. I tried to create the whole material procedurally due to quick changes and modifications, which is possible with the availability of many different maps in 3ds Max and V-Ray options. For the night scene, I added a layer of droplets to the material instead of dirt. The droplet textures are from Poliigon.
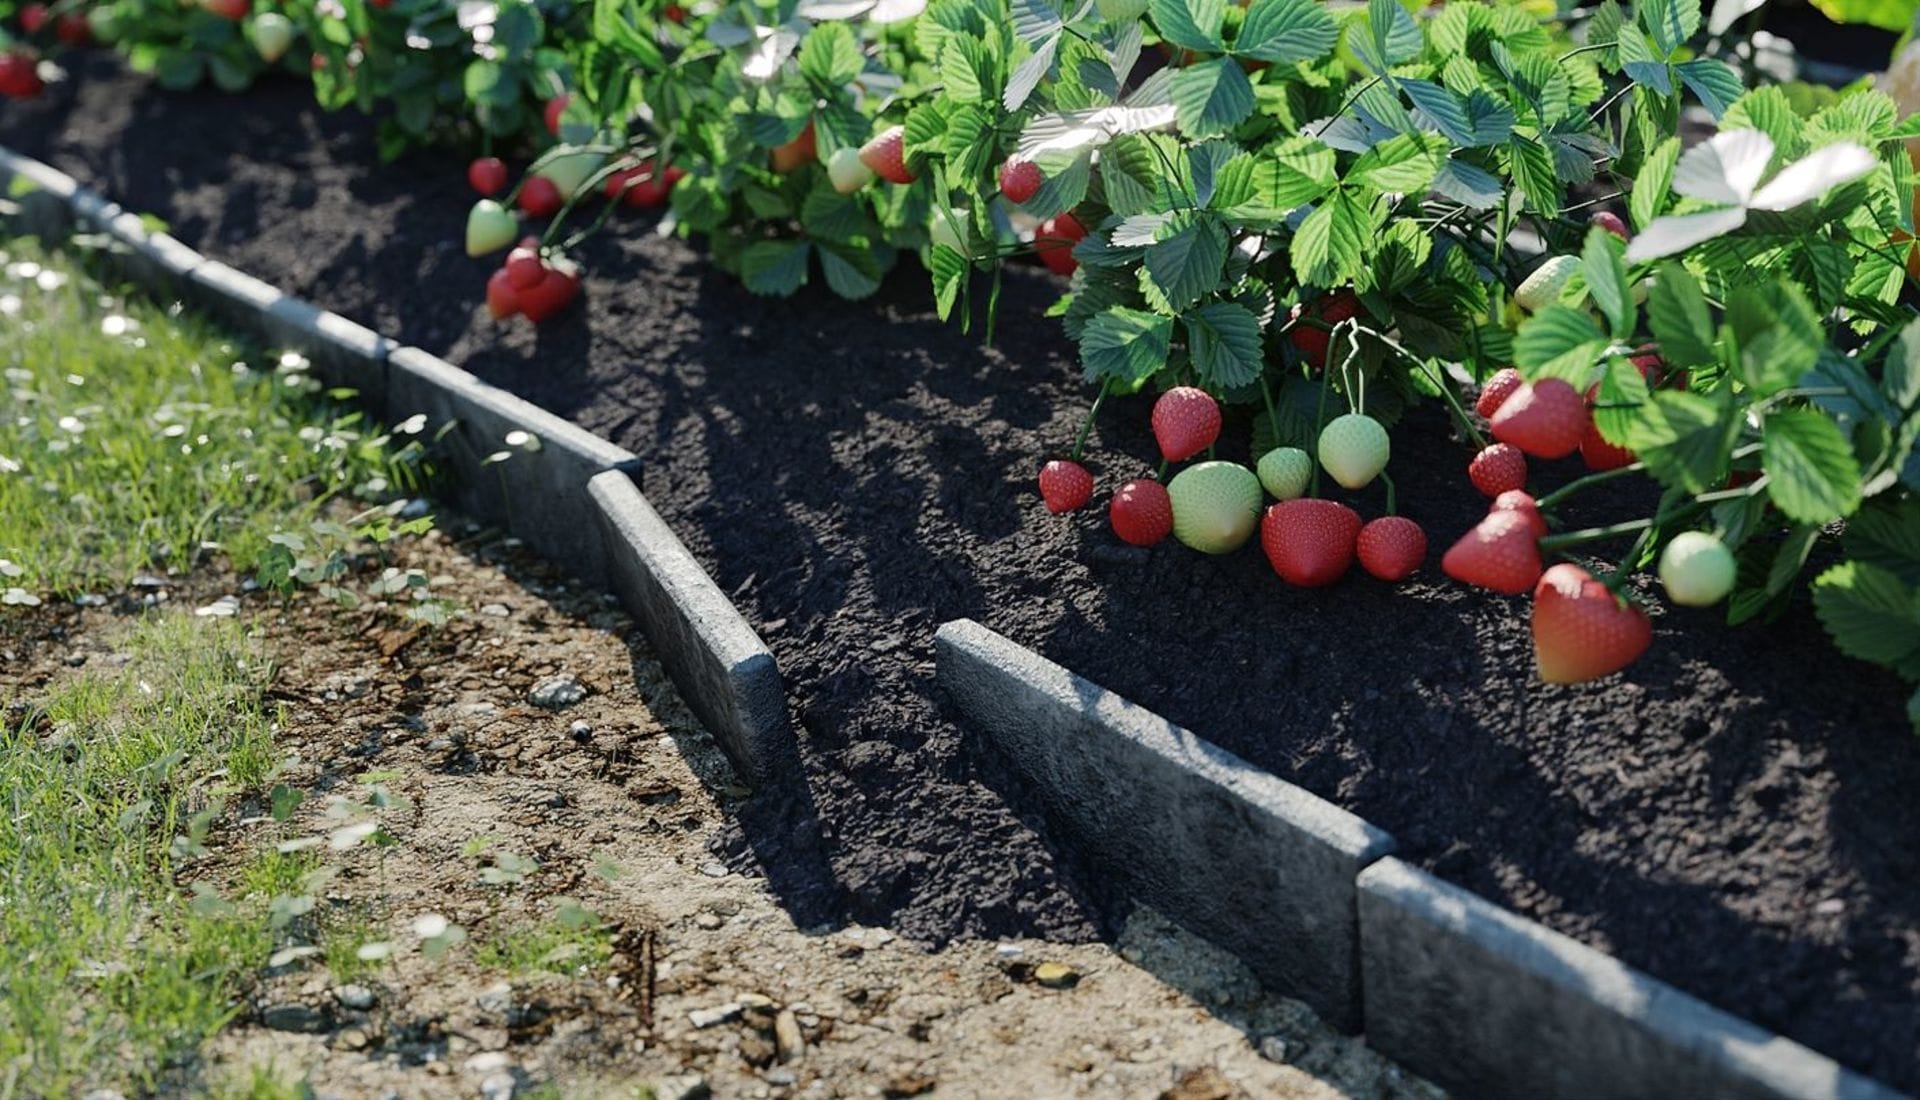
Further modeling involved the creation of flowerbeds. I wanted them to look worn out and old from people walking and working near them, so I decided that I would make the stone edge of the flowerbeds broken and crooked. At one point, I even made a gap with spilled soil. Modeling was simple, but this attention-to-detail adds to the credibility of the image.
Forest Pack
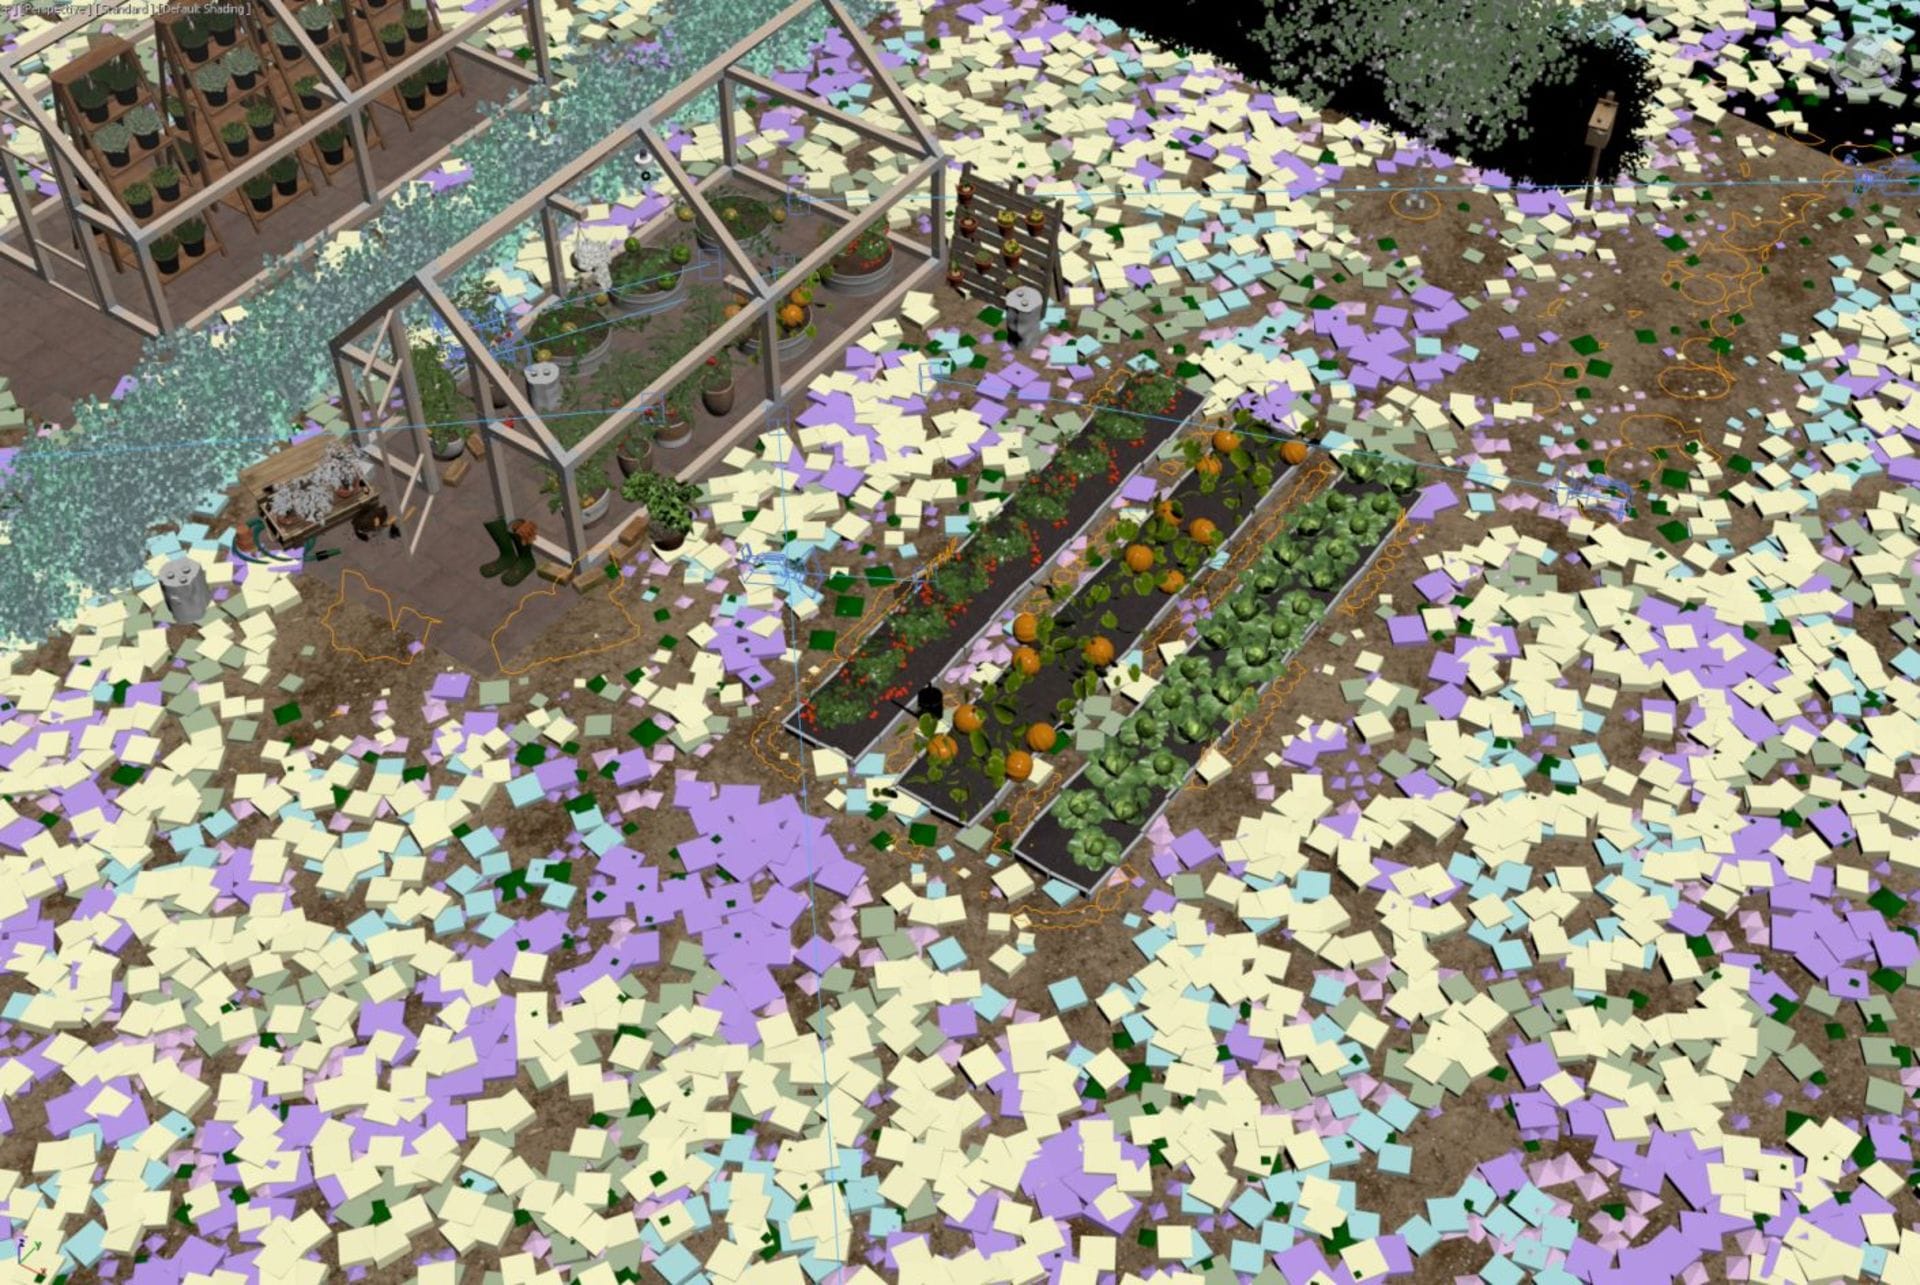
I used Forest Pack to distribute grass, tall grass and shrubs around the scene. The grass is divided into several Forest Pack objects. I wanted the paths to be trodden on where it makes sense — again, this adds a lot to the realism. For this purpose, I created the Surface object only where I wanted the grass to grow; I did not create polygons under the tiles of the greenhouse and under the flowerbeds. This was not enough, so I also drew areas in exclude mode to sketch where I wanted grass in smaller quantities or not at all: Around the flower beds, in several directions from the entrance of the greenhouse and to the right of the fence.
Setting Falloff Density and Scale to about 1 meter creates a nice transition around the places where I drew the surfaces. However, when using Density and Scale Falloff, this transition is also created around the edges of the underlying Surface object, so the grass grows less around the entire flower bed and greenhouse — and I didn't want that. Fortunately, Forest Pack offers an ability to adjust Falloff settings based on drawn surfaces or the added Surface background. So just use Falloff Affect for the drawn areas to 100% and for Surface set Falloff Affect for Density and Scale to 0%, and you're done.
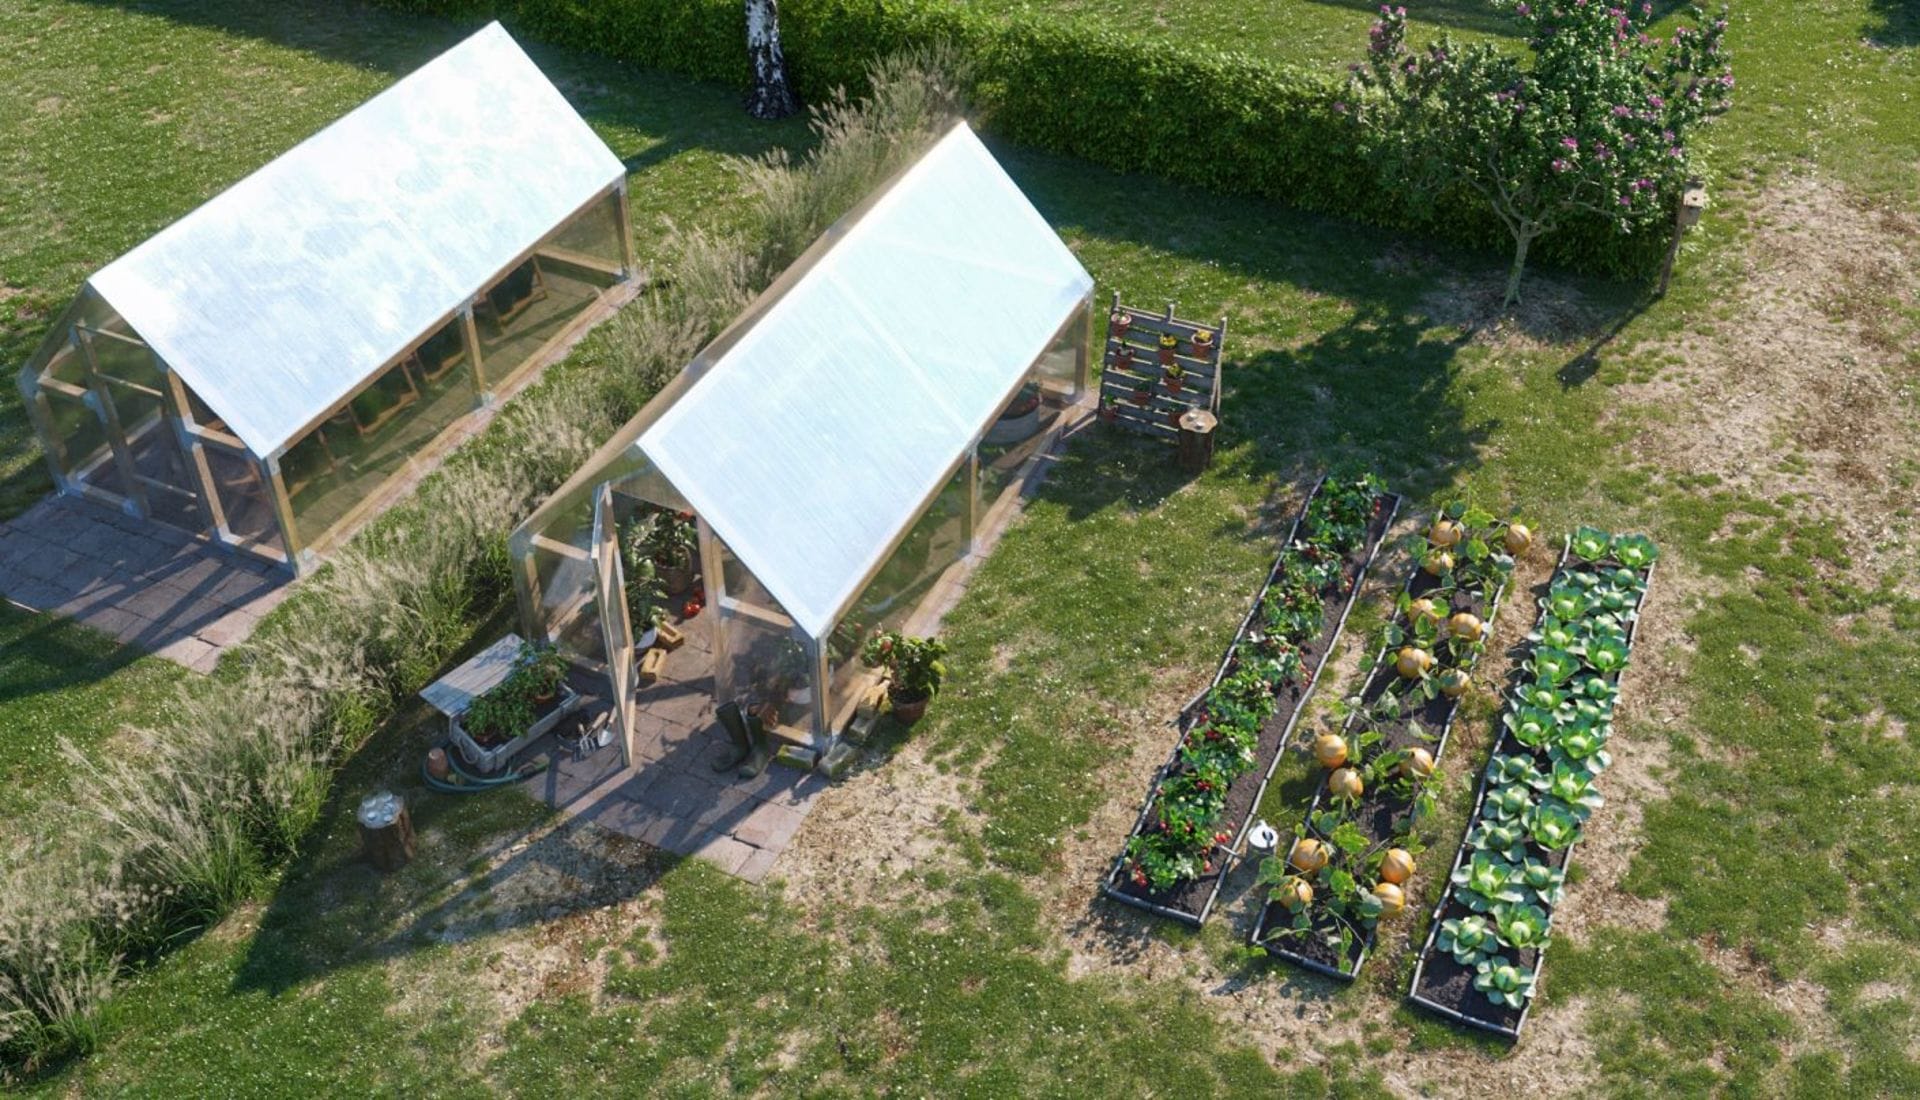
Dividing the grass into several Forest Pack objects is better than trying to do everything with one object. You have more control with distribution and settings separated for each object. One object can have lower grass, in the other it can be a little higher, daisies in the third, fallen leaves in another and so on.
You can also change the transformations for models in various ways or influence their distribution separately. In addition, the use of Clusters in the Distribution section is suitable for this purpose — this allows you to cluster similar models based on ColorID from the Geometry section. It is possible to create an empty model that is set to Disabled; however, it will also be included in the clustering, creating empty spaces in the scene distribution. Depending on the Cluster settings, it’s possible to effectively create small spaces that don’t contain any objects and therefore break up possible repetitive patterns of different Forest Pack objects.
The result is a variety of grass that looks very realistic and believable, because certain objects cluster together in different places but at the same time do not create any uniform patterns.
Lighting
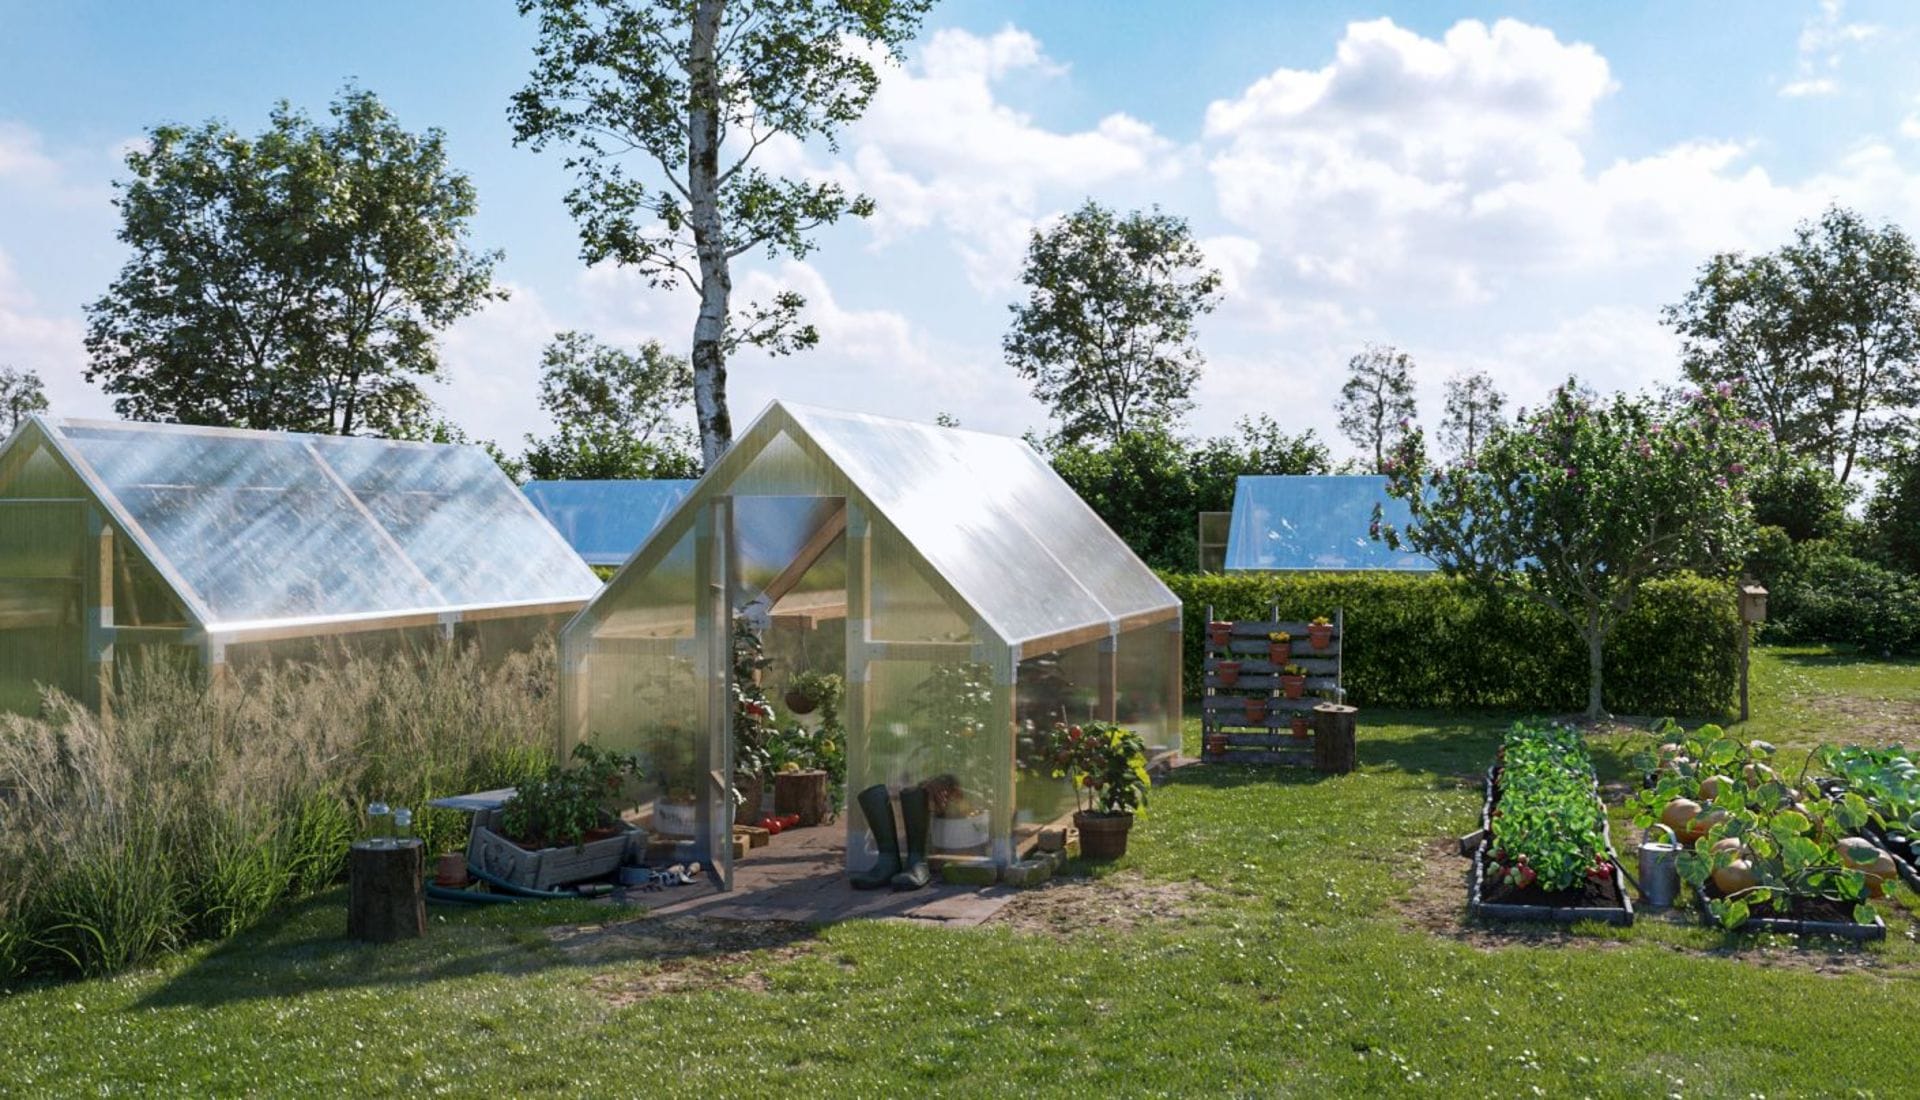
Lighting the day scene was very simple: I used two Dome lights. The first light illuminates the scene but it is set to Invisible so you can’t see it in the background. This is because the map used from HDRI Haven illuminated the scene nicely, but the trees in the background didn’t look quite right. The second Dome light, on the other hand, had the Affect diffuse, Specular, and Reflections options unchecked, so it doesn’t affect the scene, but it is visible in the background as the sky because it doesn’t have an Invisible option selected.
V-Ray and camera settings
To shoot the scene, I used a Physical Camera from 3ds Max. For the shot inside the greenhouse I used a fisheye effect. This is very simple to set in V-Ray, but for such an exact effect it’s necessary to change several parameters. In the camera I set the Focal Length to 35 mm and in the V-Ray settings I changed the type of the camera to Fish eye, unchecked the Fish eye auto-fit box, set the Fish eye dist to 1.1, and the Fish eye curve to 0.83.
With V-Ray 5, you can also use VRayPhysicalCamera to change parameters without affecting the brightness of the image with the newly added EV parameter. Of course, it is necessary to pay attention to the characteristics of real cameras and stay within their limits; however, the parameter saves time when setting up.
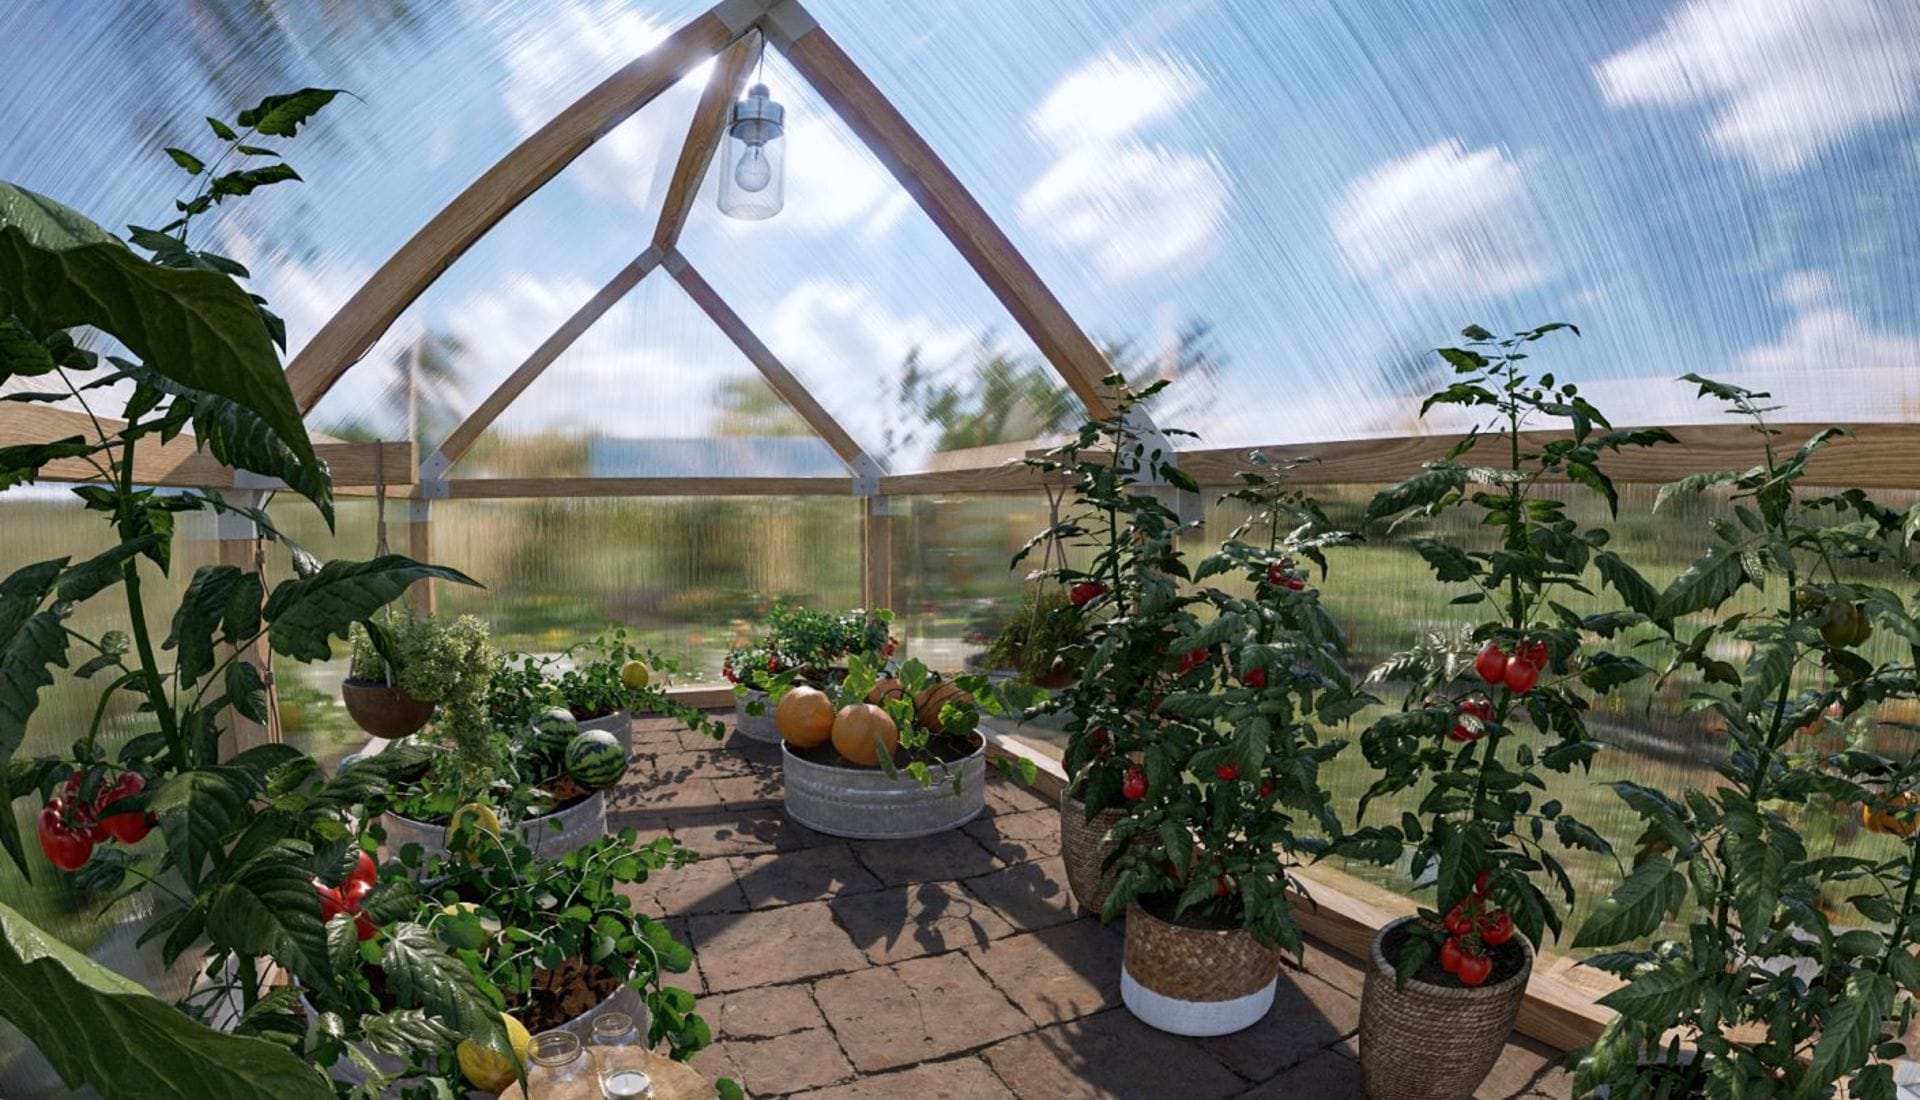
I left V-Ray more or less in the basic settings. I used BF + LC and as a type for LC, I set Hash map, which is the best quality. No other type is available with V-Ray 5. I calculated the image via a progressive image sampler with the Noise Threshold setting at 0.004.
Night scene and tyFlow
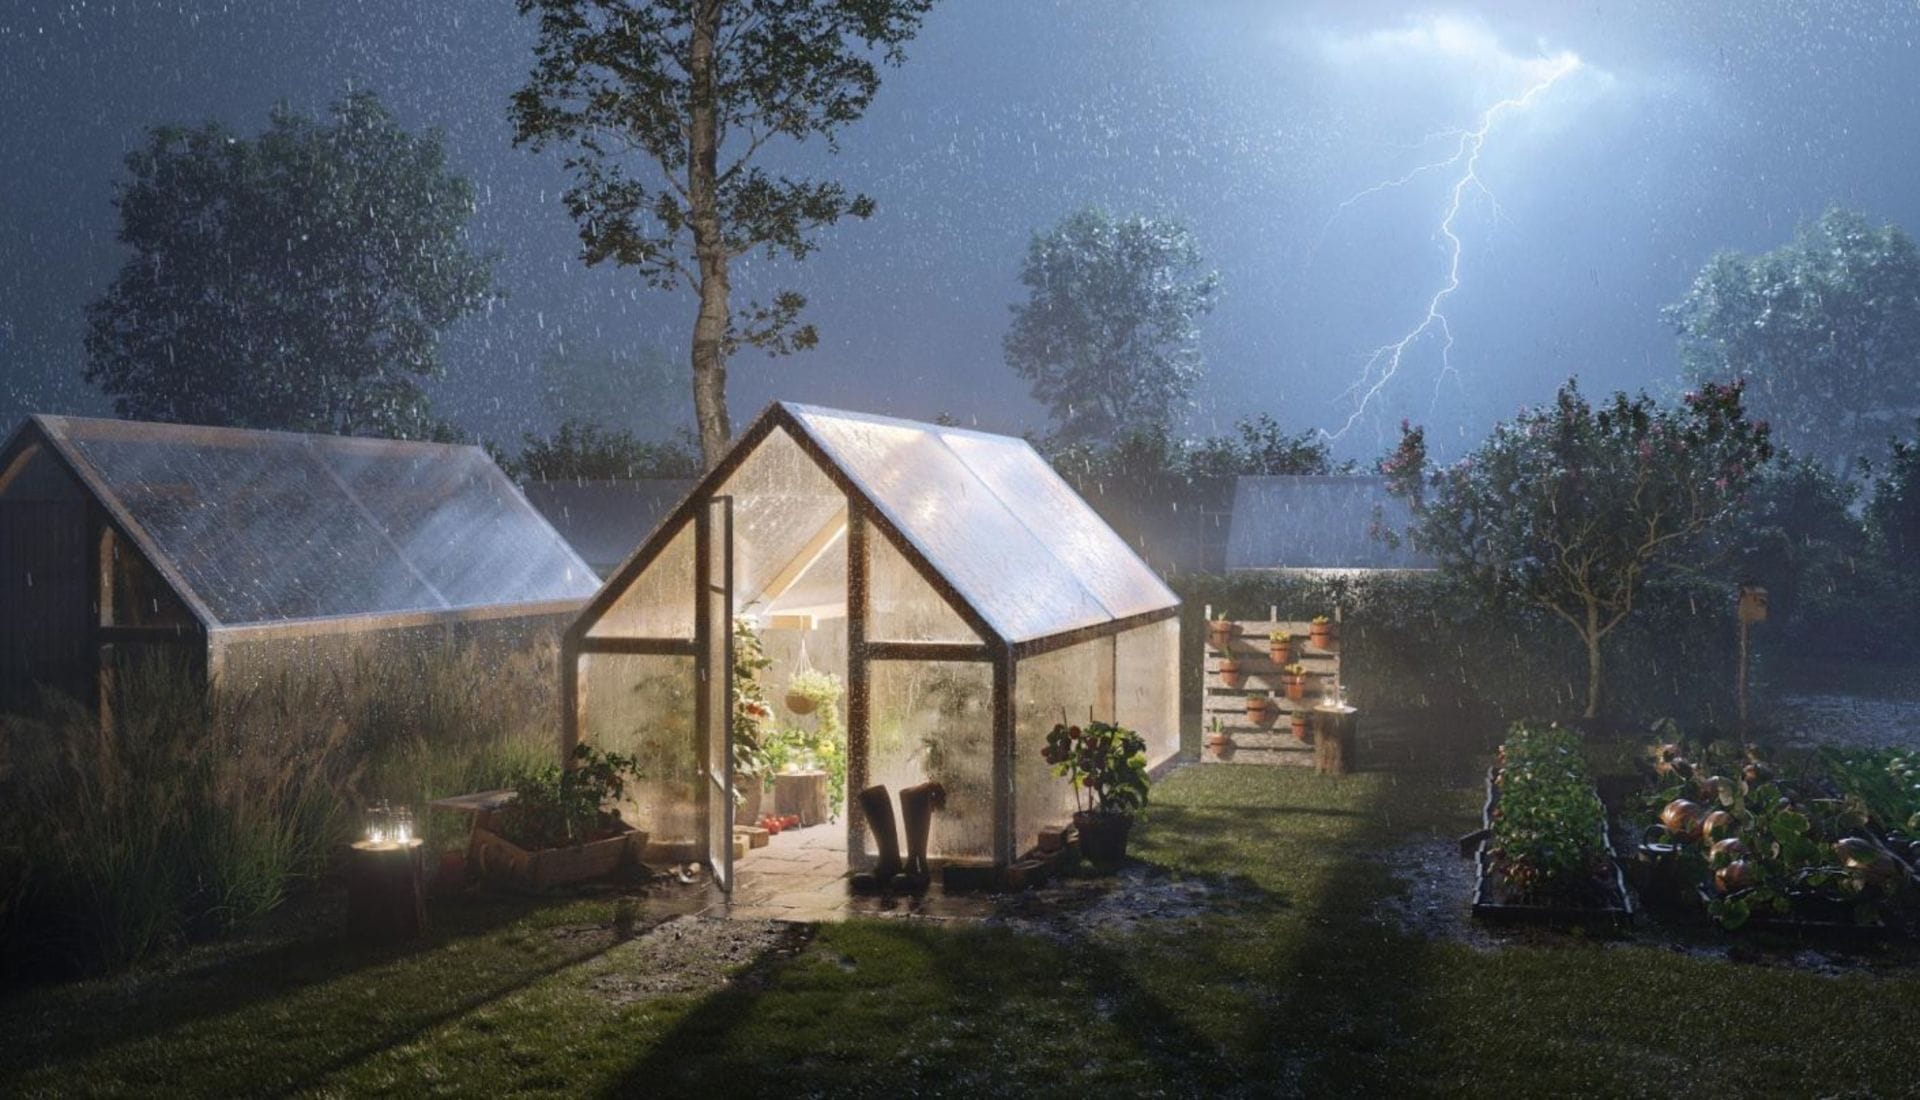
I liked the day scene and I was inspired to do a night version as well. I lit the inside of the greenhouse and it looked very good but illumination of the surroundings was missing. I didn't want to use light from the moon; instead I was looking for intense cold light from one place in order to contrast the warm light from the greenhouse. So I decided on lightning and rain.
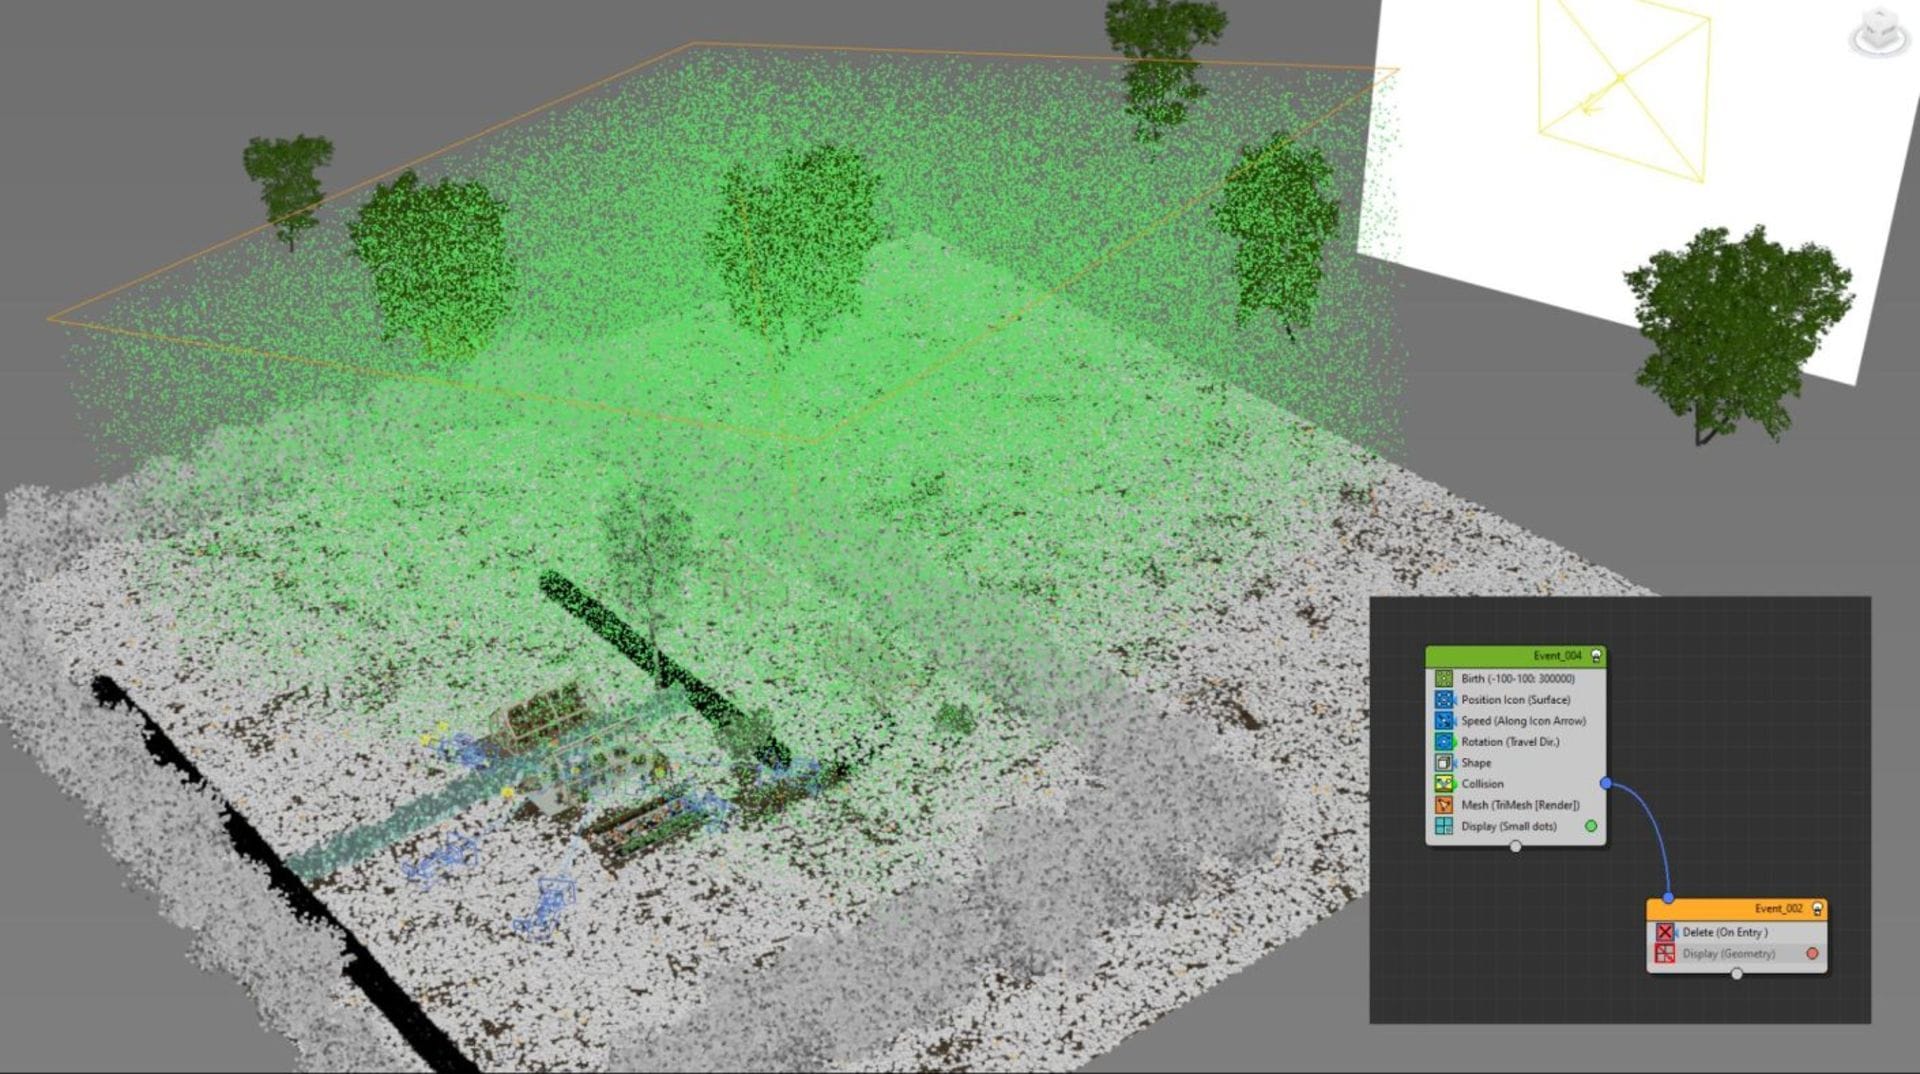
For the rain, I used tyFlow, which is very fast and works well with V-Ray CPU. The flow you can see in the picture is really simple: 300,000 particles are created in frame, -100 at the location of the highlighted object, which is placed slightly obliquely to cover the main space of the scene. In frame 0, the whole scene up to the ground is covered with rain. At the same time, I added the ground and greenhouses as collision objects that erase particles after they touch so there is no rain inside.
I also wanted to add fog with the rain, so I used VRayEnvironmentFog and a separate Atmospheric Render Element. I left the fog completely without textures, because processing textures would take a long time in such a complicated scene. I later edited the fog in Photoshop to display it only where it makes sense.
Lighting the night scene
I illuminated the night scene with several lights. There is a spherical light in the greenhouse and on all the candles. But the main ones are three lights, as you can see in the picture. Light one simulates only the reflection of lightning on the grass; it does not have a diffuse component allowed, only reflection. This light has the Directional parameter set to 0.95 and is aimed from the flash at the grass in front of the camera. Thanks to this setting, the grass is illuminated by a blue reflection, but only at a low angle, and the light no longer affects the grass on the left side of the image.
Light two illuminates only the volumetric fog and light three is big and illuminates the rain. The use of real-time IPR with the help of Debug Shading helped a lot; when you always select one light and VFB will show you the illumination of only this one light, that you can then quickly set in real-time.
In V-Ray 5, I verified that the overall lighting settings are much easier and faster thanks to Light Mix, which works really well. After setting the lights in the Light Mix, you can transfer the entire setting either directly to the lights or to the layers, saving a lot of work.
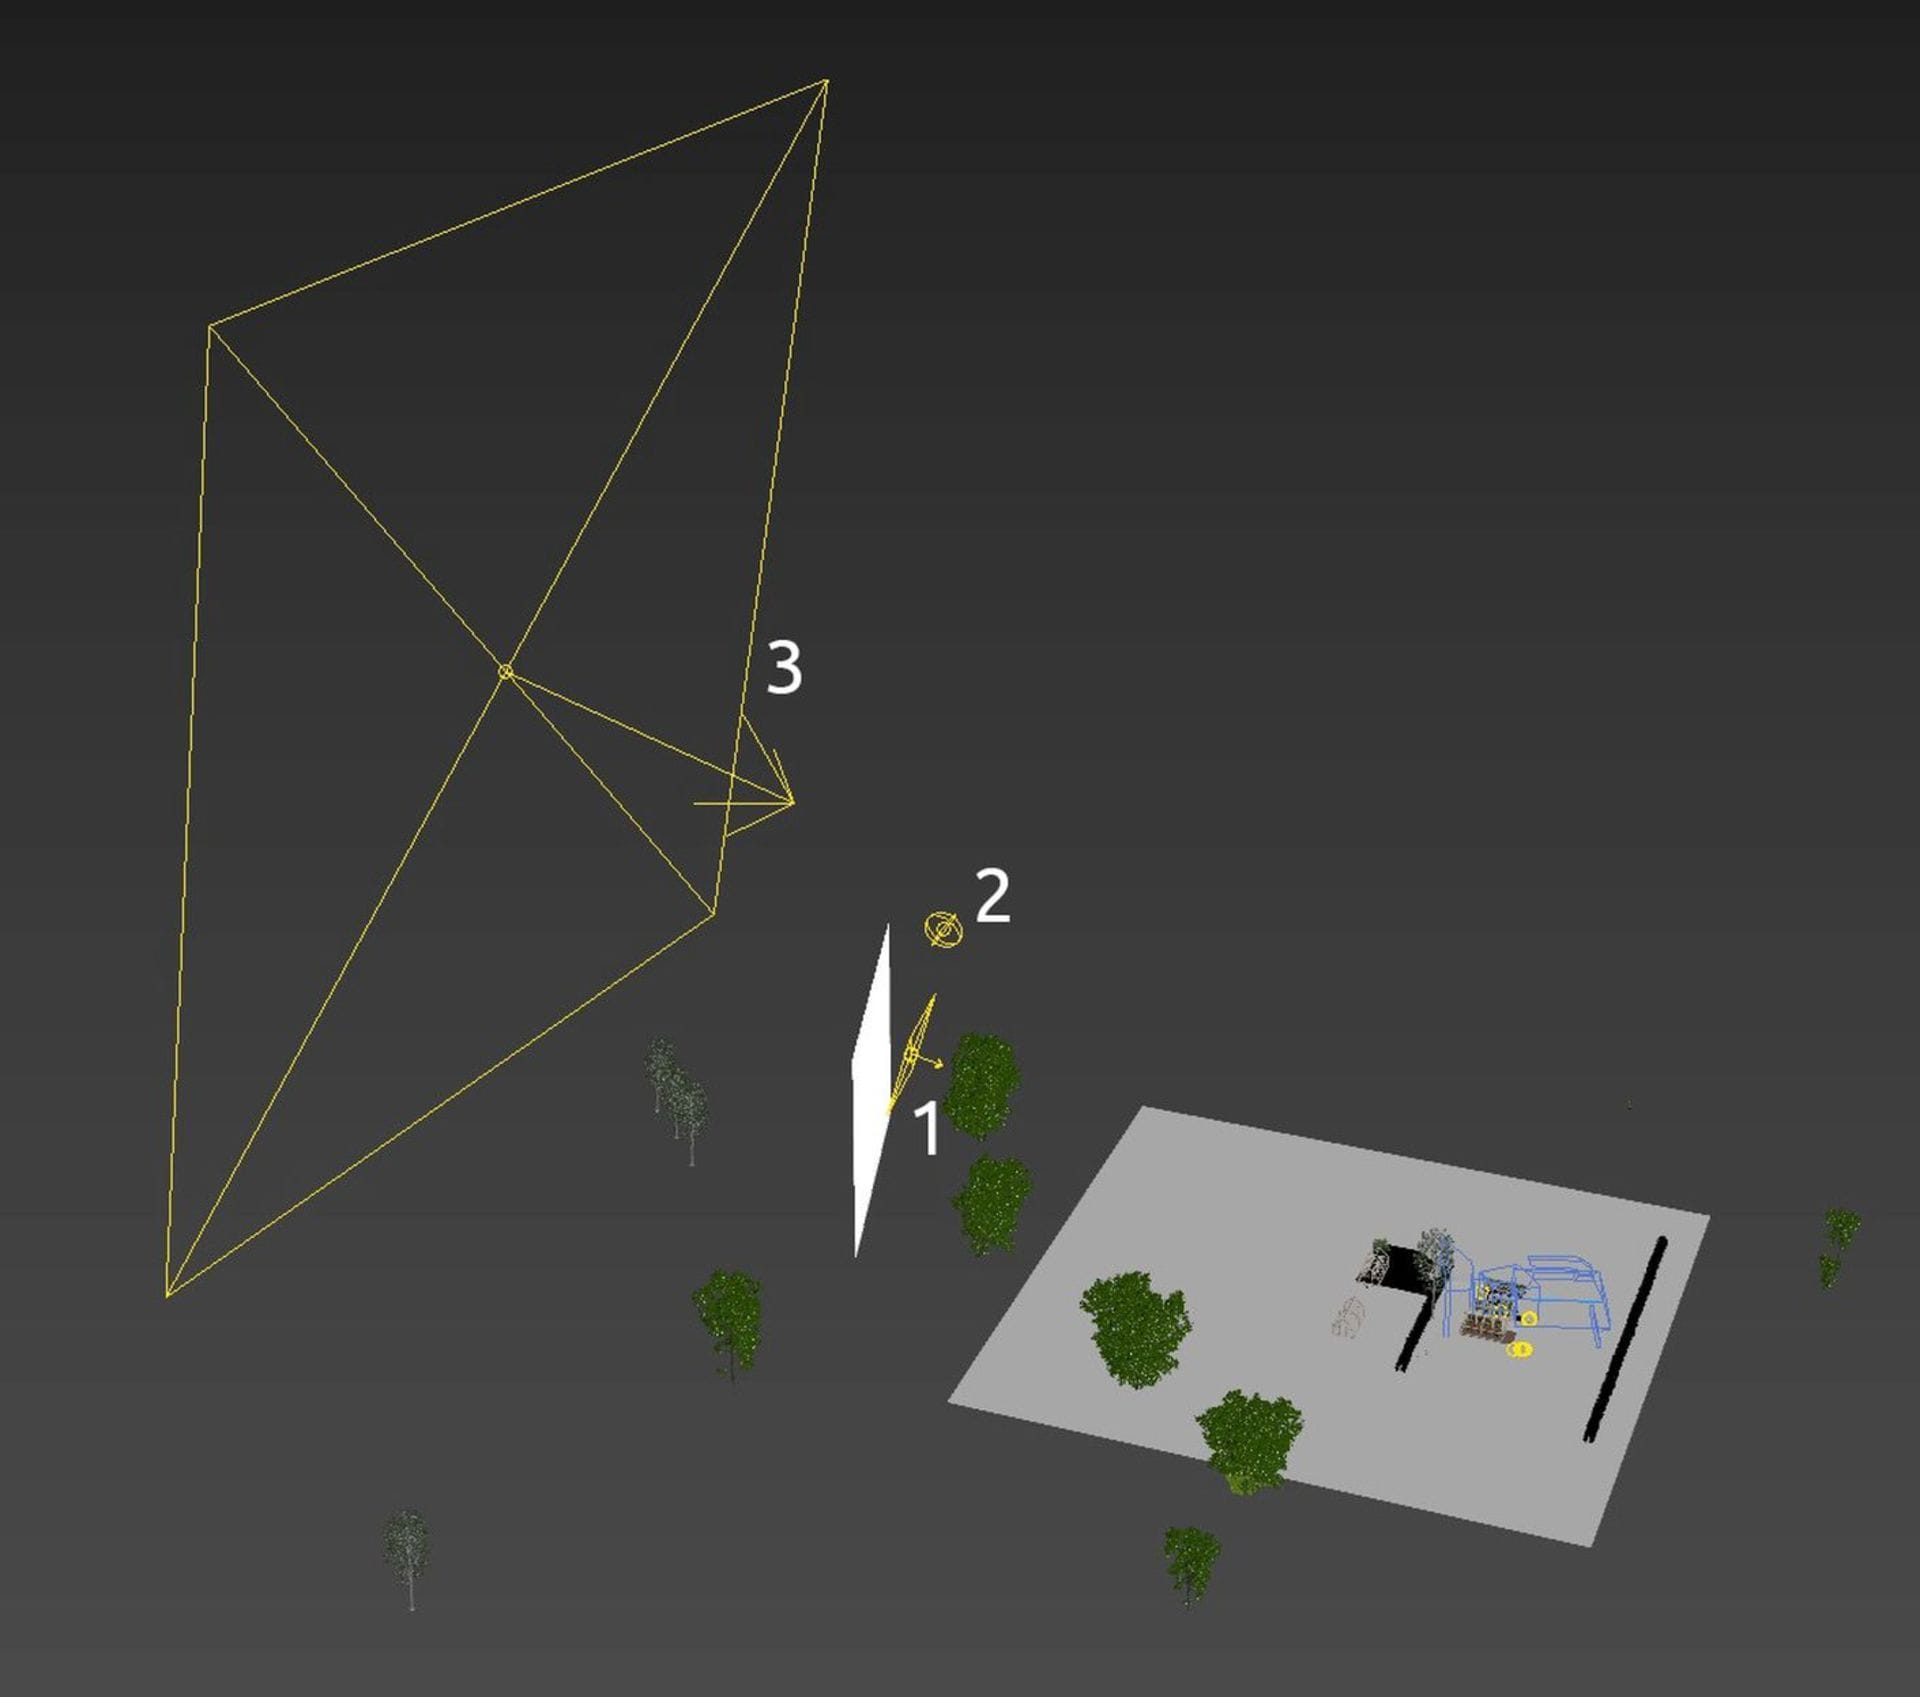
The white rectangle in the image is a mapped texture of lightning. The object is hidden from the camera in the scene because in post-production I got higher quality from the texture of the flash and I could incorporate it better into the scene. However, the glow of the flash texture is reflected in the raindrops and in the greenhouse, where it is partially reflected, so it is important to have the texture in 3D space too.
Post-production
Post-production was fun. From V-Ray, I used the standard Beauty pass and the Atmospheric pass for fog. In the V-Ray VFB, I suppressed bright spots with Highlight Burn and used LUTs from the 3DCollective collection. In V-Ray 5, everything is simpler, especially with much more control over Filmic tonemapping and layer options, as I've already verified in the tests.
In Photoshop, I also used the Camera Raw filter, and finished a few details with curves, levels, sharpening, hue and saturation, and also LUT. You can see the progress in the video.

