We’ve improved the way that IPR works in V-Ray Next for Maya to help you dramatically speed up your workflow. Here’s everything you need to know.
Introduction
Interactive rendering has become a critical part of people’s workflow. Combined with V-Ray GPU, being able to get instant feedback as you make changes can drastically speed up your workflow and allow you to iterate faster. This process will enable you to try more options as well as see micro changes on the fly and get the best result.
In V-Ray Next for Maya, we have made some significant changes to the way that IPR works with V-Ray in several ways that will allow you to have a workflow where you are continually rendering. These changes are noticeable in four main areas: faster overall IPR, AI denoising, IPR playblast and Debug Shading.
The new interface
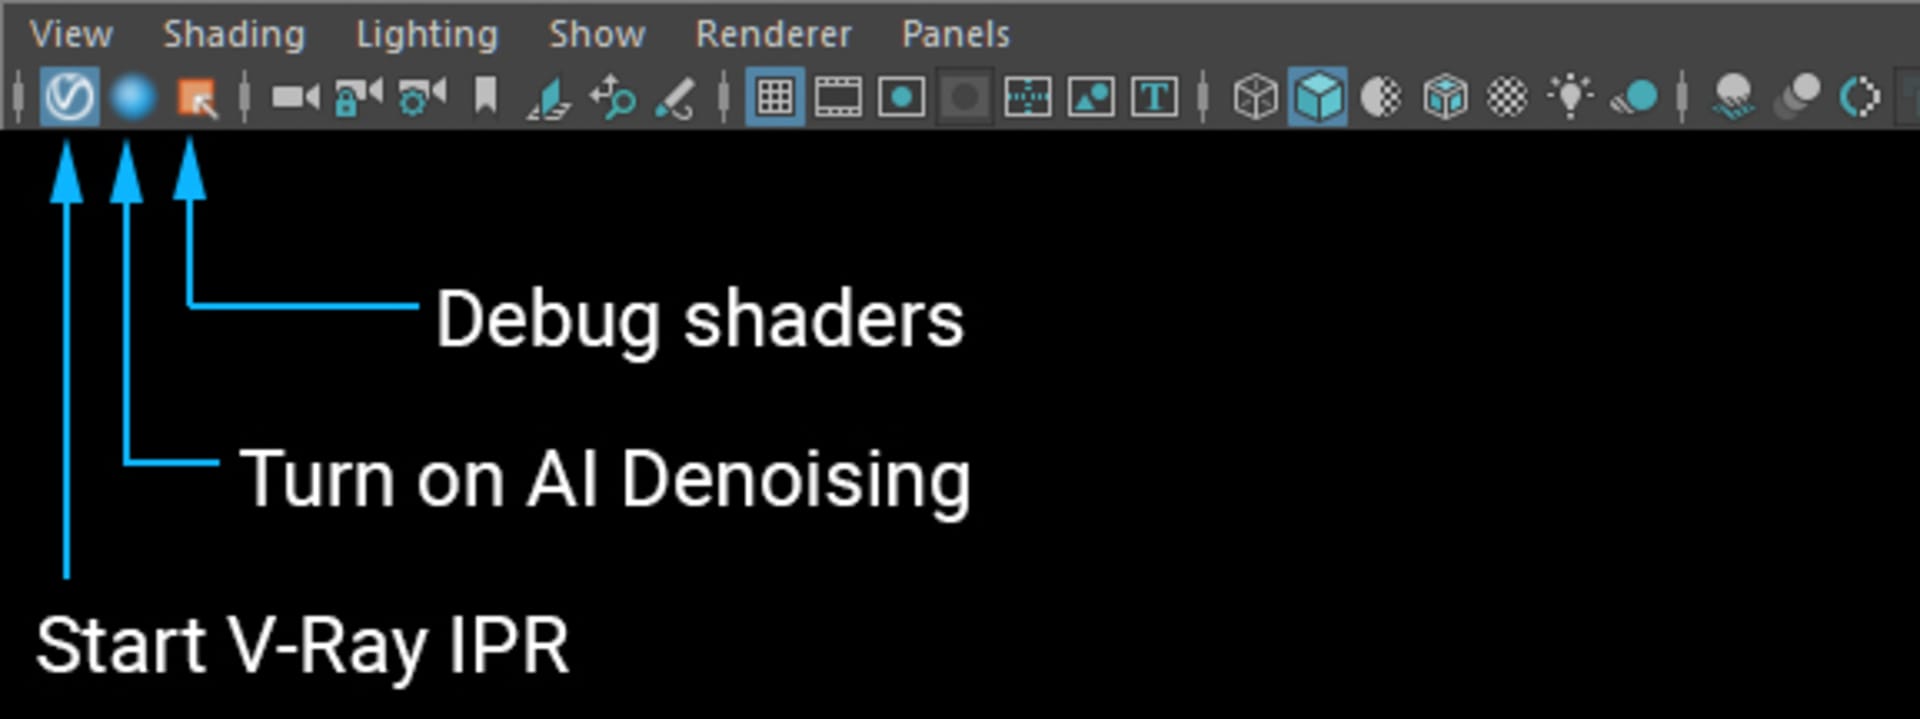
The first thing you might notice is the new interface that is part of the viewport. It is now a one-click process to start V-Ray IPR right inside the viewport. You also have a button to start the AI Denoiser and a button to enable the Debug Shading with its modes in a right-click menu.
All the changes made to V-Ray Next for Maya in the IPR workflow will allow artists to start rendering, working and making choices from the moment Maya is opened.
Chris Nichols, Chaos Group
Overall faster IPR
The changes to V-Ray Next in the IPR are not just with the interface. Under the hood, IPR mode is almost completely re-written. The first thing you will notice when you click on the IPR button is that the time between clicking the button and the time that the first pixels start to render has significantly reduced; this allows you to begin to see your renders much faster.
Additionally, in the past, IPR would update the image once you were finished making changes to the scene by releasing the mouse button. Now, it will instantly and continuously update. For example, if you moved your camera before, it wasn't updated in the render until you stopped moving your camera and let go of the mouse. With V-Ray Next, it will now continually update your image giving you a new level of feedback, and it will resolve that render once you let go.
You can also now change cameras within the IPR viewport — you don't need to restart V-Ray IPR. This technique allows you to see the effects while they are happening, and get a better render as you let go of the mouse. The same also works for any other parameters, such as changing colors, moving objects or lights, and so on.
AI denoising
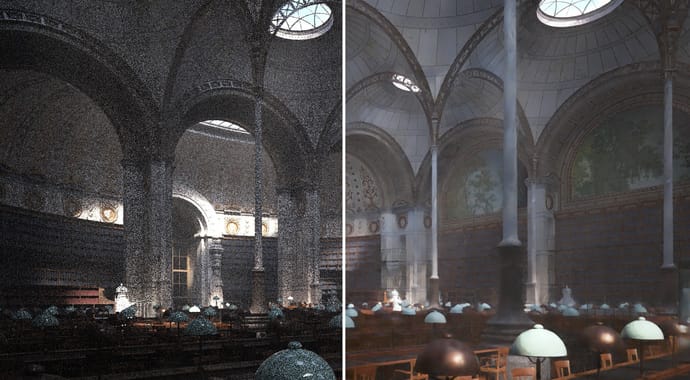
We have discussed the benefits of AI denoising in the past. As we have improved and sped up the general IPR workflow, we can now use our AI Denoiser during IPR in the viewport to provide a smoother rendering as part of that workflow. What this means is that you can use V-Ray right in the viewport and constantly render while you are iterating your scene. As such, V-Ray can now become a replacement for your viewport — at all times.
IPR playblast
At this point, based on these improvements, you should be able to think about V-Ray as something that is continuously rendering in the viewport. This workflow can now extend to playblasting. So, this means that, after you have made some changes, you should be able to make a V-Ray rendered playblast and see how your implemented changes affect the whole animation. While it will not replace your final production rendering, it will allow you to look at the changes quickly — without having to wait overnight for your scene to render on the render farm.
In this section, we will show how to do a V-Ray playblast, as our attempt to do this in Maya was unsuccessful.
The first thing to know is that you can playblast in V-Ray CPU or GPU. You can also use the AI Denoiser if you want to. And you can change the quality from the IPR tab in the render settings:
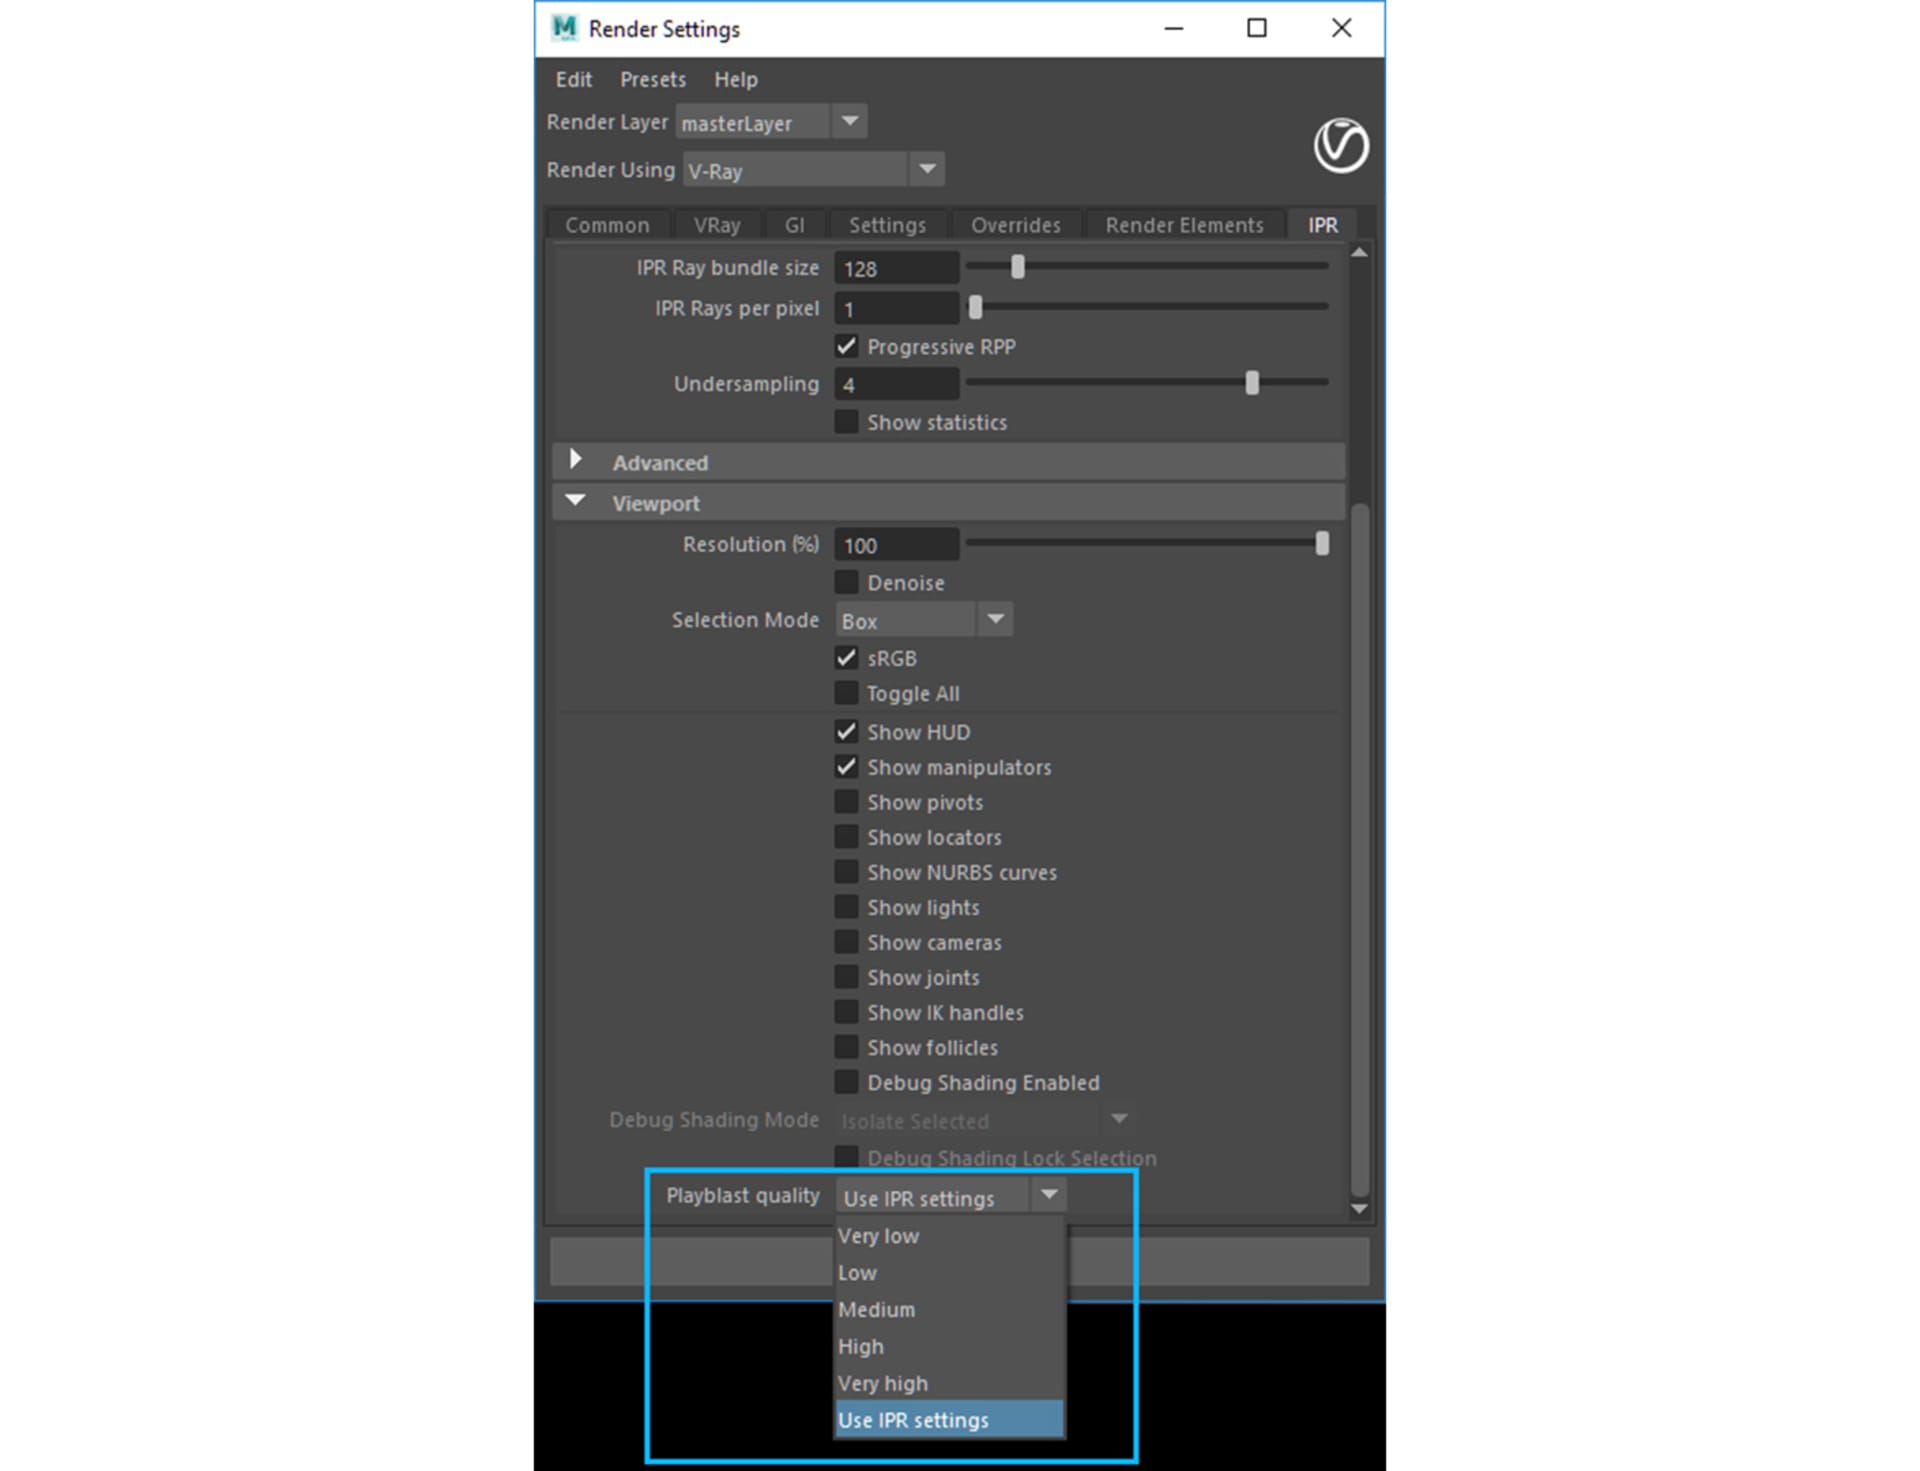
From there, you can select different preset attributes, or directly set your own by selecting “Use IPR settings.” This technique will allow you to set the quality you want in the IPR dialog. Once you’ve done that, you can make a playblast the same way you always have by selecting Playblast from the Playback menu, and it will render it with V-Ray.
This video outlines the process:
Debug Shading
Last, but certainly not least, one of the best new features that we've added to the IPR is Debug Shading. To activate it, click on the icon, then right-click to use its different modes.
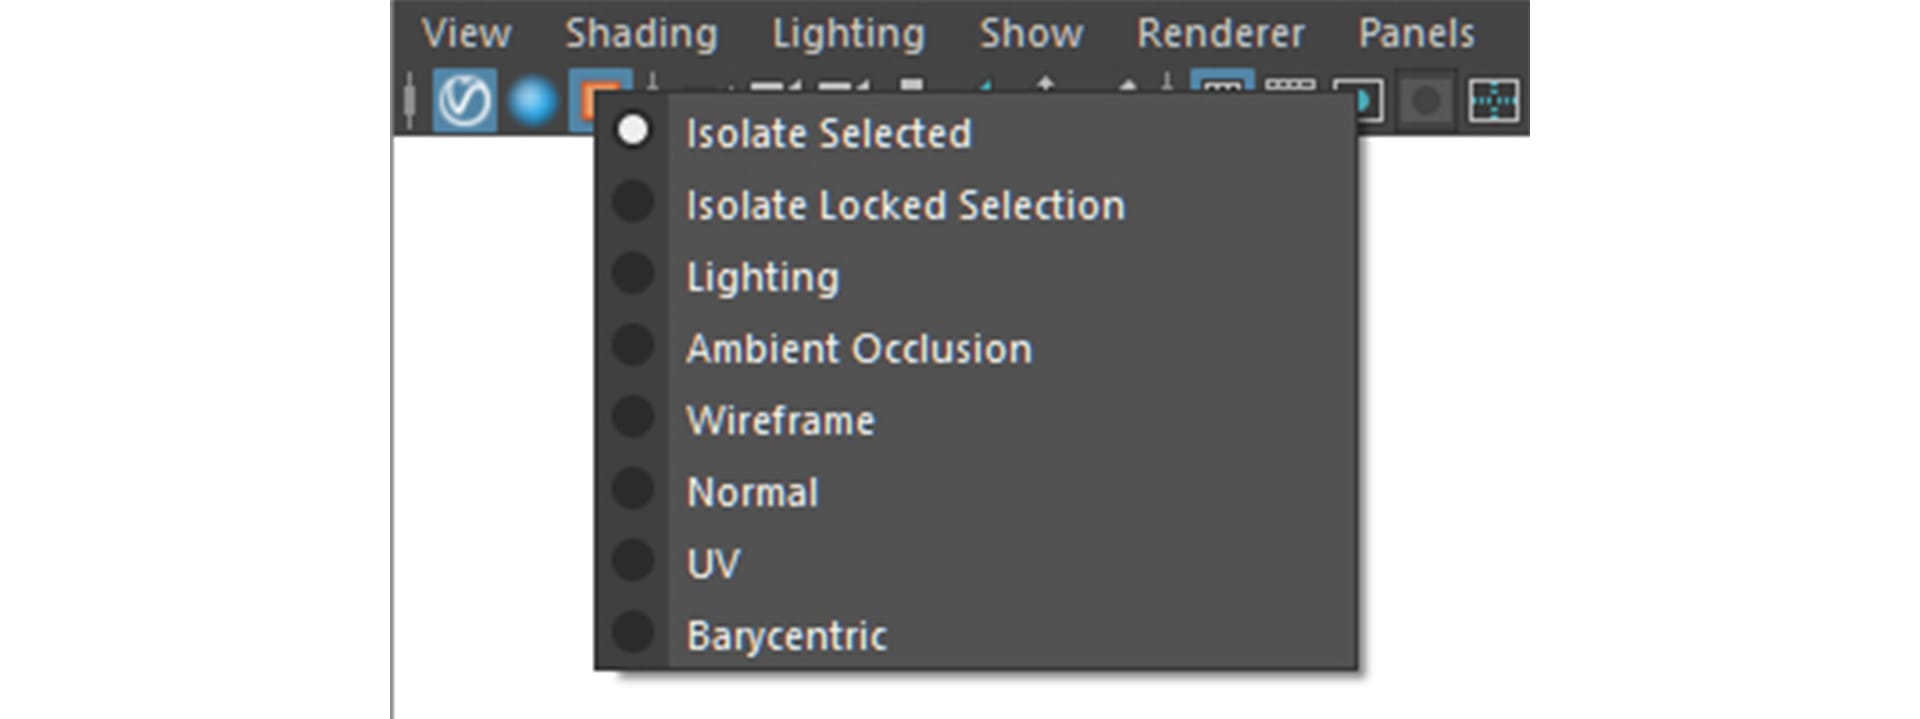
While these quick modes, such as Lighting, Normals and UVs, can quickly help an artist figure out what is going on, the Isolate Selected option is the real power of this feature. When choosing this option, V-Ray will only render with what is selected; this includes objects, shaders and even lights. To better understand this, here are some examples:
- Within one of your scenes, select an object, or a group of objects, while in the Isolate Selected mode. V-Ray will only render those objects that you see. Everything else will be black.
- Select a single light or a group of lights. Now it will render the whole scene, but only take into consideration the light(s) you've selected. You can use this to isolate the contribution of that light and change its values or position on the fly.
- Finally, choose an object that you want to adjust shaders on, and then expose that shader graph in Hypershade. When you select any node with the graph, V-Ray will only render the object up to that point in the graph; this allows you to precisely see what each portion of the shader is contributing to the actual rendering.
Now, let’s say you've selected a series of objects and a few lights, and you want to adjust a shader but still see the rendering based on your current selection — then you can switch the Debug Shading mode to Isolate Locked Selection. This way, you don’t lose your current selection set as you continue to adjust values.
In addition, you can use the Debug Shading mode in combination with the AI Denoiser — and even playblast it if you want to.
This makes it one of the best tools to fine-tune and see exactly what is going on in the different parts of your scene.
This video will give you an even better idea of how the Debug Shading works on a scene:
In summary
V-Ray has always been committed to making rendering as fast as possible. We introduced our first version of V-Ray RT (now known as V-Ray GPU) in 2008. Today, along with new hardware such as the RTX cards from NVIDIA, V-Ray can give you feedback quicker than ever before.
While this does not mean that offline rendering will go away anytime soon, it does mean that you will be able to constantly be rendering and seeing those changes as you make them. Adding new Debug Shading on top of IPR makes it much easier for artists to see what is going on and what needs to be adjusted.
All the changes made to V-Ray Next for Maya in the IPR workflow will allow artists to start rendering, working and making choices from the moment Maya is opened.

