Almost ready to hit the render button? Make sure you take a look at Shusen Zhao’s list of render tips to smooth out your workflow and avoid potential pitfalls.
We’ve all been there. You’ve painstakingly put your scene together, tweaked the camera, lighting and textures to perfection, and the excitement of seeing the final result is rising. But, when you hit render, something is wrong.
Fortunately, rendering has never been more straightforward and, with the latest builds of V-Ray, errors are largely a thing of the past. However, there are a few things you can do before you start rendering to ensure it goes as smoothly as possible. We asked rendering expert and 3D artist Shusen Zhao to share his pre-render checklist.
1. Check the texture path
There are few things more frustrating than missing textures in your final render. This is usually because we didn't check our texture paths before rendering, and then we have to waste time and effort re-rendering. But there’s an easy solution — in V-Ray for SketchUp and V-Ray for Rhino, you can use the V-Ray File Path Editor tool directly.
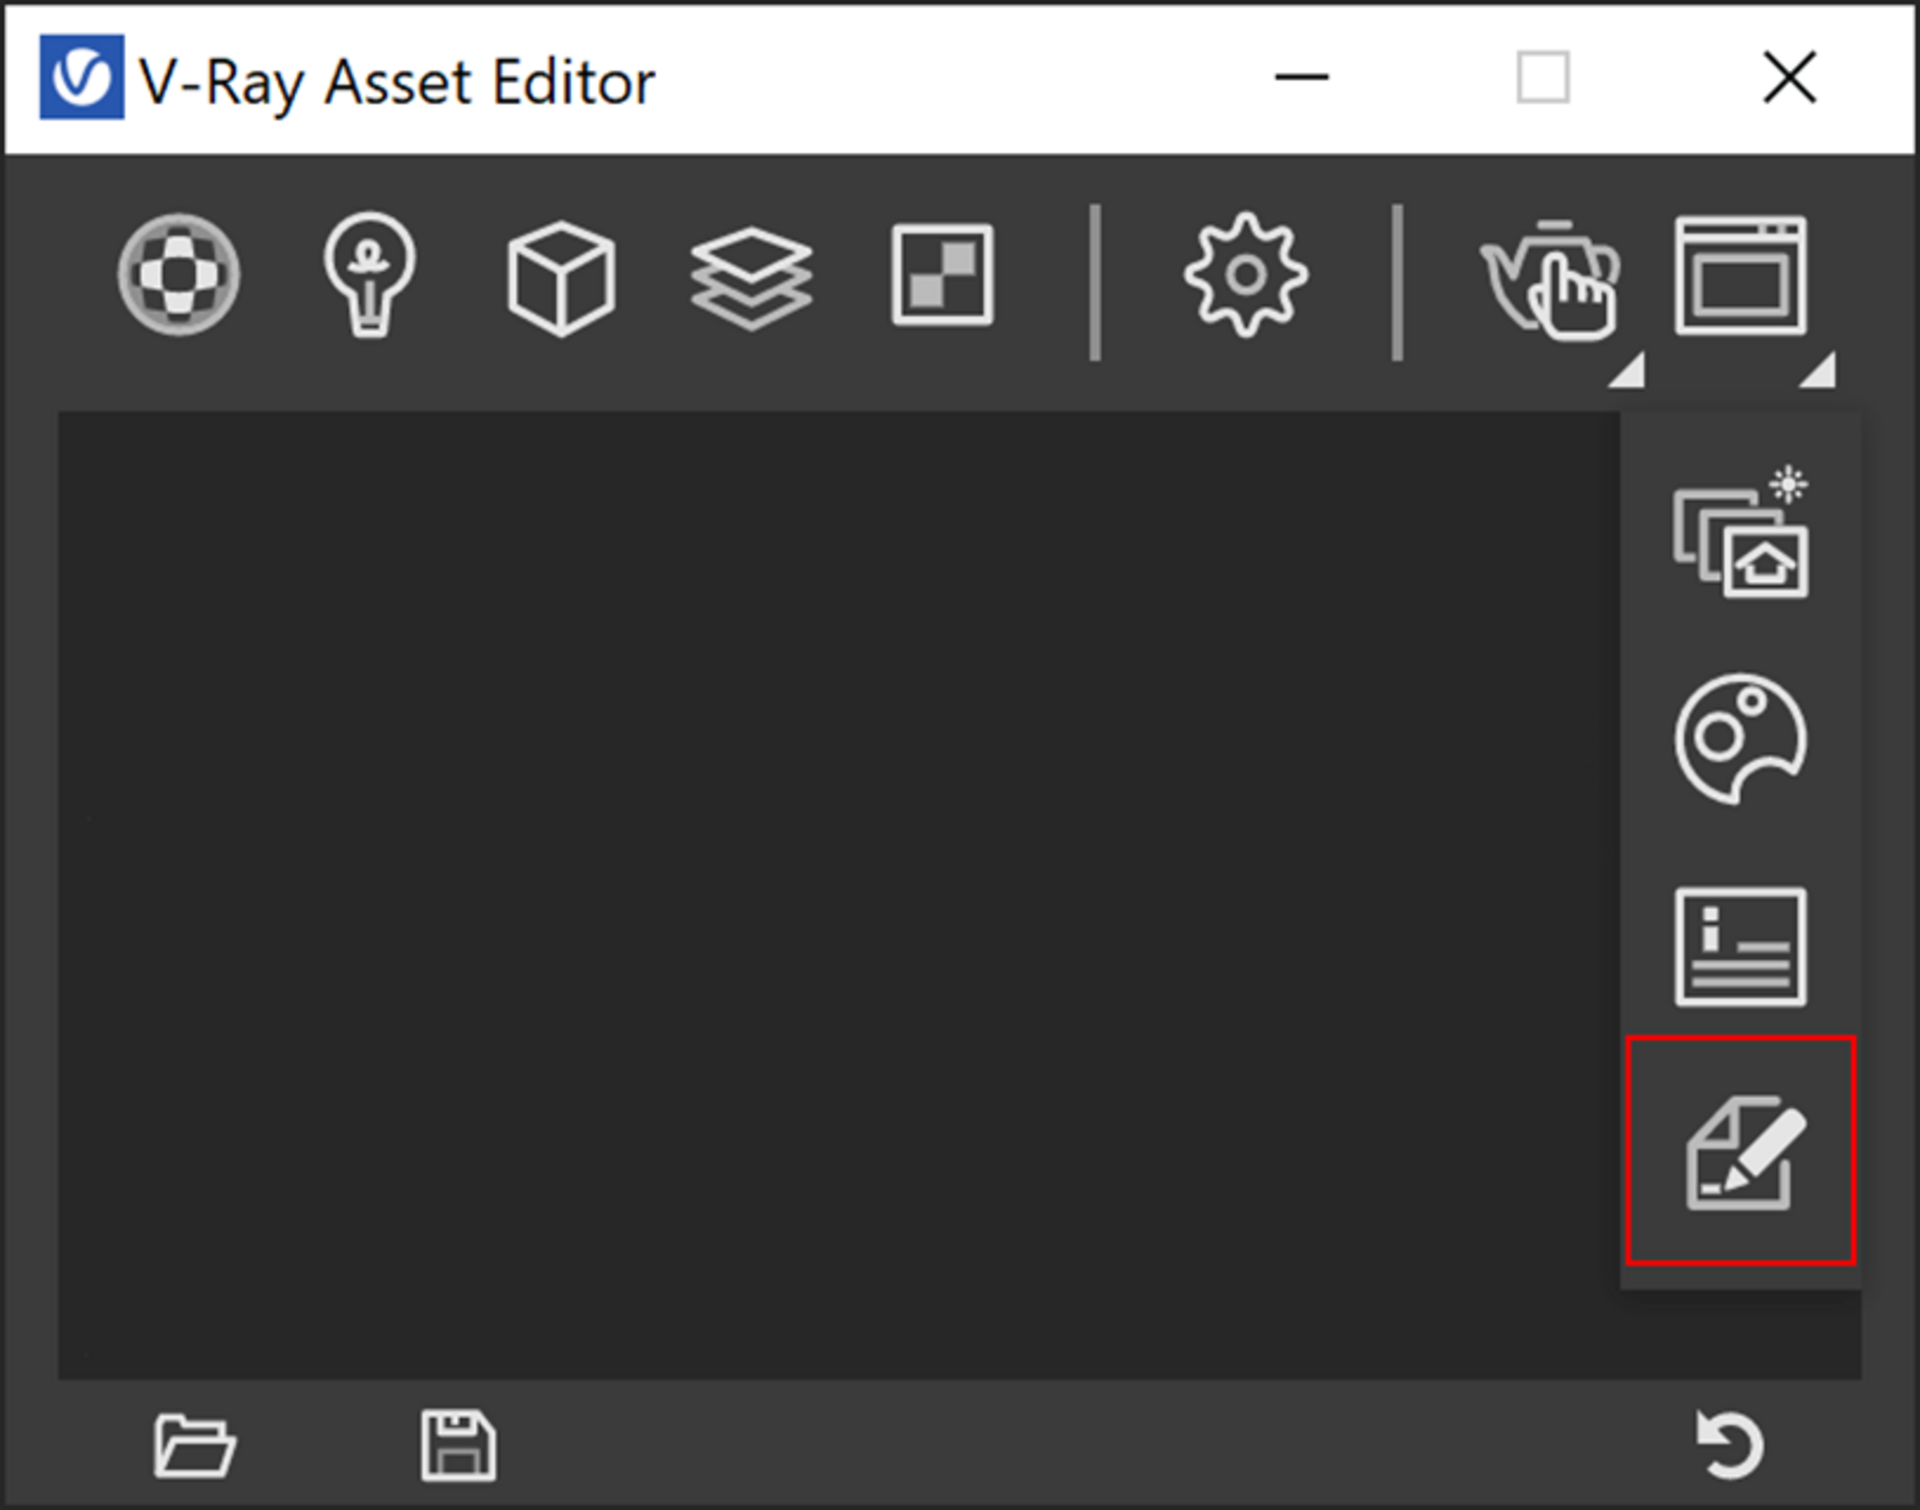
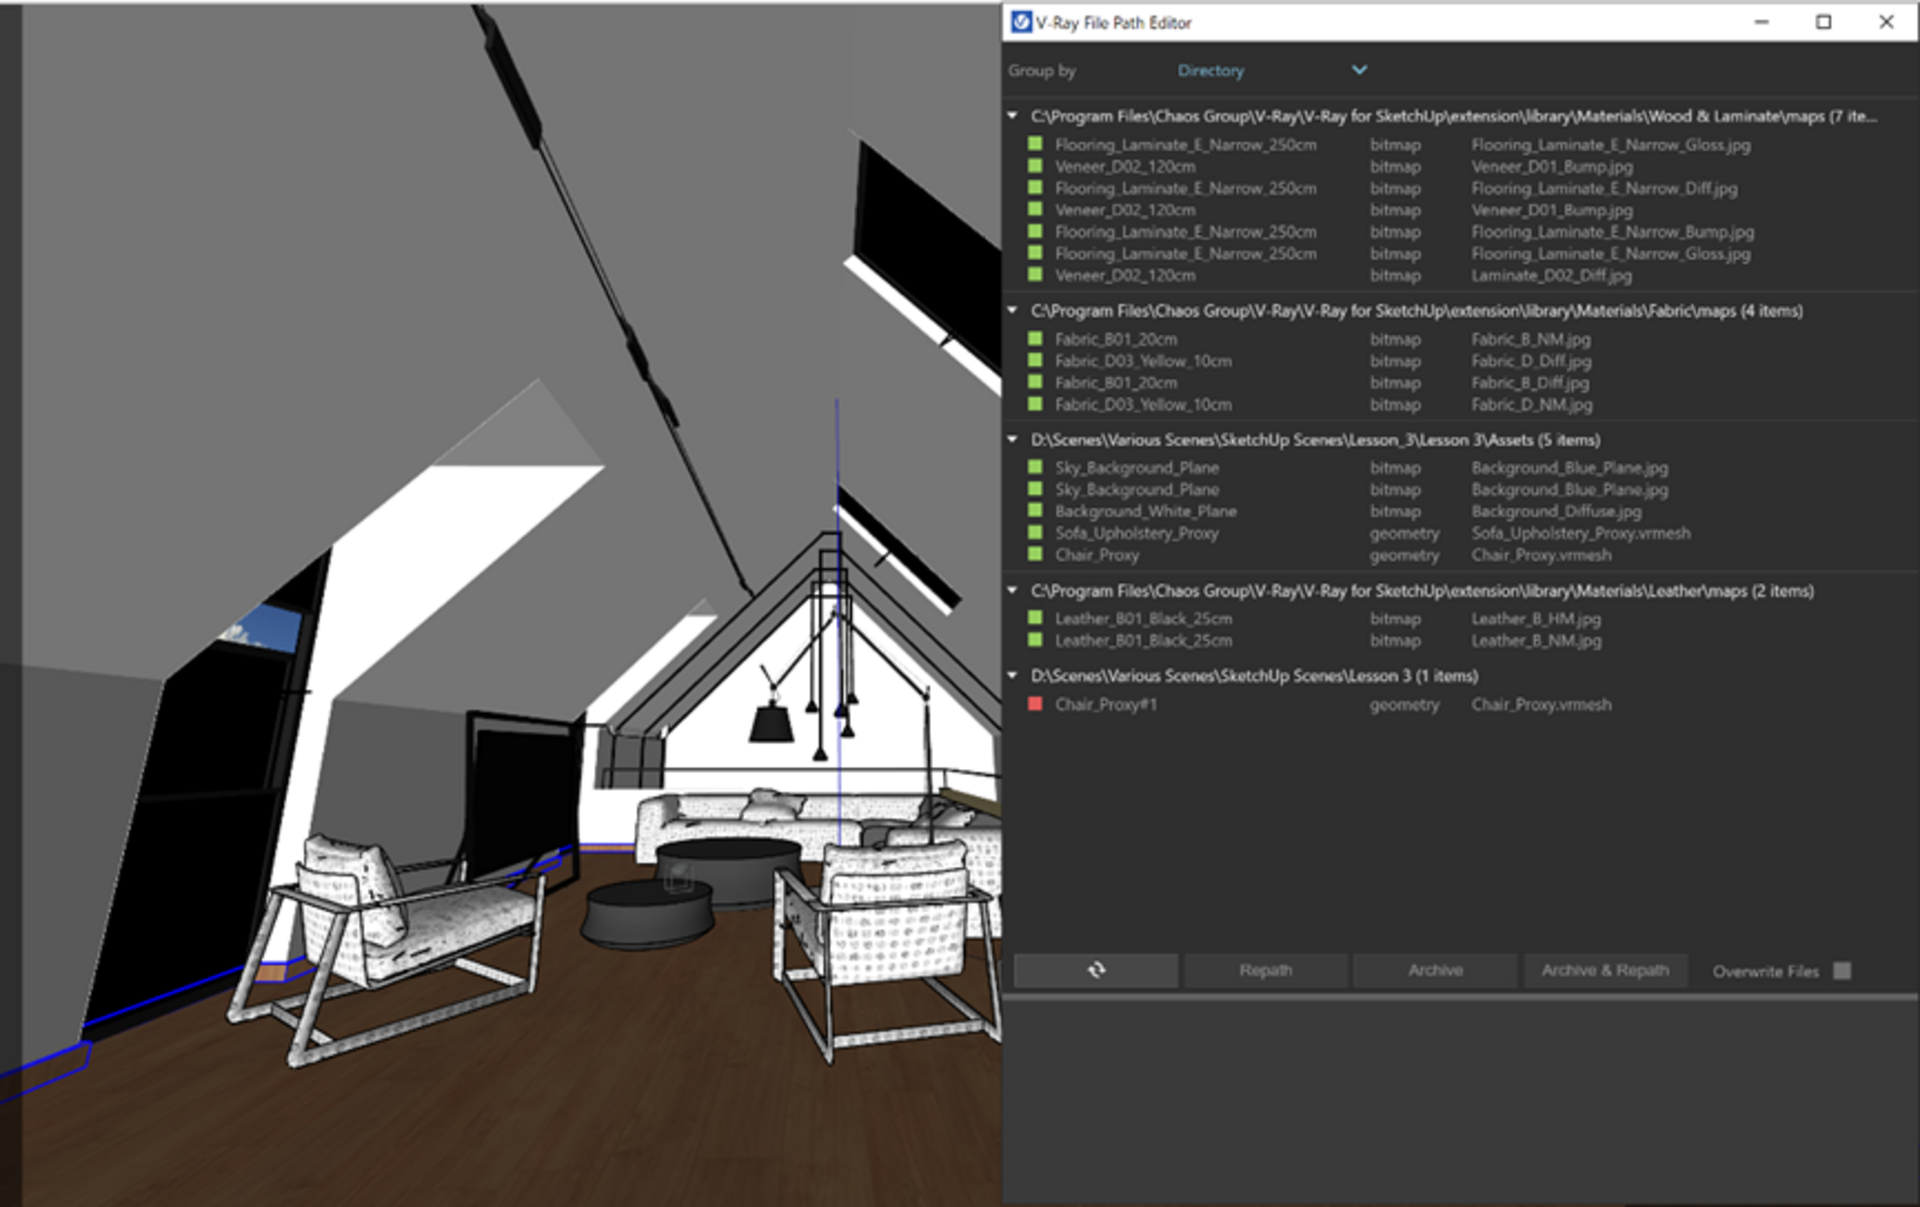
With this tool, you can set file paths, create scene archives, and keep track of assets such as textures, IES files, and proxy objects. What’s more is that it gives you a neat overview of all available files in the scene, so you don't lose track of any.
The files in this window can have three different color indicators, depending on the status of their file path:
- Green – The file is available and its path is visible by V-Ray.
- Yellow – The file is available, but it is embedded in a temporary cache file.
- Red – The file is missing or inaccessible.
Pay attention to red ones when you check the texture path, because these will affect your rendering results.
2. Add the necessary rendering elements
Success needs to be honed. A good rendering result often needs proper adjustment as well. Because of this, we can add render elements such as Cryptomatte, Light Mix, etc. before we render.
These render elements give us more room for adjustment and create more possibilities in the V-Ray Frame Buffer later on.


3. Adjusting the composition
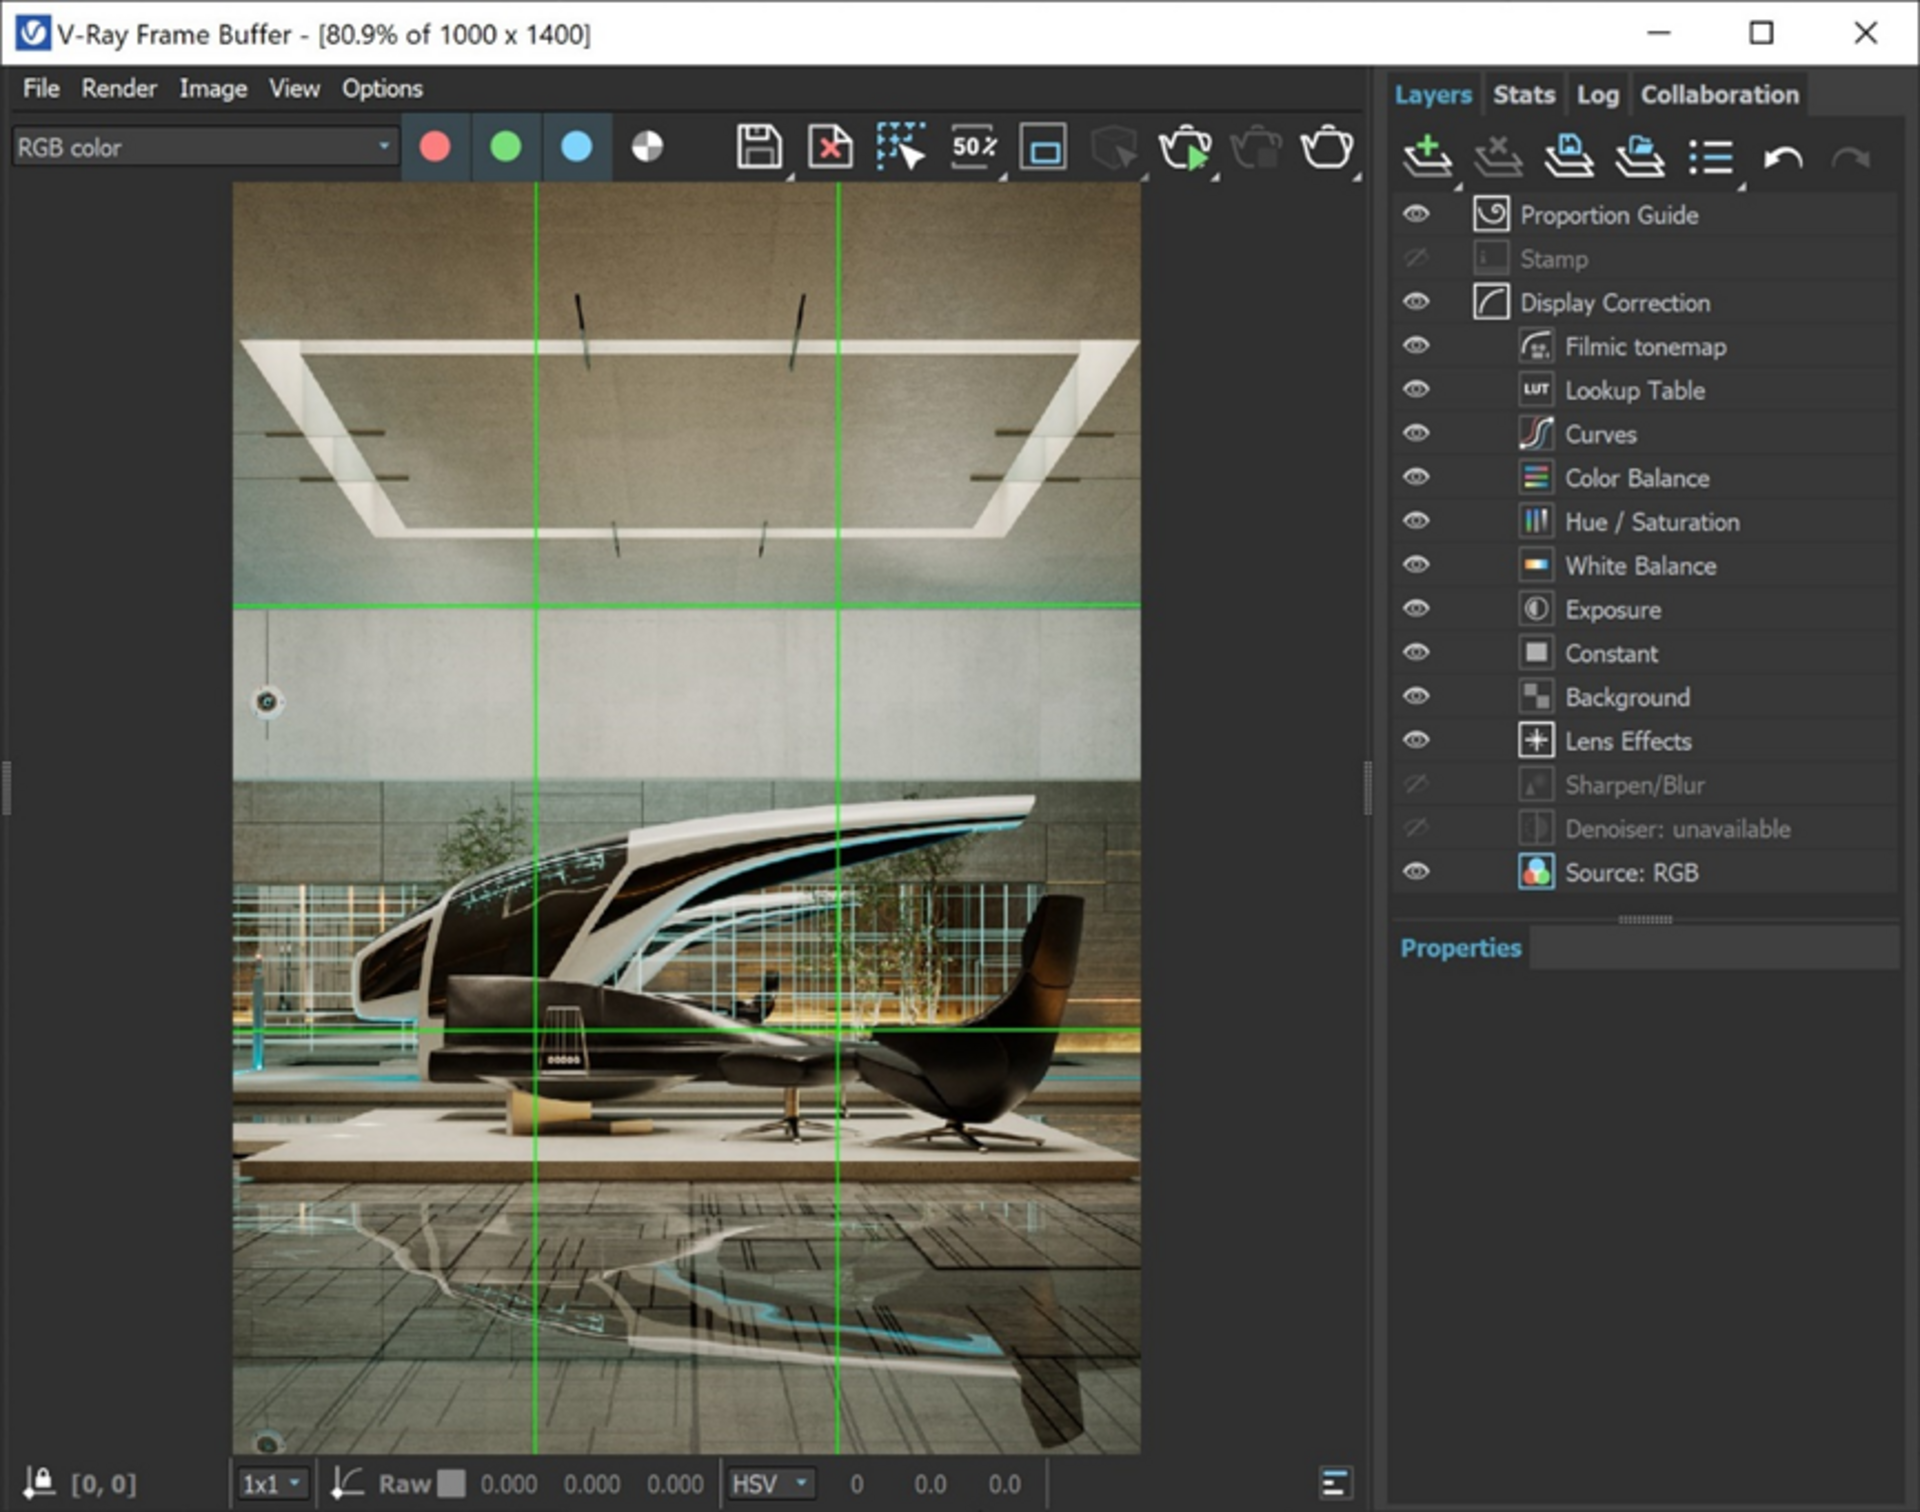
V-Ray 6 adds the Proportion Guide to the V-Ray Frame Buffer to make renders more appealing.
The Proportion Guide layer allows for a number of composition guides to be overlaid on the image. The available guides are Rule of Thirds, Diagonals, Golden Ratio, Center Cross, and Custom Grid. By using these grids, we can create more aesthetically pleasing compositions.
4. Choose the right rendering engine
V-Ray offers two rendering engines: V-Ray CPU and V-Ray GPU. If you want to enable GPU rendering, from V-Ray Asset Editor → Settings tab → select CUDA or RTX engine. GPUs will render faster as they’re specifically designed for massively parallel computing.
Although V-Ray GPU and V-Ray CPU are mostly the same in terms of supported features, there are still slight differences in their code bases. This is why it’s not a good idea to switch between engines in the middle of your project. If you are using V-Ray GPU or CPU during the preview phase of your adjustments, try to use the same one for the final render — otherwise, your final results may not be the same.


5. Try cloud rendering
Before we render our final image, we tend to increase the resolution and quality. However, our computers often have hardware limitations that prevent us from getting the final render quickly — and this is where Chaos Cloud can prove useful. This rendering service is built into V-Ray and can submit jobs to the cloud in a single click.
Clicking on the Render in Chaos Cloud button will send your current scene to Chaos Cloud for analysis. Once the scene is successfully analyzed, you have to finalize some of the settings of the render job before it starts rendering in Chaos Cloud.
In addition, Chaos Cloud now has a collaboration service, which makes it easier to share work with clients, team members, and other stakeholders for easy review, markup, and comments at any time.

Conclusion
With these tips, you can ensure your renders turn out as you want, without any unexpected surprises.This will also speed up the progress of your projects and get the work done more efficiently, giving you time to work with more clients — or to relax.
What would you add to our checklist? Let us know your pre-render rituals in the comments section below.

